Prep Time: 25 minutes
Cook Time 38 minutes
Total Time: 1 hour 3 minutes
Makes 4 servings
For the Zucchini Boats
2 very large zucchini (about 11 ounces each)
1 tablespoon olive oil
1 small yellow squash, diced
1/2 yellow onion, diced
1/2 red bell pepper, diced
1/2 pound ground turkey
2 tablespoons Homemade Taco Seasoning (see recipe)
1 egg, beaten
For the Homemade Taco Seasoning
1 tablespoon chili powder
1 1/2 teaspoons ground cumin
1 teaspoon paprika
1 teaspoon garlic powder
1/2 teaspoon onion powder
1/2 teaspoon dried oregano
1/2 teaspoon sea salt
1/4 teaspoon freshly ground black pepper
Preheat the oven to 400°F.
Mix all the taco seasoning ingredients in a bowl and set it aside.
Use a large knife to cut each zucchini lengthwise in half. Using a melon baller or small spoon, carefully scoop out the insides, leaving a 1/4- to 1/3-inch-thick shell to make room for the filling.
Heat the oil in a heavy, large skillet over medium heat. Add the yellow squash, onion, and bell pepper and sauté until the vegetables begin to soften, about 3 minutes. Add the turkey and taco seasoning and sauté until the turkey is cooked through, about 5 minutes. Remove the skillet from the heat and let the taco filling cool a bit.
When cool, add the beaten egg and mix well. Stuff each zucchini with some of the filling, mounding it slightly and then pressing gently to compact it. Place the boats in a baking pan and bake them uncovered until the zucchini is just tender, about 25 to 30 minutes.
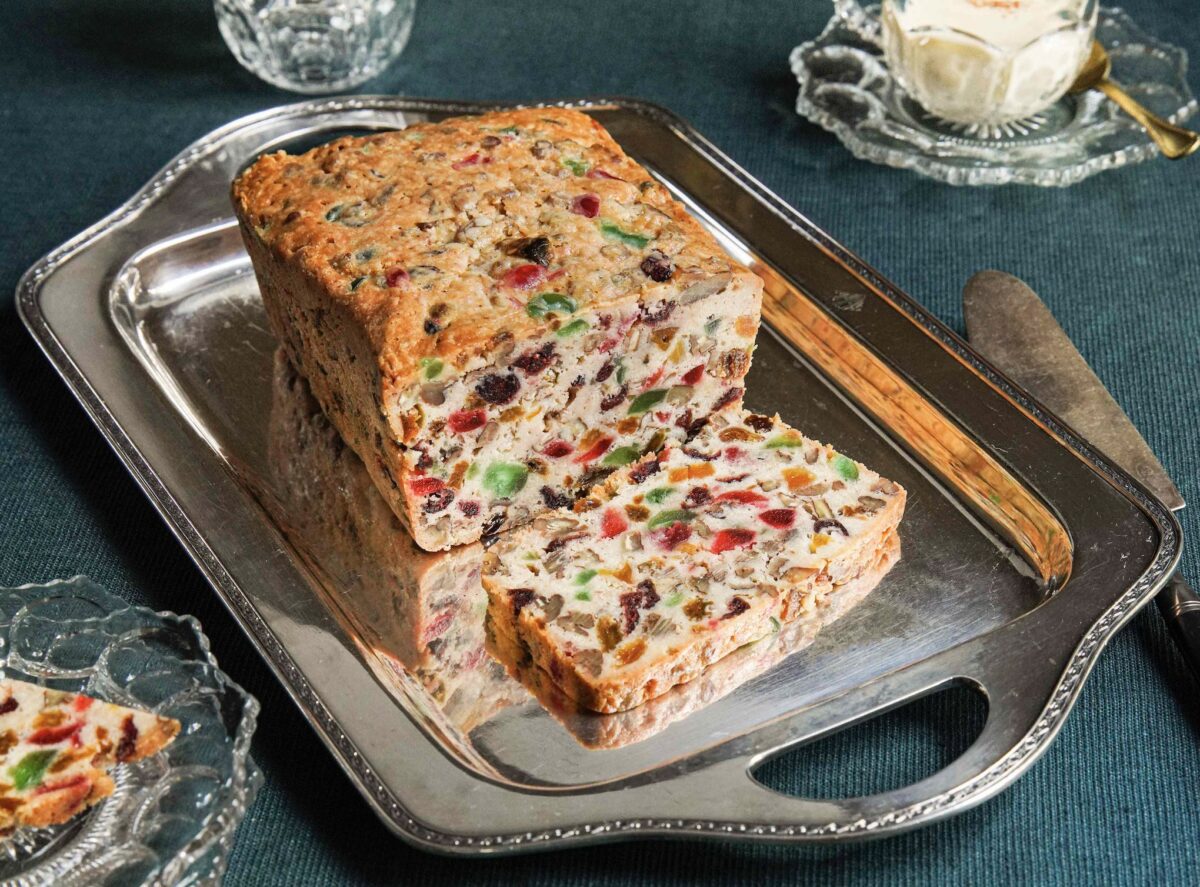
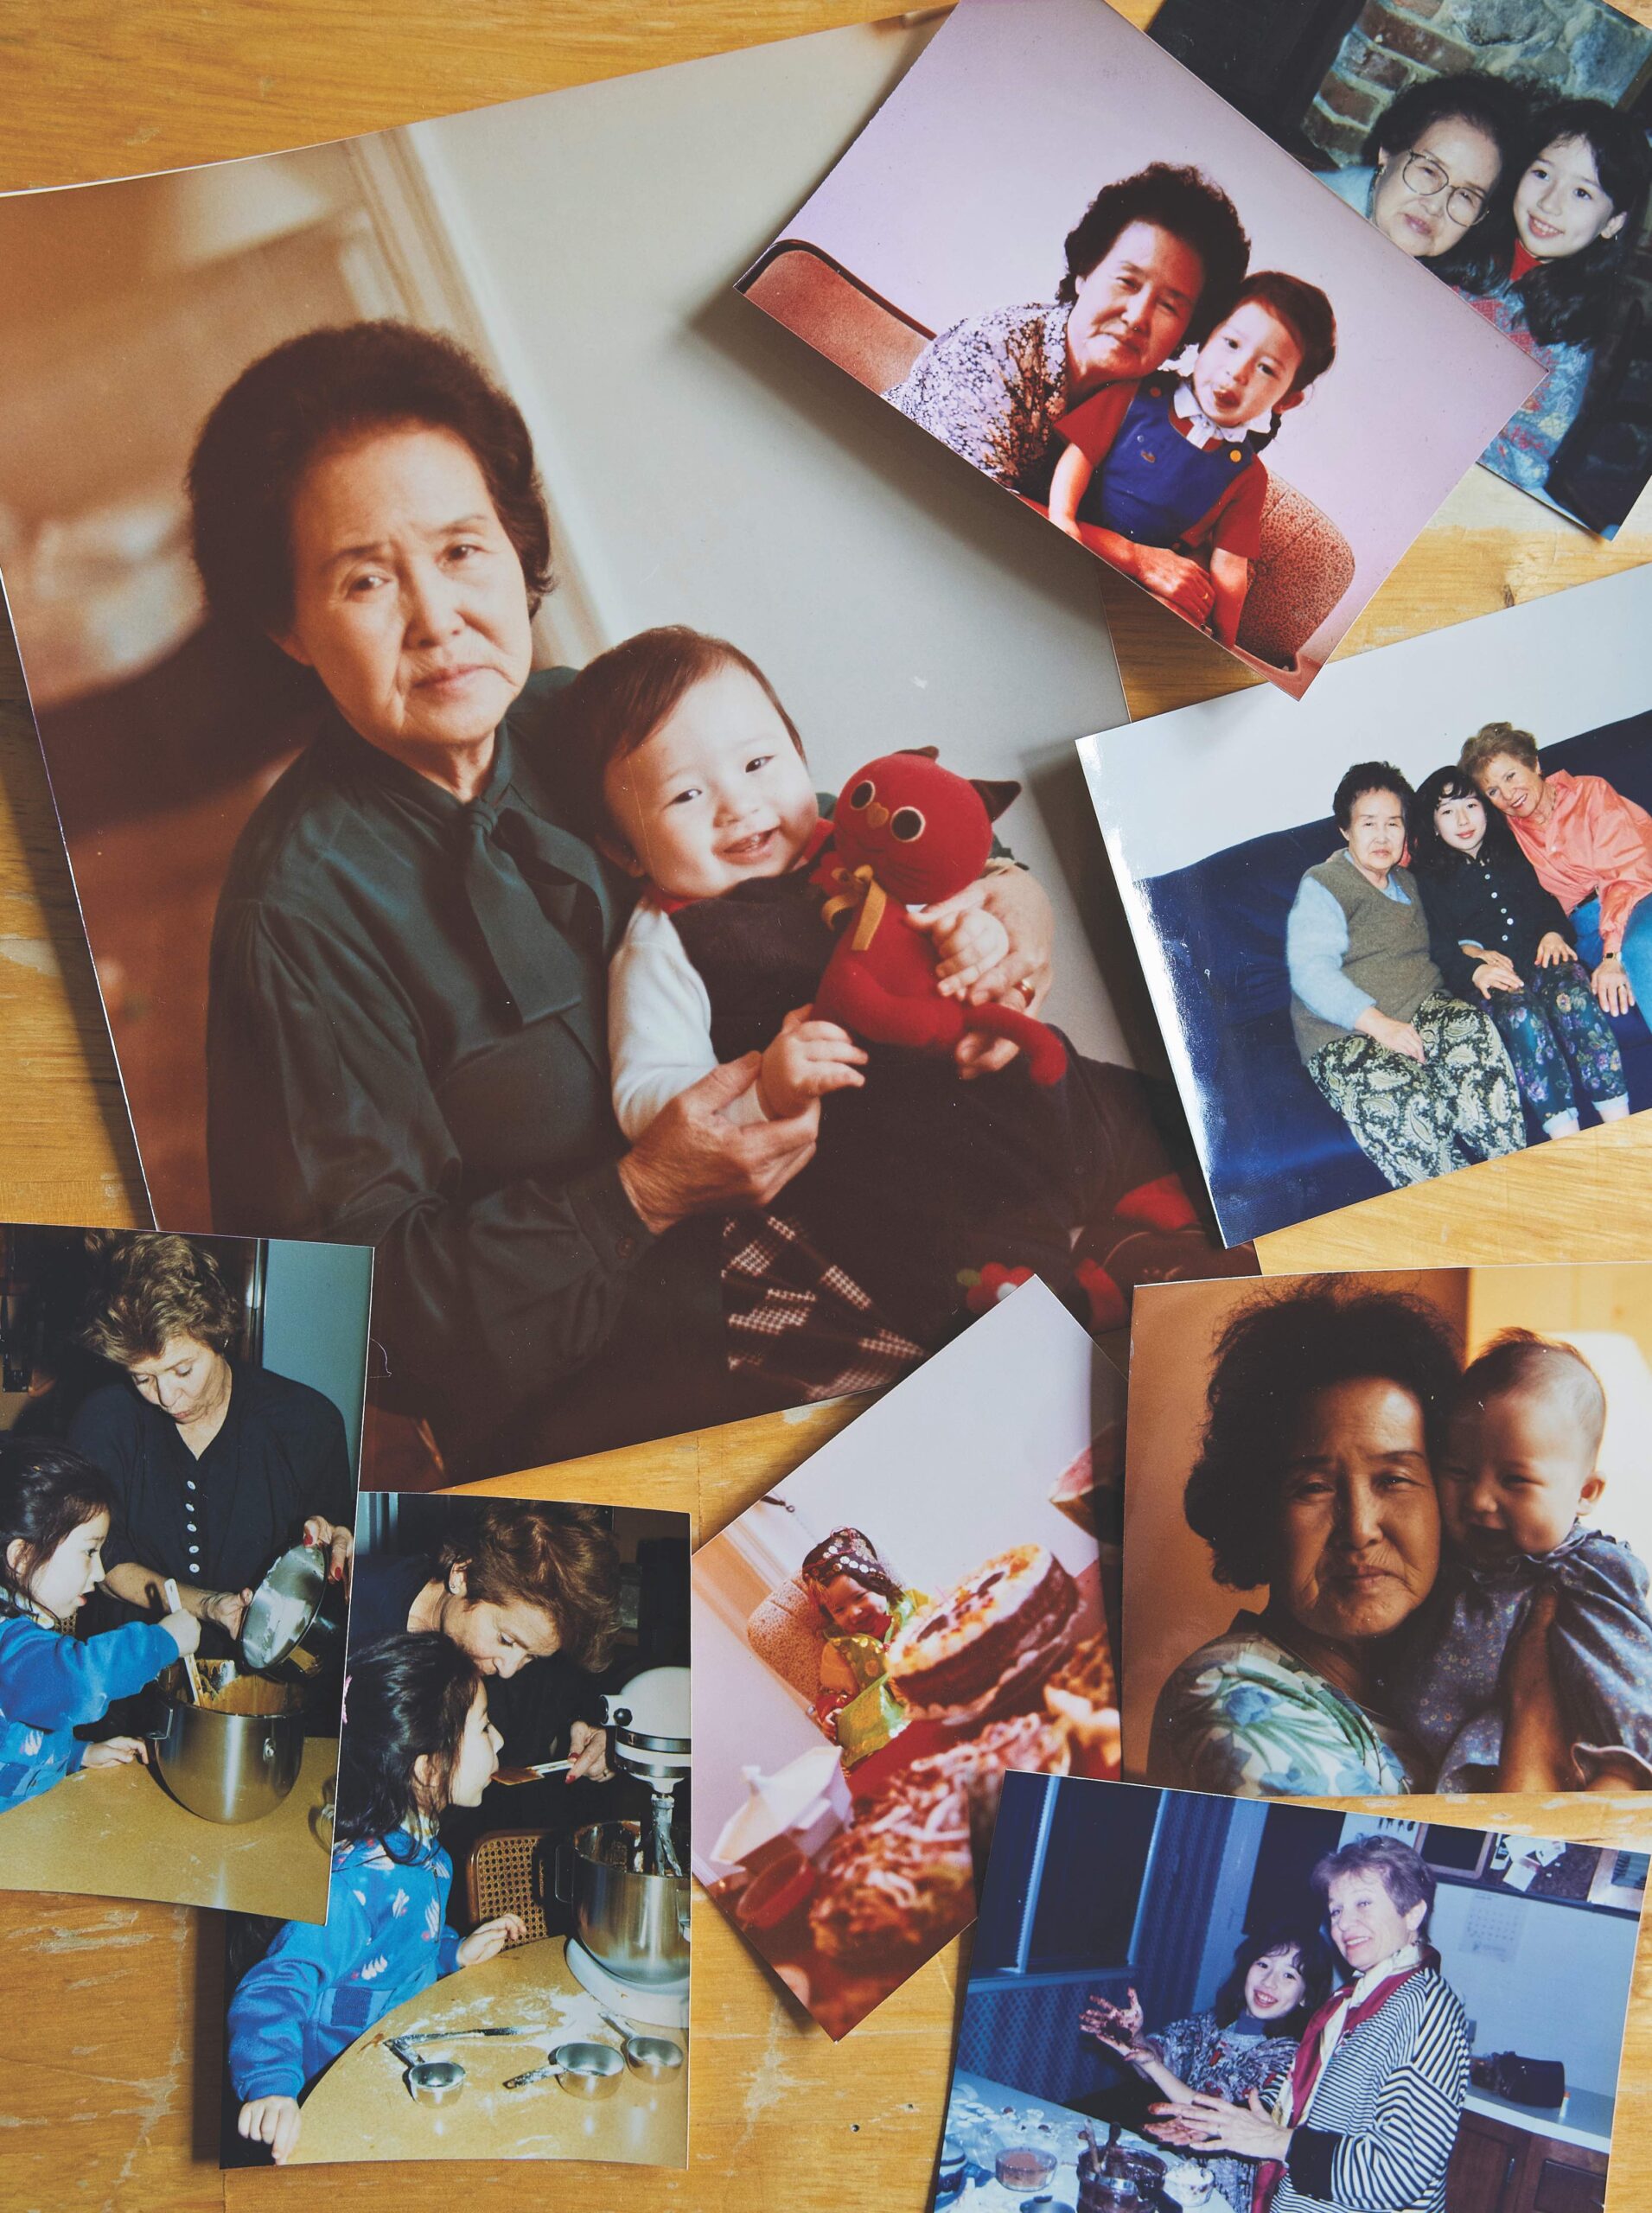
Mrs. Mosal’s White Fruitcake and Boiled Custard. (Rinne Allen)
In the foreword to “The Jackson Cookbook” (1971), Eudora Welty wrote that each Christmas she baked a white fruitcake from a recipe her mother had gotten from a friend.
“What took me so long to bake Mrs. Mosal’s fruitcake?” I wondered, as I chopped the candied cherries and pecans and reached to the back of the cabinet for the bottle of whiskey. I have adapted the recipe only slightly, keeping the red and green cherries but using fewer of them. What you get is a lovely and festive fruitcake drenched in bourbon, and after one bite, it will change your mind about fruitcake. Slice and serve with boiled custard.
Fruitcake has many faces. In “Mrs. Porter’s New Southern Cookery-Book” (1871), Mary Elizabeth Porter mentions several kinds of fruitcakes: light (white), like this one, or dark (black), as well as Yankee (with butter and white sugar) or Confederate (with lard and molasses). Sally White fruitcake has coconut and almonds, and Japanese fruit cake isn’t really a fruitcake at all but more of a unique layer cake with a citrus and coconut filling popular in the Deep South.
Fruitcake making was once an annual affair, just like winterizing your house or putting chains on the tires of the car to prepare for snow days ahead. If baked and soaked in bourbon at Thanksgiving, the fruitcake would be ready for slicing by Christmas.
Plan ahead: Bake this cake several days to weeks before serving so it can soak in the liquor.
Prep Time: 40 to 45 minutes Bake Time: About 2 hours
Serves 8 to 10
Soft butter and flour for prepping the pan (see Note)
1 pound mixed dried fruit of your choice (currants, raisins, dried apricots, dried cherries, or red and green candied cherries)
2 cups (228 grams) pecan halves or chopped pecans
2 cups (240 grams) all-purpose flour, divided
12 tablespoons (1 1/2 sticks/170 grams) unsalted butter, at room temperature
1 cup (200 grams) granulated sugar
3 large eggs, at room temperature
1 teaspoon vanilla extract
1 teaspoon baking powder
1/2 teaspoon ground nutmeg
1/2 cup bourbon or brandy, plus more for soaking the cake
Heat the oven to 250°F, with a rack in the middle. Grease and flour a 9-by-5-inch loaf pan.
Chop the fruit into small, uniform pieces, 1/4 to 1/2 inch in size. Place in a small bowl. Chop the pecans into the same size pieces and place in a separate bowl. Toss the fruit with 1/2 cup of the flour. Set aside.
Place the butter and sugar in a large bowl and beat with an electric mixer on medium speed until light and fluffy, about 3 minutes. Scrape down the sides of the bowl. With the machine running, add the eggs, one at a time, and beat on low until incorporated. Add the vanilla and beat until blended.
Whisk the baking powder and nutmeg into the remaining 1 1/2 cups flour. Add the flour mixture alternately with the bourbon or brandy to the butter mixture, mixing on low until just blended. Fold in the fruit and pecans. Turn into the prepared pan.
Bake until the cake is firm and very lightly brown, about 2 hours. The interior temperature should be 200°F on an instant-read thermometer. Remove from the oven and, while hot, drizzle over additional bourbon or brandy. Let the cake cool in the pan for 30 minutes. Run a knife around the edges of the pan, then invert the cake once and then again so it cools right side up on the rack. Let cool completely before serving, about 1 hour.
To store, wrap in clean cheesecloth. Place in a metal tin and store covered in a cool place for up to a month. Each week, pour another 1/4 cup bourbon or brandy over the cake, if desired.
Note: Back when my mother and grandmother baked fruitcakes, they would grease the loaf or tube pans with butter and then line them with brown paper. I remember seeing the paper peeled off the sides of the baked fruitcake and my mother telling me it was to protect the cake from overbaking and keep the edges soft.
Eudora Welty (1909–2001), American novelist, wrote about small town life in the Mississippi delta, 1962. (Everett Collection Inc/Alamy Stock Photo)
Boiled Custard
I grew up with boiled custard on Christmas Eve, served in punch cups with fruitcake and pound cake. It was a Middle Tennessee holiday tradition, a gentler version of eggnog, and you can make it without any alcohol, as I am sure my Presbyterian grandmother did.
You’re not going to find it in every Southern cookbook because it is so regional. But you will find it in Tennessee and Mississippi cookbooks, and the recipe I settled on is from “Being Dead Is No Excuse” (2005) by Gayden Metcalfe and Charlotte Hays. They call it Bourbon Boiled Custard, but as I said, not everyone puts bourbon in it. But if they do, it’s gonna be good, especially with Mrs. Mosal’s White Fruitcake, baba au rhum, Christmas black cake, and festive cookies.
Prep: 20 to 25 minutes Cook: 10 to 14 minutes Chill: At least 4 hours
Serves 8
1 cup (200 grams) granulated sugar
2 tablespoons all-purpose flour
4 large eggs
Big pinch of salt
3 cups whole milk
1 cup heavy cream
2 teaspoons vanilla extract
1/4 cup bourbon (optional)
Place the sugar and flour in a large, heavy saucepan or in the top of a double boiler (see Note). Whisk in the eggs and the salt until smooth.
Place the milk in a separate saucepan and bring to a simmer over medium heat, letting bubbles form around the edges of the pan, 3 to 4 minutes. Remove from the heat and stir in the cream.
Ladle 1/2 cup at a time of the warm milk mixture into the egg mixture and whisk to combine. Place the pan with the eggs over low heat or over simmering water in the double boiler. Stir with a flat spatula until the mixture creates steam and thickens enough to coat a spoon, 10 to 14 minutes, or 170 to 175°F on an instant-read thermometer.
Remove the pan from the heat and pour the custard into a glass bowl. Stir in the vanilla and bourbon, if desired. Place in the refrigerator to chill for at least 4 hours. Serve as a beverage in small cups or as a sauce.
Note: If you have a heavy copper pan for making sauces, it’s perfect for this recipe because it’s thick and will protect the eggs from heating too quickly. But if you do not, use a double boiler—or what’s known as a bain-marie—where you place a bowl or insert on top of a saucepan filled with simmering water.
The trick is to keep the water at a simmer, not a boil, and to make sure the water is not touching the bottom of the bowl or the insert holding the custard. It takes a little longer to thicken with the double boiler, but every pan and stove is different. You are looking for a just-thickened custard that coats the spoon. It will thicken more as it cools.
Recipe reprinted from “Baking in the American South: 200 Recipes and Their Untold Stories” by Anne Byrn. Copyright 2024 by Anne Byrn. Photographs 2024 by Rinne Allen. Used by permission of Harper Celebrate.
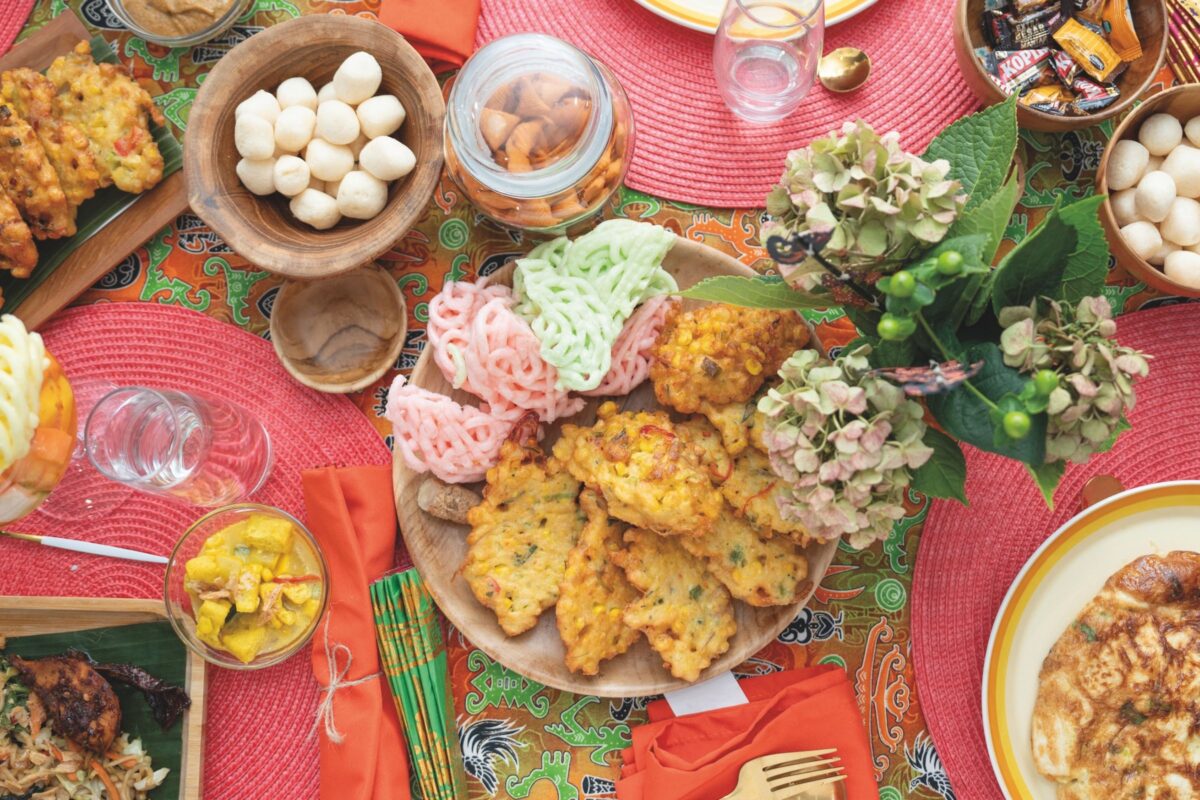
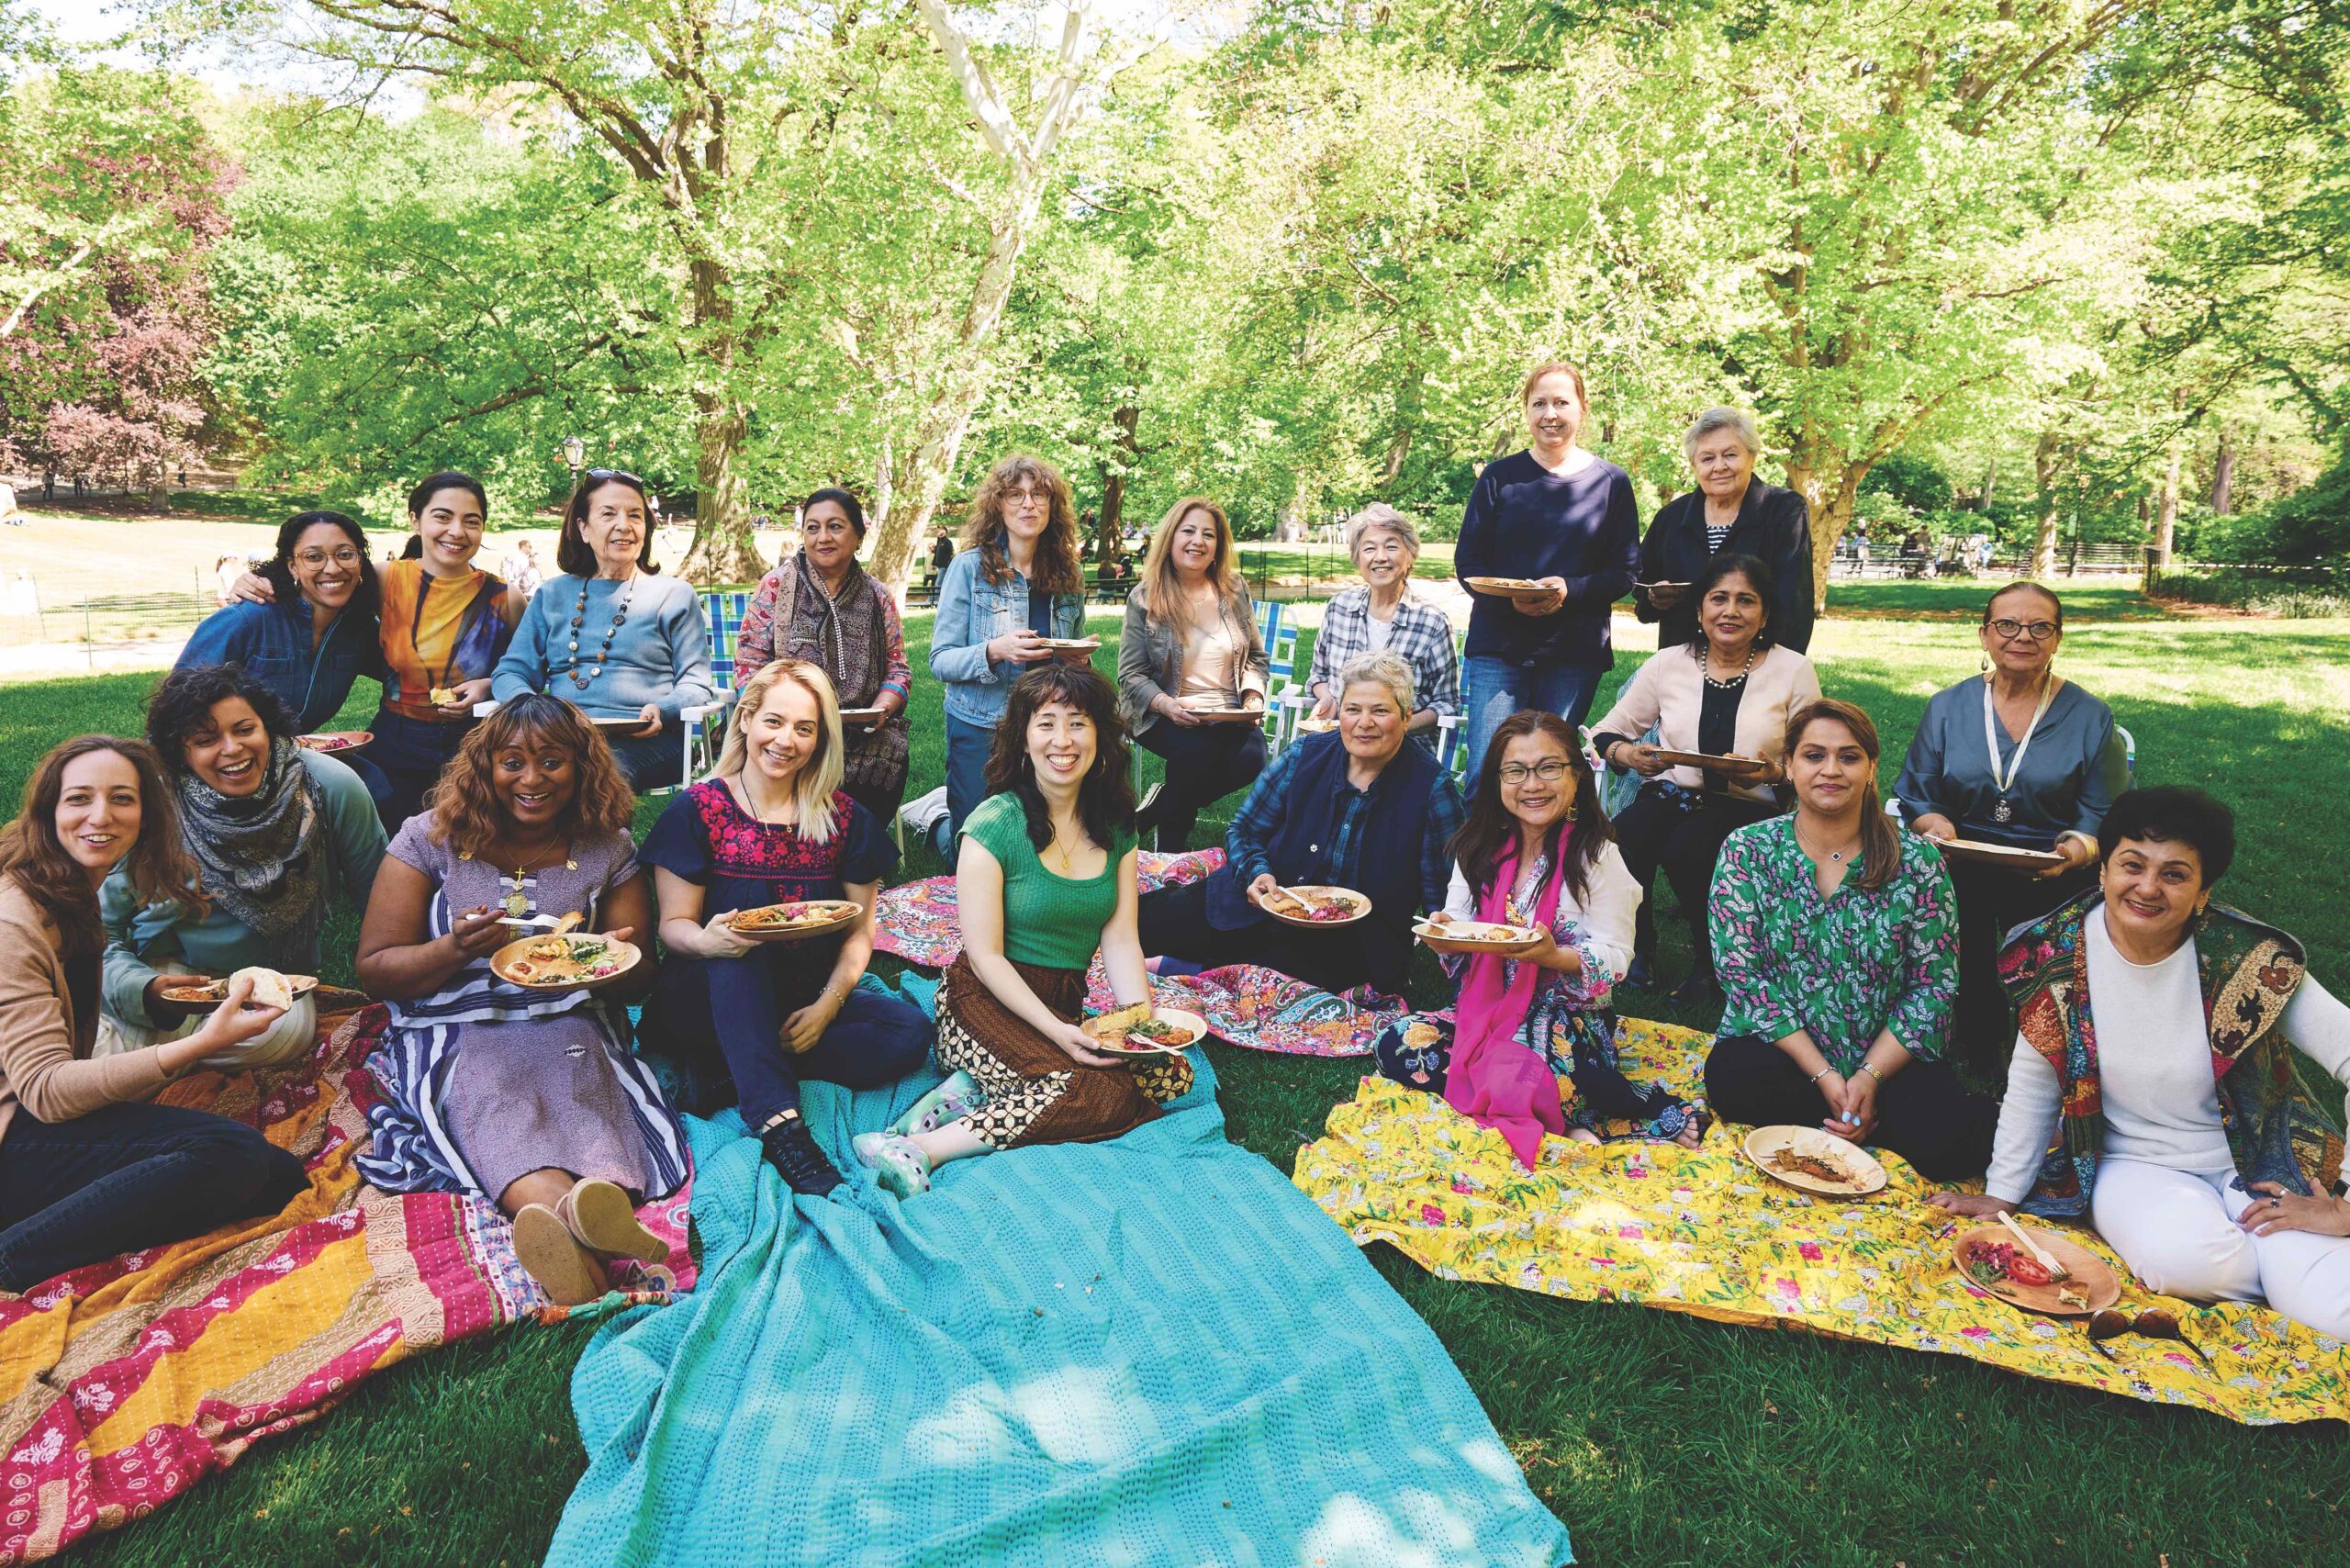
An Indonesian feast at cooking instructor Shandra Woworuntu’s
home in Queens, New York, including tofu and egg omelets, corn and shrimp fritters, and an
assortment of Indonesian crackers and candy. (Samira Bouaou for American Essence)
We arrive at Shandra Woworuntu’s home in Queens, New York, on a Sunday afternoon, six strangers on another stranger’s doorstep, buzzing with nervous excitement. At 1 p.m. sharp, the door cracks open to reveal a shy teenage boy with scruffy black hair, wearing a T-shirt and shorts. He ushers us inside. We slip off our shoes and make small talk in the hall. Then a woman’s—undoubtedly a mother’s—shrill command from somewhere above us summons our greeter upstairs—something about guests and chairs. As he bounds away, we exchange glances and chuckles. We know we’re in for something special.
We’ve come for a cooking class—but no starchy chef’s whites nor gleaming industrial stovetops await us here. Woworuntu is a proud member of the League of Kitchens, a cooking school unlike any other: Its instructors are immigrant grandmothers and mothers from around the world; its classrooms are the instructors’ homes across New York. Students can venture to Staten Island to learn Lebanese cooking; Brooklyn to break into Bangladeshi; and here, Queens, to indulge in Indonesian. Live online classes let home cooks around the world visit from afar.
Lisa Kyung Gross, who founded the school in 2014, was intentional about both the teachers and the setting.
The daughter of a Hungarian Jewish New Yorker father and Korean immigrant mother, Gross grew up eating traditional Korean dishes her grandmother cooked from scratch. But whenever she tried to help in the kitchen, she was shooed away by many a well-meaning immigrant parent’s refrain: “Don’t worry about cooking. Studying is more important,” her grandmother said.
She died before Gross could ask for her recipes.
Gross dreamt of finding another Korean grandmother to cook with in her home, to learn her family recipes—but then she thought, why stop at Korean?
Lisa Kyung Gross founded the League of Kitchens in 2014. (Kristen Teig)
She found two immigrant women, from Lebanon and Bangladesh, to teach cooking classes on their traditional cuisines. She envisioned an experience “that was not only about amazing cooking and eating, but also about creating an opportunity for meaningful cross-cultural learning, connection, and exchange,” she said.
She knew that she wanted her teachers to be home cooks, not restaurant chefs, because “in most places around the world, the fullest expression of a cuisine isn’t in a restaurant—it’s in the home,” she said. “Most culinary traditions have been oral traditions passed down between women in the home.”
She also wanted the classes to be held in those most intimate spaces. “When you see their cooking tools and how they store their spices, and you’re eating the food on their traditional dishware, being taught how you eat it, it’s such a deeper cultural experience,” she said.
For Gross, who’d felt disconnected from her own heritage, “it felt healing,” she said.
(Kristen Teig)
Kitchen Ambassadors
A decade in, the League of Kitchens has 14 instructors, from Argentinian to Uzbek. Gross’s requirements are rigorous. She estimates she’s interviewed 300 to 400 people and done 75 in-home cooking auditions to find their winning team.
“We’re really looking for people who are not only good home cooks, but exceptional home cooks,” she said. These are women who are known in their communities for their food, who “can cook for 40 people with their eyes closed,” and who possess deep knowledge of their traditional cuisine.
They are also, importantly, warm and dynamic teachers and hosts, passionate about sharing their stories with others.
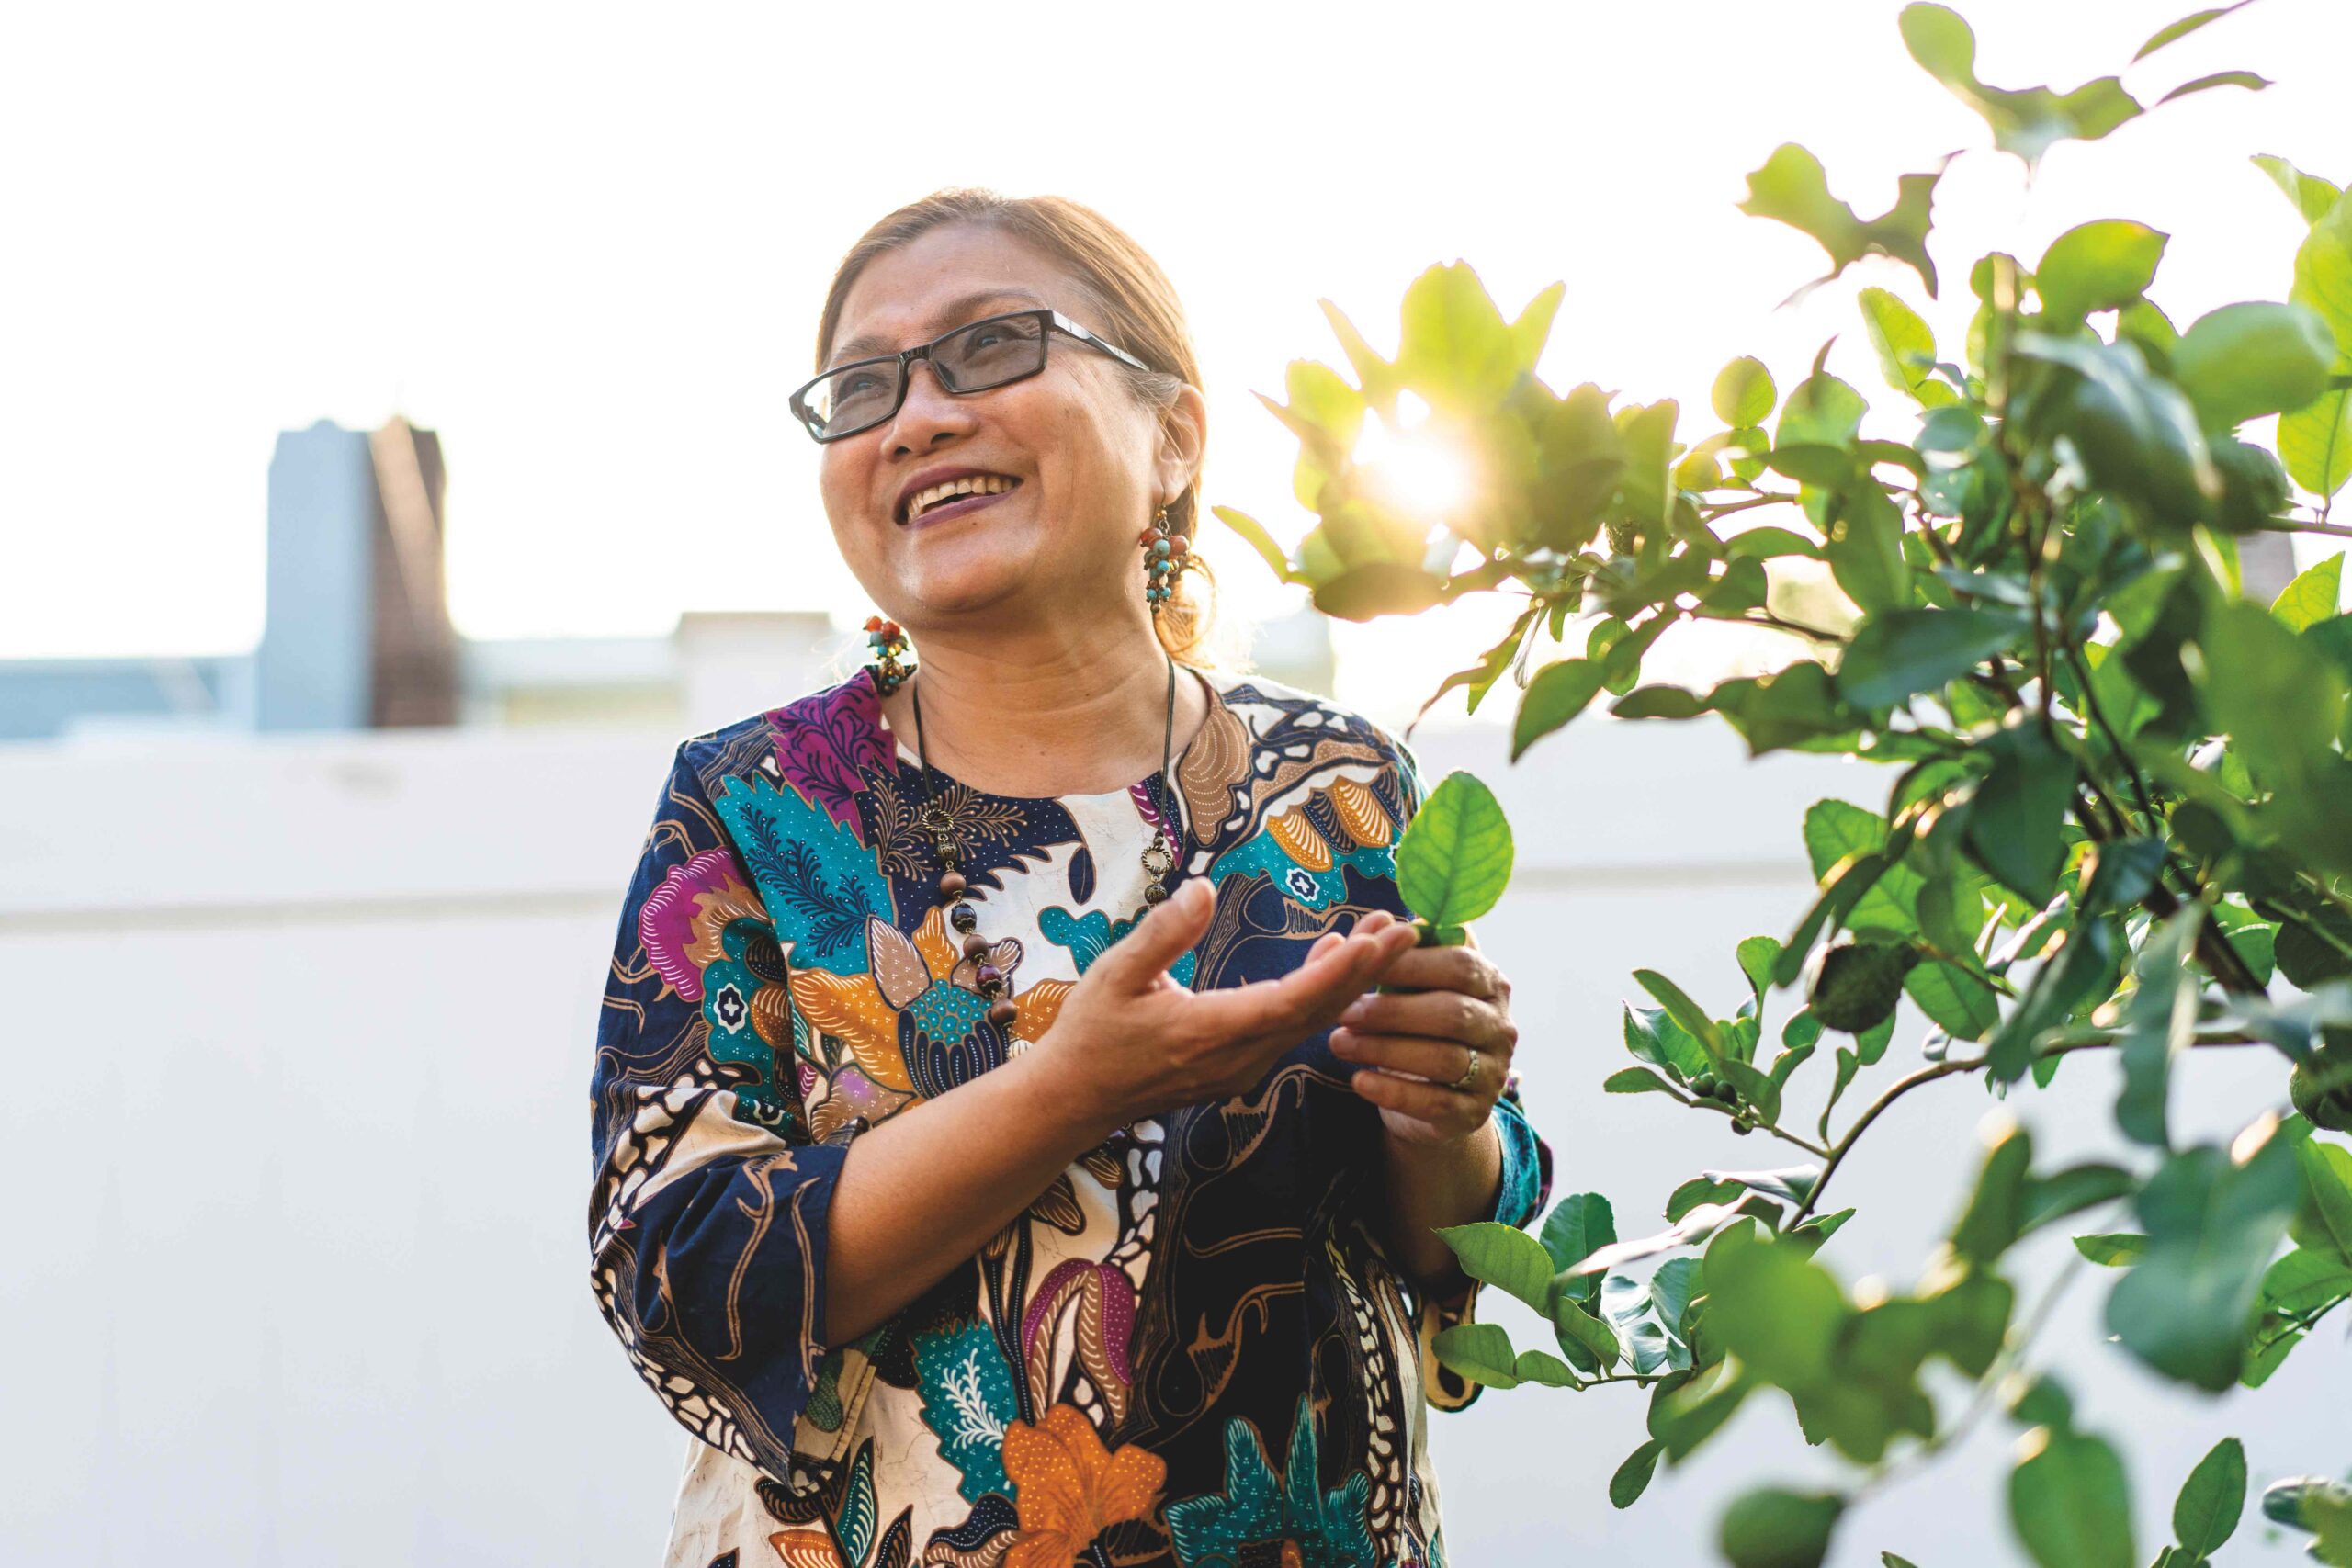
I discover as much as we walk up the stairs of Woworuntu’s home and finally meet our host—as vibrant as the dazzling, multi-colored spread of food she’s already prepared. A “snack,” she says of the veritable meal, giggling.
Woworuntu is bubbly and high-spirited, punctuating most sentences with a joyful cackle of a laugh. She’s excited to introduce us to the rich and varied cuisine of Indonesia and its 17,000 islands. “Indonesia is not just Bali and Jakarta,” she says. Today we’re eating dishes from East Java, where she grew up. The people there love to party, she says, and the food matches their spirit. “You will experience spicy, salty, sour, sweet. All the flavors come together.”
As we dig in, we learn about each other: a married couple who lives in the neighborhood and wanted to try something new; a young UI/UX designer who loves to cook and is attending her third League of Kitchens class; a pair of newlyweds about to go to Indonesia for their honeymoon.
Woworuntu with one of her two backyard lime trees, from which she harvests both fragrant leaves and fruit. (Samira Bouaou for American Essence)
We also learn about Woworuntu and the dark story hidden behind her warm smile. After losing her job as a financial bank analyst and trader in Indonesia, she came to the United States in 2001 at age 25, thinking she was getting a job in hospitality. It was a trap: She was taken at the airport and sold into sex trafficking. She escaped—twice—and was instrumental in convicting her captors, only to spend the next three years living on the streets of New York. She’s since dedicated her life to giving trafficking survivors the support she didn’t have by founding a nonprofit, Mentari, through which she teaches cooking classes to help survivors find work. She traveled the world speaking and consulting with governments and NGOs, including as a member of the first U.S. Advisory Council on Human Trafficking in 2015.
“Cooking is my healing,” Woworuntu says. Food also played a role in helping other survivors. “I used to sit with the victims, give them tea, and talk, giving them food and getting to know them.” That opens up the conversation to dig “beneath the surface of this person,” she says.
She brings that philosophy to her classes, too.
“‘How do I become a blessing for people?’” she asks herself. “It [takes] courage to come to my table without knowing who I am, who will be [there]. Food is a platform for people to speak, to get connected, to share. I think it’s just amazing how they open up.”
Cultural Immersion
It helps that she is a generous teacher and animated storyteller, welcoming us into the fold of her family and culture. We meet her husband, Randy, a retired police officer, and her 17-year-old son, Nick, our greeter—and her (paid!) dishwasher and trusty assistant.
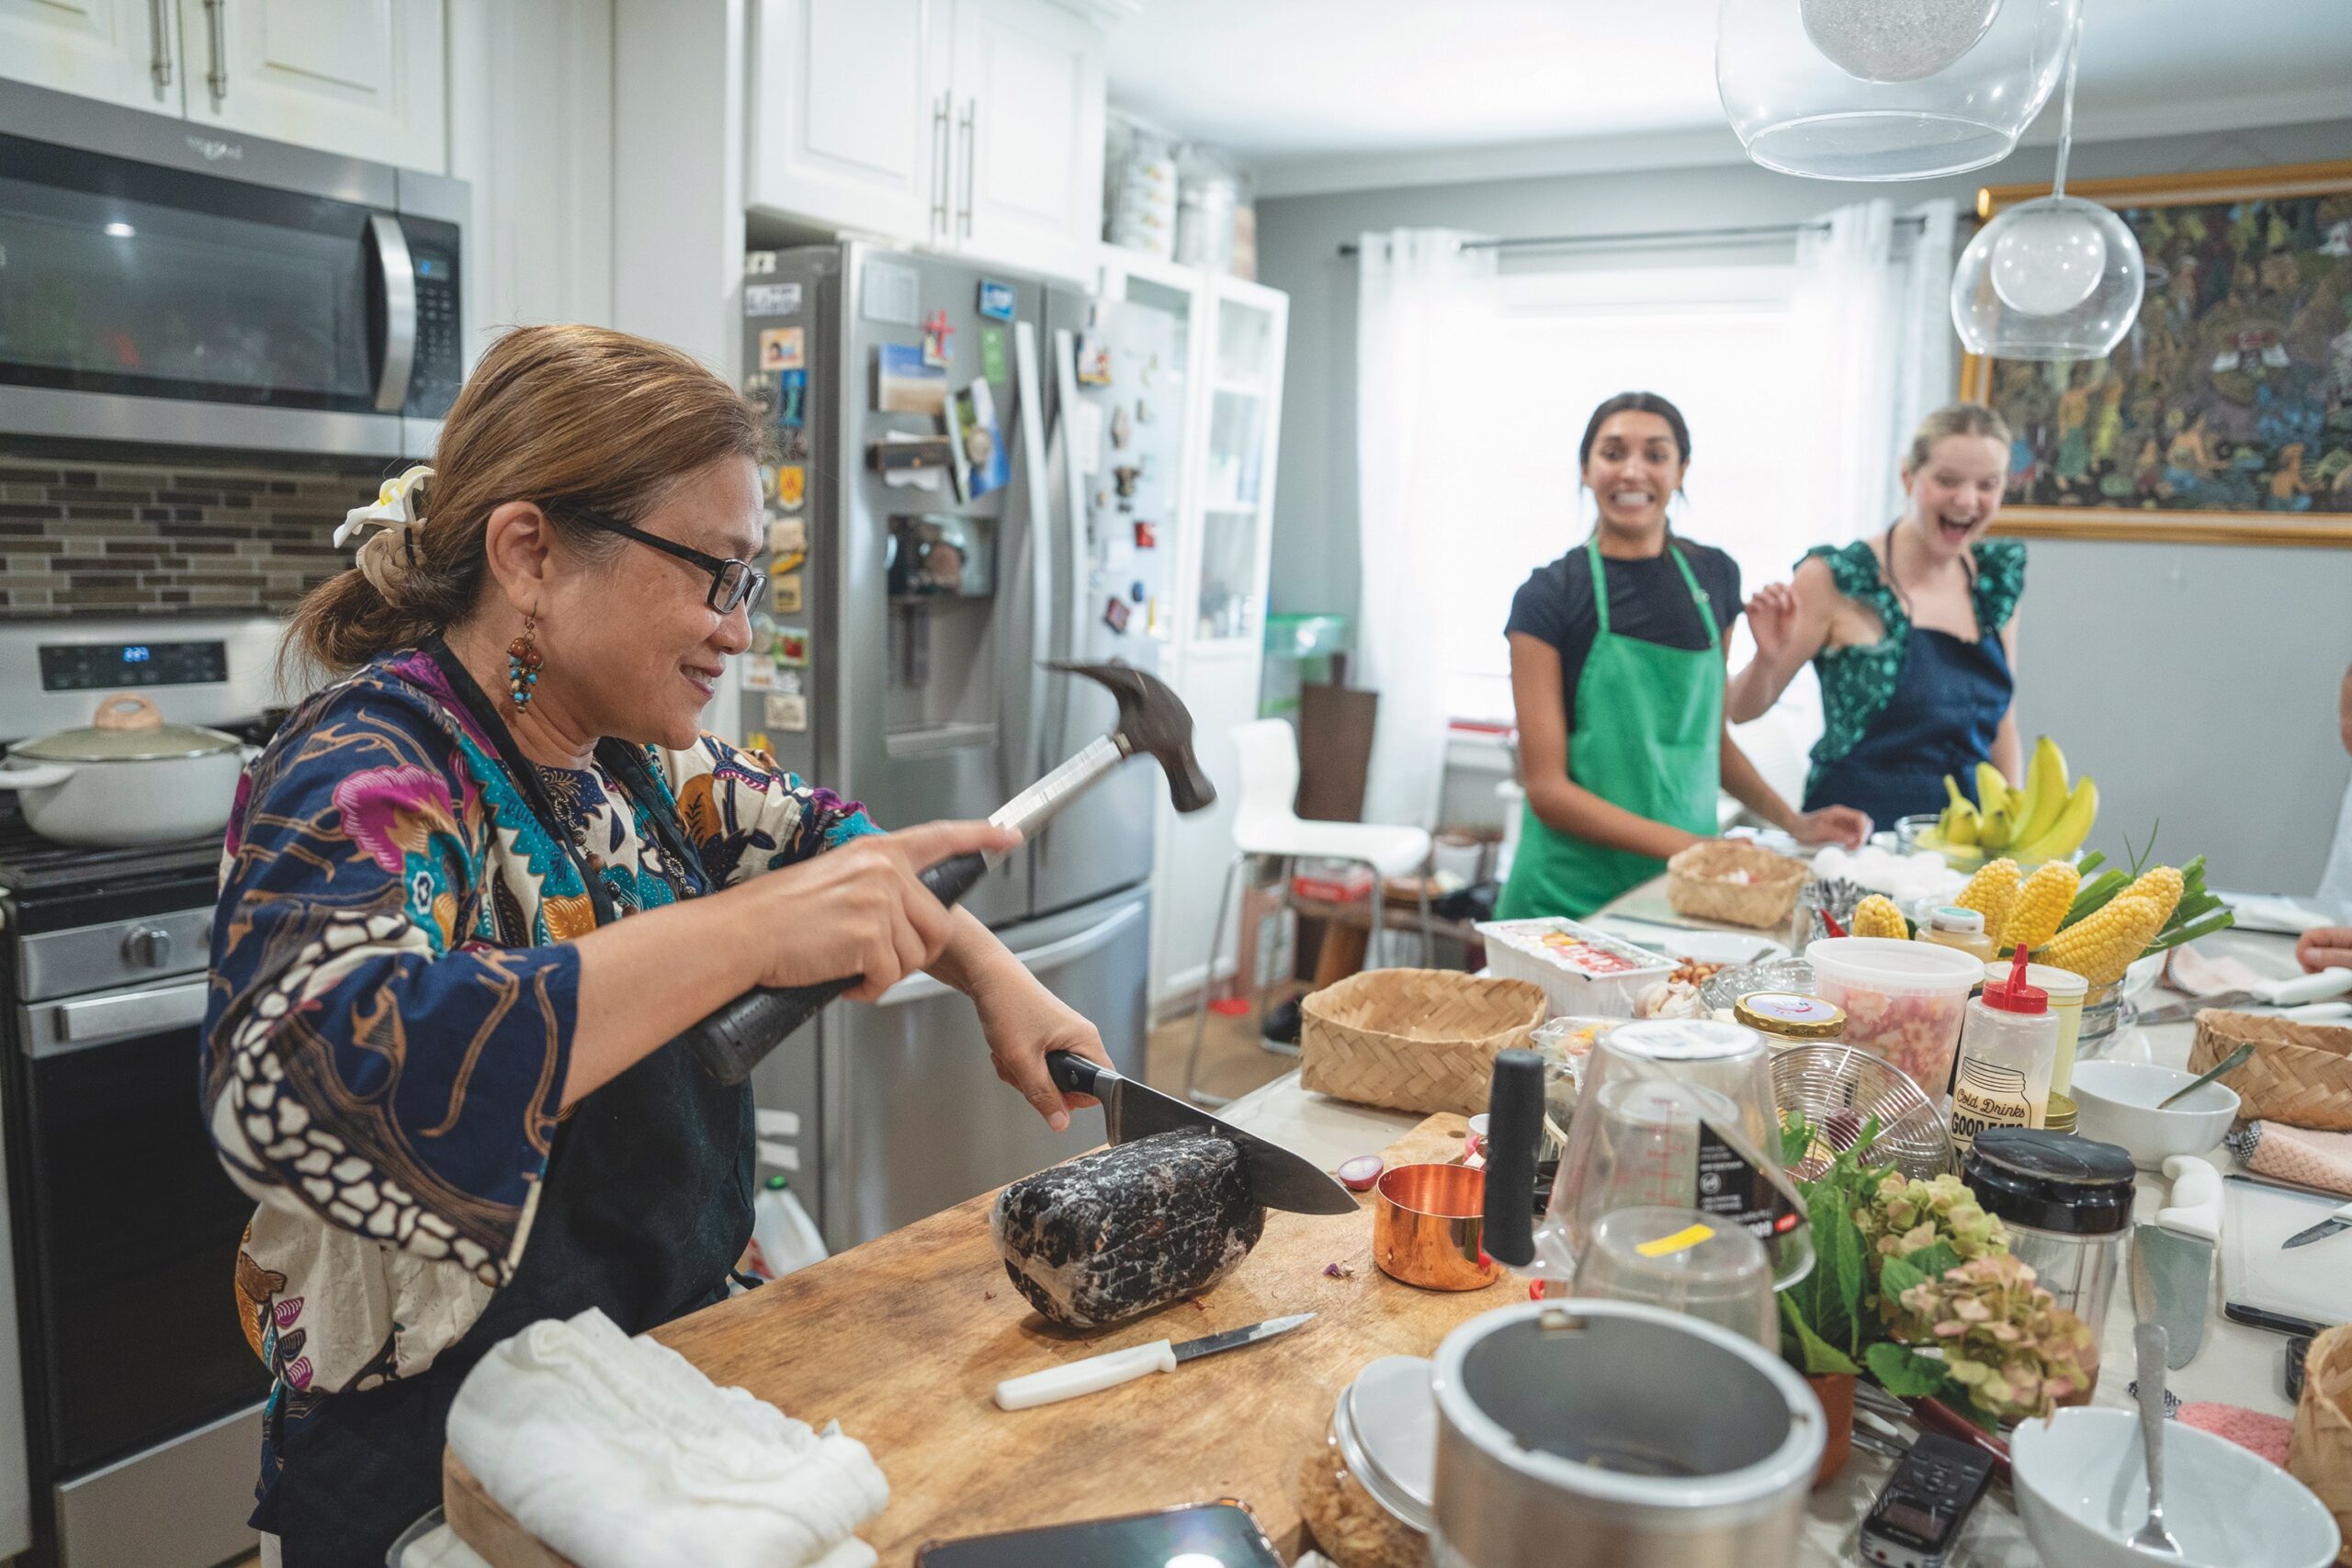
Woworuntu introduces ingredients paired with folklore and childhood stories, or expert kitchen tips. She measures garlic and shallots by handfuls—“how my mom and grandma taught me,” she says—and passes them into our hands so we can feel the weight. She lets us taste some truly special items: fragrant lime leaves and juicy white ginger from her backyard; smoked coconut sugar and kopi luwak (civet coffee) from recent travels to Indonesia. To help slice through a block of tamarind pulp for us to try, she swiftly brings a hammer down onto her chef’s knife, grinning all the while, until the dense, sticky fruit yields.
She’s also a blazing-fast cook. As we don our aprons, she bounces between showing us our next tasks, tending multiple pans on the stove, and putting out our fires (once nearly an actual one) without breaking a sweat.
A resourceful cook, Woworuntu uses a hammer to help her slice through a block of tamarind pulp prepared for her by her mother. (Samira Bouaou for American Essence)
We are far less dexterous. But our teacher is cheerful and encouraging, even when we cut the garlic the wrong way and spill gobs of half-cooked omelet onto her stove: “Don’t worry, don’t worry!” she sings, unfazed as the flames leap up from the oil.
We bond as we cook, cheering each other’s triumphant omelet flips and reaching over to save wobbly bowls from disaster.
“How many chiles should we add?” Woworuntu asks us, mixing batter for fritters. “Maybe 15?” We glance at each other, mumble unconvincing “Sure”s. “Ten, then,” she relents. We collectively exhale.
When we fall unprompted into an assembly line to roll and fill klepon, balls of pandan mochi stuffed with coconut sugar and rolled in coconut shavings, Woworuntu can’t stop giggling and snapping photos.
Three hours later, we finally sit down for our feast: corn and shrimp fritters, perfumed with lime leaf and fried to a golden crisp; cucumbers dipped in bumbu kacang, a sweet-and-savory peanut sauce I want to eat by the spoonful; and plate-sized egg and tofu omelets, loaded with bean sprouts, a second kind of peanut sauce, and fried shallots, all served with rice and crackers. For dessert, we’ve made caramelized bananas topped with condensed milk, chocolate sprinkles, and shredded mozzarella (don’t knock it ’til you try it); and the klepon, crowded on giant platters like snowball cookies in pastel green. A student remarks that she now understands why our welcome spread was a “snack.”
“I like to feed people,” Woworuntu later tells me. “Because my grandma used to feed people.” Her family owned several food businesses in Indonesia, and from a young age she learned to help cook traditional dishes for their many employees.
“I think I got it from family culture,” she continues. “They believe if you feed people, one day, if [your family’s future generation] needs food, someone will feed them.”
It extends beyond the table, too. “I think if you share kindness with other people, it’s contagious.”
Students assemble klepon, sweet rice cakes flavored with pandan and stuffed with coconut sugar. (Samira Bouaou for American Essence)
Breaking Bread, Building Bridges
Woworuntu sends us off with bursting stomachs, Tupperware full of leftovers, and yet more gifts: precious lime leaves and cucumbers from her garden, apples from her second home in upstate New York, and even an invitation to join her there on her next family escape.
For the newlyweds, she ducks into a room and emerges with a vibrant Indonesian fabric sash for the bride to wear on their trip. “Are you sure?” she asks, eyes wide. Yes, Woworuntu insists, pushing it into her hands and telling them to let her know if they need anything else. “We’ll text you,” the husband says with a smile.
Gross says these scenes are common at the end of classes. “Everyone’s hugging, everyone’s exchanging numbers, people feel that the instructors are like their new favorite auntie,” she said. “There’s something really magical that happens on an emotional level of connection.”
The friendships formed can last long after. Damira Inatullaeva, the Uzbek instructor, recalled one student who took an online class and mailed her a painting of hands making Uzbek dumplings. Another student decided to travel to Uzbekistan, and they met up in Inatullaeva’s hometown of Samarkand.
“Before the class,” Inatullaeva marveled, “many of my students didn’t even know what Uzbekistan was.”
After spending time in an instructor’s home, she said, “you will think that our world is very different, very colorful, [with] a lot of different tastes.”
She’s experienced that firsthand: She loves taking other League of Kitchens classes herself, as many instructors do.
“I love Nepali momos, I love Argentinian alfajores, I love Greek salad and spanakopita,” Inatullaeva said. Her favorite is New York pizza.
So while she’s proud of her heritage, she stops short of calling Uzbek cuisine the best. “All the cuisines of the world, they are unique. I discovered that here in New York,” she said.
Uzbekistan kebab. (Kristen Teig)
She recalled that when she first came to the United States, she resolved not to cook Uzbek food—only “American food.”After 10 years in America—nine of which she’s spent teaching for the League of Kitchens—she’s revised her resolution.
“I want my Uzbek cuisine to also be part of American cuisine,” she said. “This is my dream.”
The rich tapestry that is America continues to be woven; Gross sees that as something to champion. “Our instructors, they are representatives of their cultures, but they’re also New Yorkers. They’re Americans,” she said. “They value very deeply preserving their traditions and recipes, but they also go out to eat Thai food, and love pizza, and cook varied cuisines in their homes. They interact with other people from other cultures, their lives are rich with many cultures, and the best things coexist.”
For Gross, fostering these cross-cultural connections is the most powerful part of the League of Kitchens.
“All the time we hear from students who say, ‘This part of the world that felt abstract and distant now feels personal and meaningful,’” she said.
“That is the great hope of what we do: create peace and love and connection between people who are different, through storytelling, through sharing, through food.”
Get Cooking
The League of Kitchens offers cooking workshops in-person in the New York area (2.5 hours for $175, 4.5 hours for $220) and online (2.5 hours, $60 per device). In-person classes include a welcome snack or lunch, hands-on cooking instruction, and a shared meal. Online classes include live, interactive cooking instruction and a virtual dinner party; a list of ingredients and equipment is provided in advance. All students receive a packet of the instructor’s family recipes and background information. LeagueOfKitchens.com
For a kitchen companion to keep closer at hand, Lisa Kyung Gross and the school’s instructors have published “The League of Kitchens Cookbook: Brilliant Tips, Secret Methods, and Favorite Family Recipes From Around the World” (November 2024). Gross’s warm encouragement guides readers through recipes detailed enough to be mini cooking lessons, while instructor profiles and anecdotes add deeper meaning to every dish.
Lisa Gross (center, in green) with the instructors of the League of Kitchens. (Kristen Teig)
Kitchen Secrets
For Lisa Kyung Gross, running the League of Kitchens has been “the best culinary school you could imagine,” she said. She shared some of her top takeaways from their instructors.
Use the best ingredients you can get. “Your food will only taste as good as the quality of your ingredients,” Gross said. Many instructors emphasize using in-season produce and shop at several different places to get exactly what they want.
Freshly toast and grind your own spices. Gross has noticed this makes an especially big difference in flavor for cumin and coriander. She recommends toasting the seeds in a completely dry pan over the lowest heat possible until they’re aromatic and crisp (cumin should be easily broken with a fingernail; coriander should almost shatter between your molars). Let them cool to room temperature before grinding in a spice mill or coffee grinder (one not used for coffee).
Pay attention to the little things. Here lies the difference between “good food and great food,” Gross said: the nuances and tricks that come naturally to a home cook with years of experience. Removing the seeds from grape tomatoes prevents watery guacamole; the contrast between paper-thin red onions and bigger-than-you’d-think tomato wedges makes an ultra-satisfying Greek salad; breaking down chicken into smaller-than-you’d-think pieces exposes more bone marrow and lends extra flavor to an Afghan curry. The delicious is in the details.
Cook with love. Every instructor prescribes this most important ingredient. This means “cooking with intention, with attention, with care,” Gross said. “If you’re grumpy, don’t cook,” added Shandra Woworuntu. “You have to be kind to the food.” For Damira Inatullaeva, it was her grandmother’s most important kitchen advice: “Don’t forget to think good thoughts about the people for whom you’re cooking.”
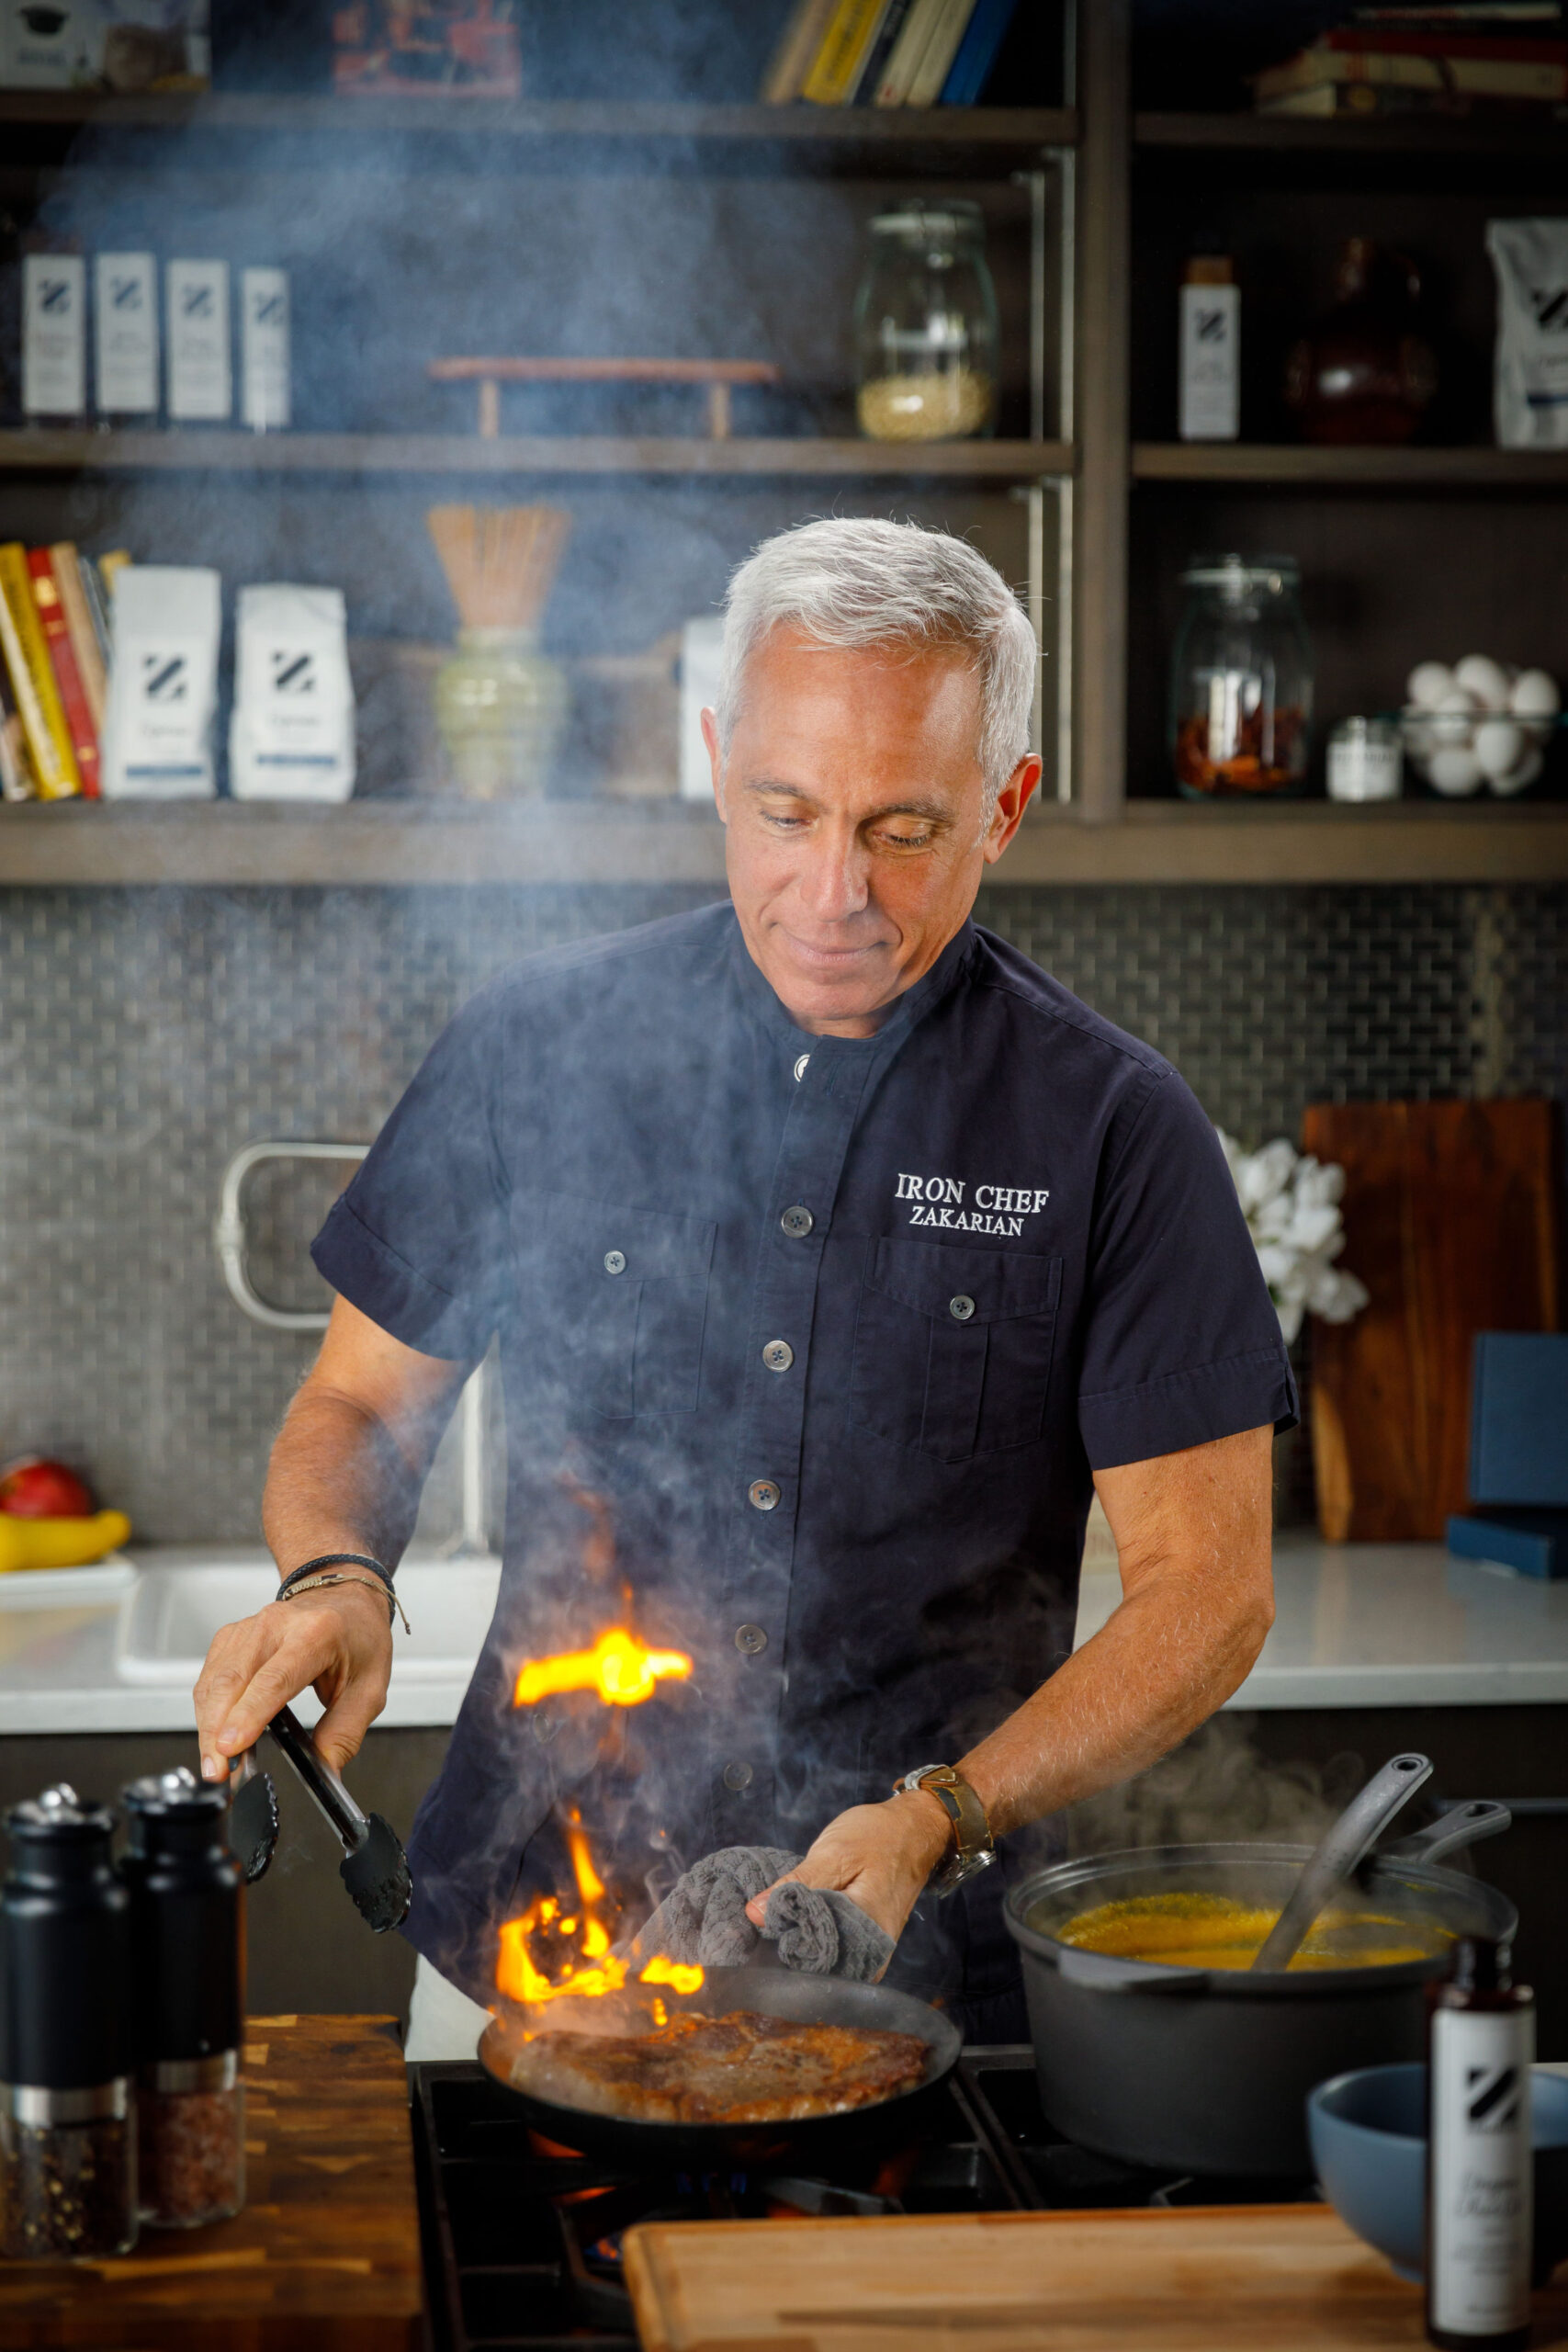
Chef Geoffrey Zakarian
runs restaurants,
frequently appears
on TV, and has his
own line of food and
kitchen products. (Aaron Lockwood)
These days, place settings at your dinner table might look like this: a knife, fork, spoon—and cell phone. You might watch television as you eat.
You’re missing the key to a good meal, says renowned chef Geoffrey Zakarian: family.
Mr. Zakarian learned this lesson at a young age. He grew up in Worcester, Massachusetts, with a Polish American mother and Armenian American father.
“Being Middle Eastern, all we did was cook,” he said. “At breakfast, we’re talking about lunch with our mouths full. At lunch, we’re talking about dinner with our mouths full. It was a never-ending circle.”
Mr. Zakarian saw that a meal was about more than just good food. It was the glue that bonded his family.
“It created a shared devotion around the table,” he said. His love of food and its effect on family eventually led to his calling as a chef.
(Aaron Lockwood)
Fighting Hunger in the City
Mr. Zakarian is not only a prolific chef and restaurateur—whose ventures have included restaurants in New York, Connecticut, Los Angeles, and Florida, where he now lives—but also a long-standing television personality, known for his appearances on the Food Network as an Iron Chef, a recurring judge on “Chopped,” and a co-host on “The Kitchen.”
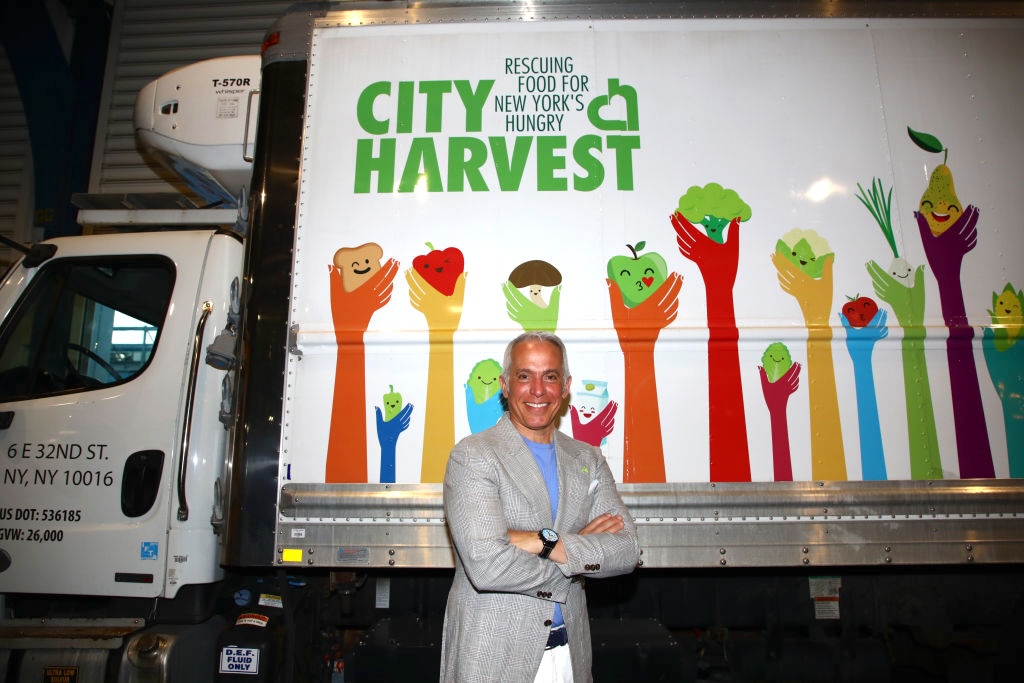
He’s also worked for years with City Harvest, a New York food rescue organization that has distributed an incredible 80 million pounds of food this year to New Yorkers in need. He’s served as chairman of the NGO’s Food Council since 2014.
City Harvest rescues much of its food because of something that might surprise you: expiration dates. “This would not be possible unless a terrible legislation for expiration dates was created. That created a false foundation where we have to throw food out [after its sell-by date] and can’t sell it,” Mr. Zakarian said. “City Harvest came along and said, ‘We’ll take it, and, in less than 24 hours, we can distribute it.’”
When asked how much of the “expired” food the charity gets is still edible, the chef has a stunning answer: “One hundred percent.”
City Harvest receives donations of surplus food from nearly 2,000 businesses, including farms, grocers, restaurants, wholesalers, and manufacturers. But Mr. Zakarian makes sure to distribute healthy food, shopping as carefully as he would for his own family.
Mr.Zakarian attends a City Harvest event in New York City, June 19, 2018. (Getty Images for City Harvest)
“Nothing with high fructose corn syrup. We’re very picky [about] what we take. Fifty percent of what we give away are fresh vegetables,” he said.
City Harvest trucks then deliver the food free of charge to more than 400 food pantries, soup kitchens, and other community food programs across the city. “It’s a very fulfilling process for everyone,” he said. “If you talk to any of the drivers, they’re so happy with what they do. They get paid to make people happy and live better; they give away food all day. What a great way to live.”
The organization holds several fundraisers throughout the year, including an annual fall food tasting that will be held on October 29 this year, at The Glasshouse in New York. Last year’s event raised enough to feed 4 million people.
The Next Generation
As a father of three, Mr. Zakarian has taken his own childhood experience of sharing a meal at the table and passed down the tradition. On any day he’s home, he makes it a point to cook breakfast for daughters Anna and Madeline and son George.
They’ve picked up Dad’s love of cooking. Anna and Madeline published a cookbook called “The Family That Cooks Together” in 2020, when they were 12 and 14, respectively. They also helped start a Junior Food Council for City Harvest that year.
Want to teach your kids to cook? Mr. Zakarian says it only takes one thing.
“Smells. This is why there’s a failure in modern cuisine, that minimalist cuisine: If nothing has a smell, it’s not memorable. Every memory you have of food is the smell.”
Chef Geoffrey Zakarian with his family. (Courtesy of Geoffrey Zakarian)
Mr. Zakarian says nothing draws a kid into the kitchen more than the aroma of something delicious. “You don’t have to ask kids to do anything. They’ll smell something, come by, and say, ‘What’s that, Mom?’ And she’ll say, ‘Well here, try it.’ I’ll say, ‘Do you want to help?’ ‘Sure.’ It’s not forcing them to do anything. It’s the memory of the smells and the clanging of pots and pans.”
Spreading the Joy
He’s also passionate about bringing those memories to other families. His cookware line, launched under Zakarian Hospitality, is designed to “make life better for the average person at home,” he said. He doesn’t focus on obscure items you might use once every 10 years, but basic, good-quality cooking tools you’ll need every day.
His television appearances aim to do the same. “I love these shows because they show people how to nourish their families,” he said. “When people watch a competition show, they love the competition, but at the end of the day, it is captivating their memory with things they want to try.” He calls it “nourishment of the stomach, but also nourishment of the soul.”
As a chef, Mr. Zakarian focuses on what he calls the Mediterranean basket, the diet from Greece and Italy. At his restaurants, “I make menus for food that I enjoy,” he said. “I just try to make food yummy for myself, and if I like it, I would say that 99 percent of my customers will like it.”
But whether he’s cooking for customers or his kids at home, his philosophy is the same.
“If you have everyone sitting around the table, that’s the real joy, that’s where everything happens—all the glances, the looks, the nuanced conversation that comes out,” he said. “If you can get them to the table, that’s the real reward.”
9 Questions for Geoffrey Zakarian
Comfort food? Steak frites.
Most beloved kitchen tool? Paring knife.
3 ingredients you can’t live without? Sea salt, chardonnay vinegar, anchovies.
Underrated ingredient? Miso.
Go-to easy but impressive dish to cook for someone? Spaghetti with lemon.
Daily wellness rituals? Work out five times a week. Don’t skip breakfast. Eat grass-fed beef, full-fat yogurt, fruits, berries. Big fan of honey and dates instead of sugar.
Favorite hobby when you’re not cooking? Golf.
Best advice for home cooks? Start learning to cook with breakfast. Eat your mistakes.
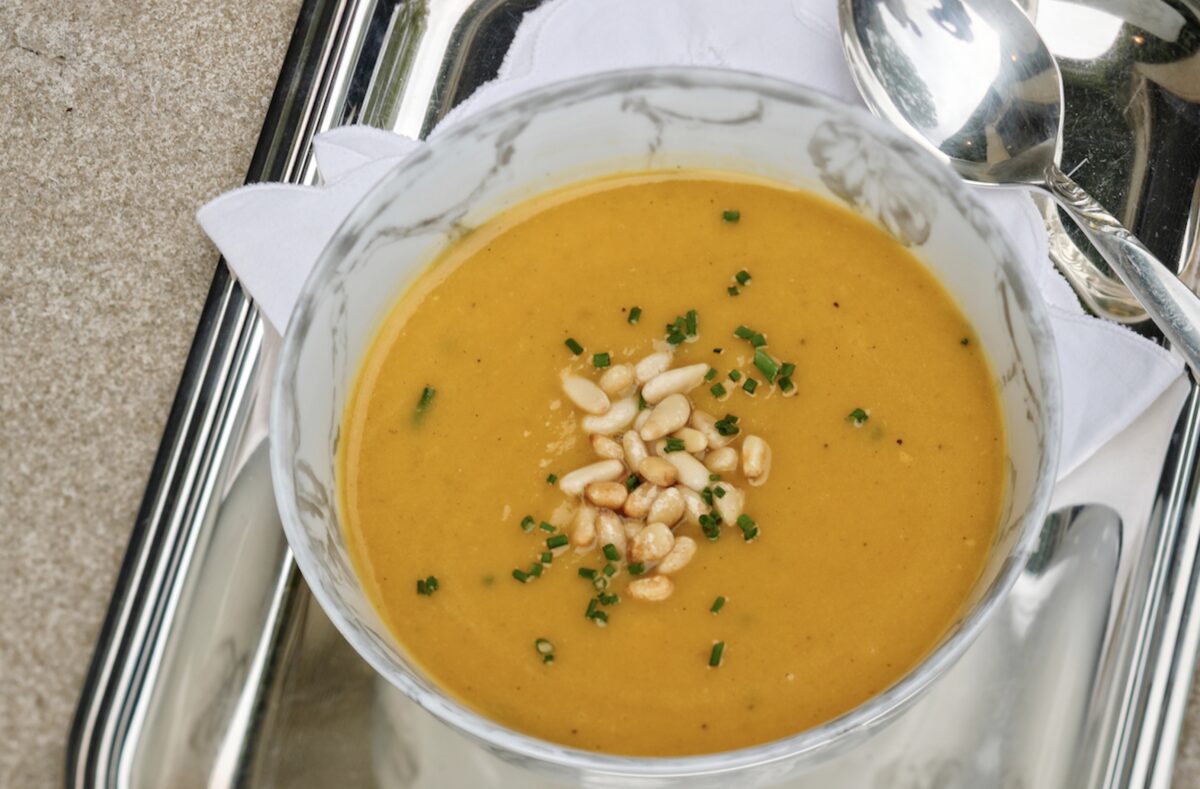
We enjoy this cold-weather soup every year, often by the fire. For parties, we prepare the soup ahead of time, and then we put on a big pot for guests to help themselves. This keeps the mess in the kitchen low and gives us something yummy to sneak off with and eat.
Serves 4
4 tablespoons unmelted butter
1 large butternut squash, peeled and cubed (about 4 cups)
1 medium yellow onion, chopped
2 tart apples, peeled, cored, and cubed
1 tablespoon Madras curry powder
1/4 cup all-purpose flour
3 cups chicken broth
1/2 cup half-and-half
Kosher salt
Freshly ground black pepper
1/4 cup toasted pine nuts, for garnish
Recommended Tools
Immersion blender or regular blender
Melt the butter in a large soup or stockpot over medium heat. Add the squash, onion, apples, and curry powder and sauté for 5 minutes.
Add the flour, stirring well to combine. Add the broth, bring to a simmer, and simmer for 30 minutes, or until the squash is very tender. Let cool for a few minutes.
With an immersion blender, puree the soup in the pot until smooth. Alternatively, carefully puree in batches in a regular blender. Stir in the half-and-half.
Reheat soup gently if necessary, and season with salt and pepper. Garnish with toasted pine nuts and serve.
Recipe Notes
Pine nuts can be toasted in a pan on the stovetop or roasted on a sheet pan in a 325-degree-F oven for 12 minutes. Give a little shake as they cook. Watch them carefully, because they can burn quickly!
If using a regular blender, be careful with hot liquids.
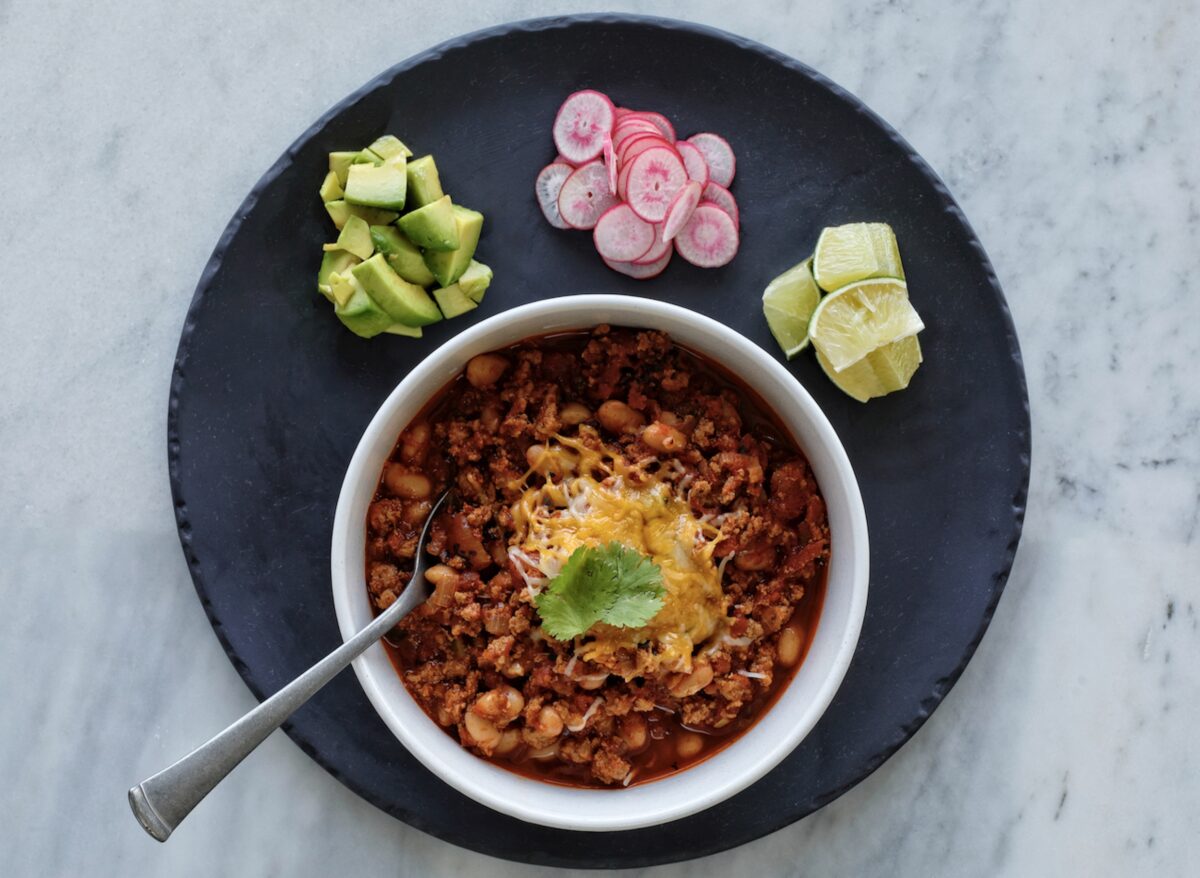
This is the Zakarian TV dinner! Whenever there’s something fun to watch, we make a batch of chili and all gather in the living room. This is the absolute only time we’re allowed to eat dinner in front of the TV, so chili holds an extra special place in our hearts.
Serves 8
For Chili
3 tablespoons extra virgin olive oil
3 pounds ground pork
2 to 3 tablespoons pancetta or bacon, cut into small pieces
Kosher salt
Freshly ground black pepper
2 large onions, chopped (about 3 cups)
6 garlic cloves, finely chopped
2 bunches scallions (white and green parts), chopped (about 2 cups)
2 tablespoons tomato paste
1/4 cup chili powder
1/4 cup ground cumin
1 1/2 cups apple cider
2 (28-ounce) cans whole tomatoes with juice (fire-roasted, preferably), crushed by hand
2 (15.5-ounce) cans small black or white beans, drained and rinsed
2 cups chicken stock
2 tablespoons green Tabasco
For Garnish
1 avocado, pitted, peeled, and chopped, for garnish
1/2 cup chopped cilantro, for garnish
4 radishes, sliced thin, for garnish
Shredded Mexican cheese, for garnish
Lime wedges, for garnish
Recommended Tools
Wide-bottomed Dutch oven or large pot
Wooden or silicon spurtle, or a wooden spoon
Ladle
Heat the olive oil in a wide-bottomed Dutch oven or large soup pot over medium-high heat. Add the pork and cook, stirring and scraping the pan bottom with a spurtle, until browned and cooked through, letting the liquid cook out. This will take 10 to 15 minutes. Caution: Do not rush through this step; it’s crucial. Add the pancetta or bacon and cook with the pork for 1 to 2 minutes. Season with pepper, about 1 teaspoon.
Reduce the heat to medium. Add the onions, garlic, and scallions and cook until wilted, about 5 minutes. Make a space in the pan and drop in the tomato paste. Let the paste toast for 1 minute and then stir it into the pork mixture. Sprinkle in the chili powder and cumin and cook and stir until fragrant, about 2 minutes.
Pour in the cider, rigorously scraping the bottom of the pan with the spurtle to get the brown bits released and incorporated. Cook until the liquid is almost reduced away, 3 to 5 minutes. Add the tomatoes, beans, and stock, then season with the Tabasco as well as about 2 tablespoons salt and 1 tablespoon pepper. Adjust the heat so the chili is gently simmering and cook, uncovered, until the chili is thick and full of character, about 1 1/2 hours.
Ladle the chili into bowls and serve garnished with avocado, cilantro, radishes, Mexican cheese, and lime wedges.
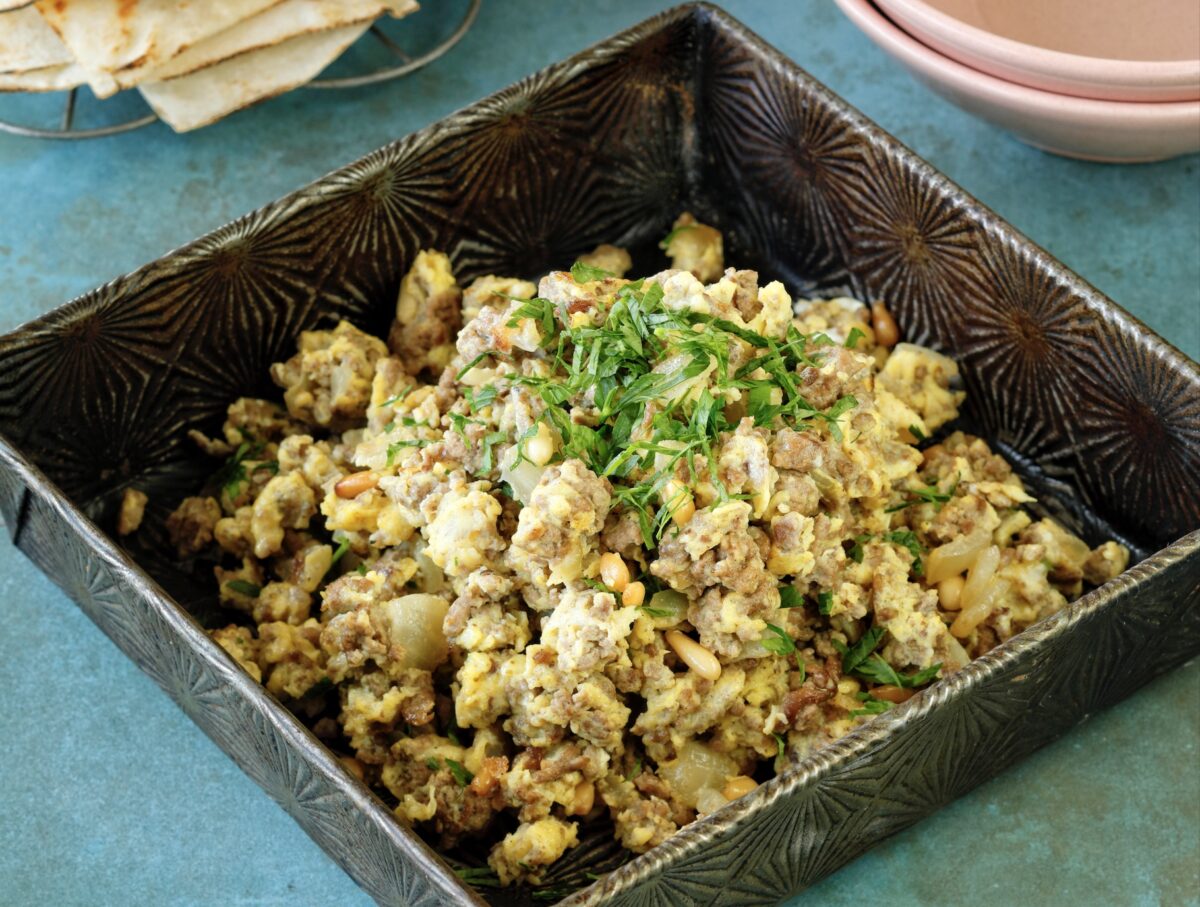
During the holidays, our grandmother Marie cooks traditional Middle Eastern dishes for our large extended Lebanese family, much to everyone’s delight. There are always leftover pieces of raw lamb she doesn’t need, so over the years, she started frying them with pine nuts and onions that she’d then scramble together with eggs for breakfast the next morning. As soon as the dish hits the table, we jump to get it on our plates. Because we enjoy this meal so much, we now shop for lamb at all times of the year just to make the breakfast “leftover dish” for ourselves!
The picture shows traditional Syrian bread, which can be hard to find, but regular pita works just as well to scoop up those delicious eggs.
Serves 4 to 6
2 tablespoons extra virgin olive oil
1 medium yellow onion, diced
3/4 pound ground lamb
3/4 teaspoon ground cinnamon
1 1/4 teaspoons kosher salt, plus more for seasoning
1/4 teaspoon freshly ground black pepper
1/4 cup pine nuts, toasted
6 large eggs
2 tablespoons unsalted butter
1/4 cup coarsely chopped Italian parsley
Warm pita bread, for serving
Recommended Tools
Cast iron skillet
silicone spatula or wooden spoon
Heat the olive oil in a large skillet (preferably cast iron) over medium heat. Add the onions and cook until softened, about 5 minutes. Add the lamb, cinnamon, salt, and pepper. Cook, stirring occasionally, until the lamb is browned and cooked through, about 10 minutes. Add the pine nuts.
Meanwhile, in a small mixing bowl, whisk the eggs and season with salt and pepper. When lamb is fully cooked, push the mixture to the edge of the pan. Add the butter to the center of the pan and allow to melt. Pour in the eggs. Using a silicone spatula or wooden spoon, stir the eggs in large circles, allowing large curds to form. Once the eggs are almost cooked, incorporate the lamb mixture into the eggs and remove from the heat.
Divide the eggs among plates, garnish with parsley, and serve with warm pita bread.
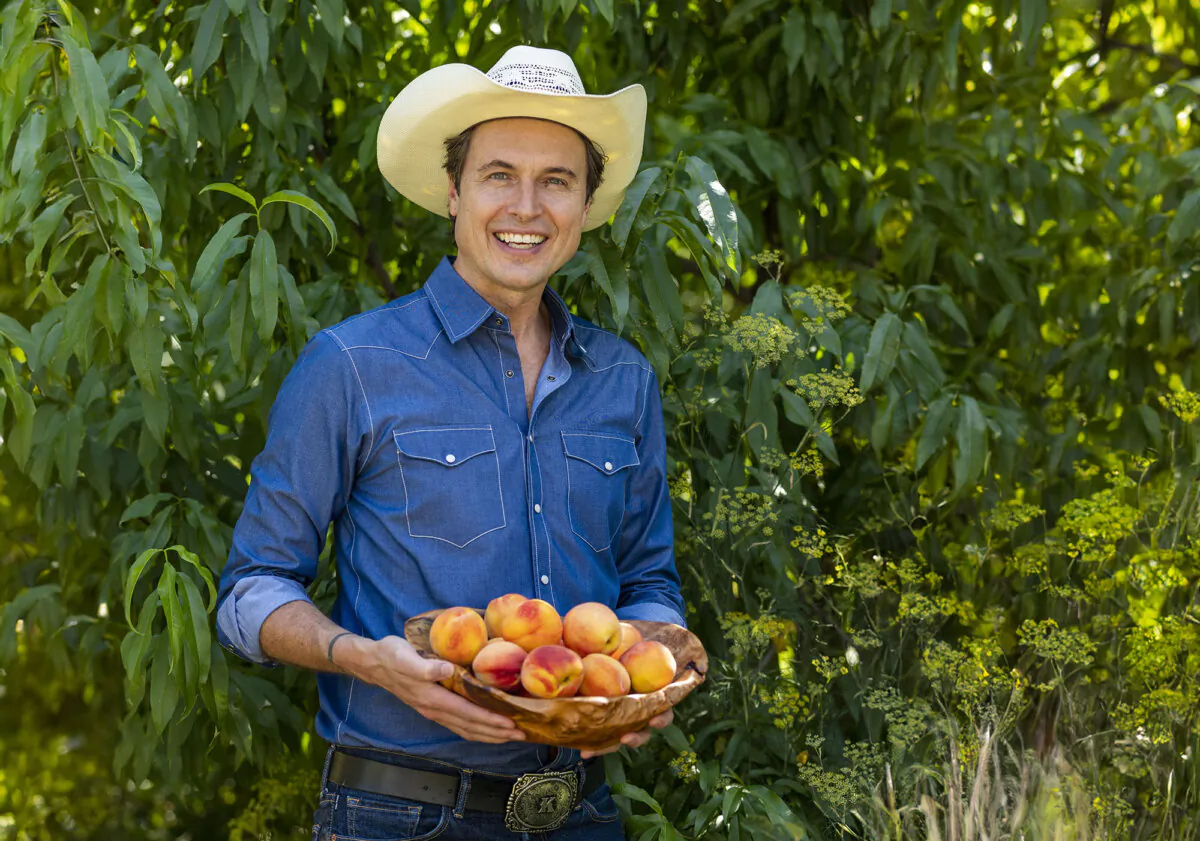
Kimbal Musk is passionate about sustainable farming and widening Americans' access to local fresh produce. (Laurie Smith)
Imagine spending 18 months at one of the most prestigious culinary schools in the world, and the first assignment you get after graduating is peeling potatoes in a volunteer kitchen.
But that’s only part of an unusual story that includes a near-death experience, a message from God, and a terrorist attack that led one man to a career dedicated to bringing local, sustainable food to Americans.
Then again, you wouldn’t expect anything less from someone with the last name of Musk. In this case, the tale belongs to Elon’s brother, Kimbal. While the more famous sibling is launching rockets and electric cars, Kimbal Musk is cooking up innovations in the kitchen. The former tech entrepreneur has dedicated his life to his nonprofit, Big Green, which supports sustainable farming, educating children about growing food, and expanding home, school, and community gardens.
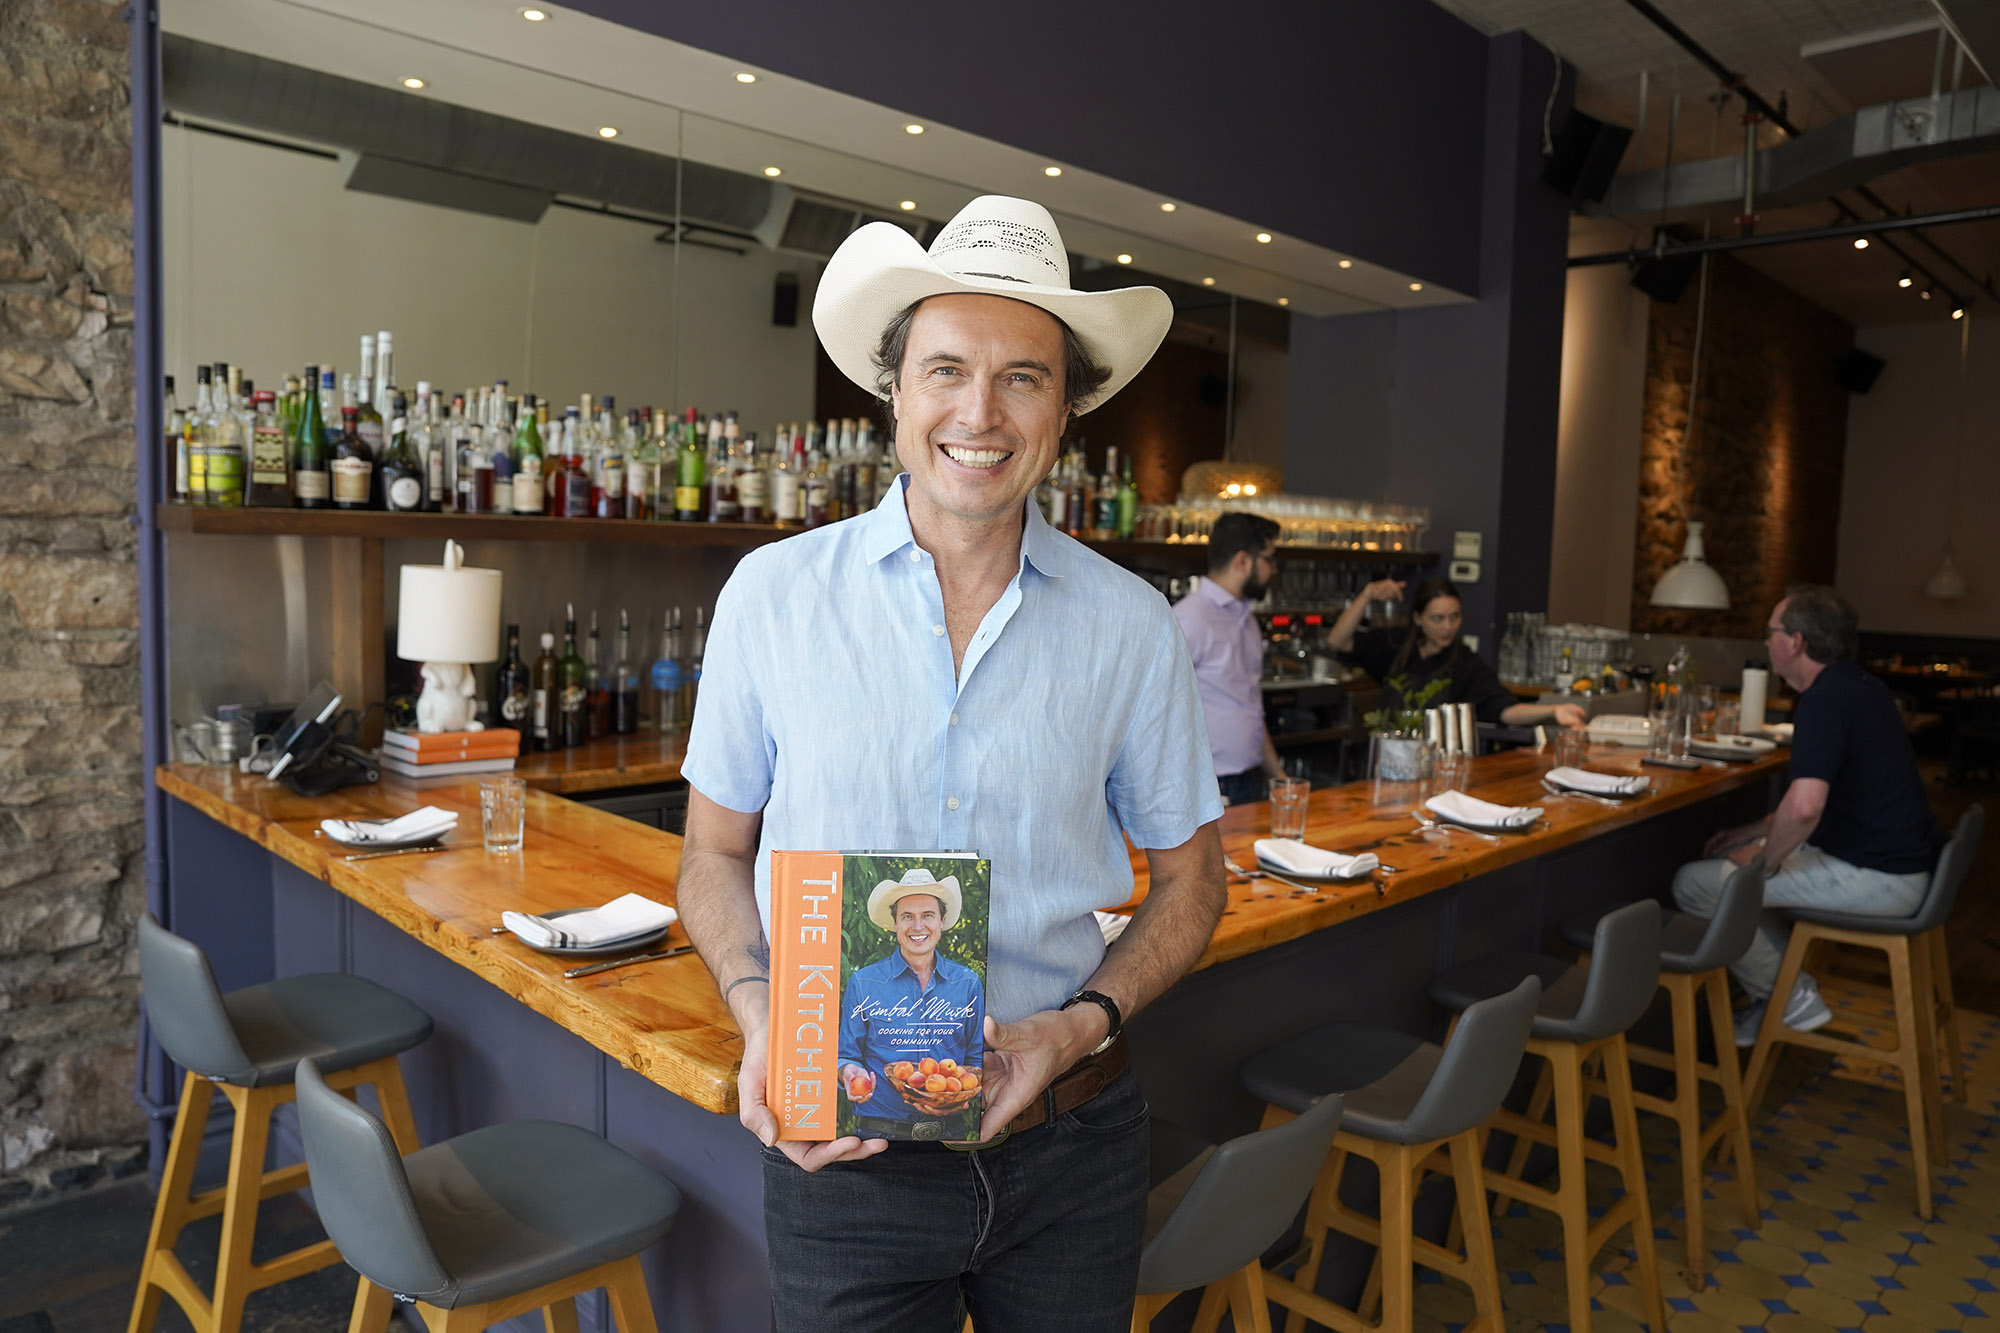
He also owns several farm-to-table restaurants in Colorado and Chicago, with a forthcoming location in Austin, Texas. “The kitchen is truly where I have so much passion,” he said. “I love … walking into my restaurant and feeling the energy of the community.” He recently wrote a cookbook, “The Kitchen Cookbook: Cooking for Your Community,” in the hopes that everyone can experience the joy of sharing the fruits (and vegetables) of their labor; he feels that cooking a meal for someone is the ultimate act of sharing.
How he came to this point in his life is a story in itself.
Mr. Kimbal Musk with a copy of his cookbook, “The Kitchen Cookbook.” (Samira Bouaou for American Essence)
From Tech to Social Entrepreneurship
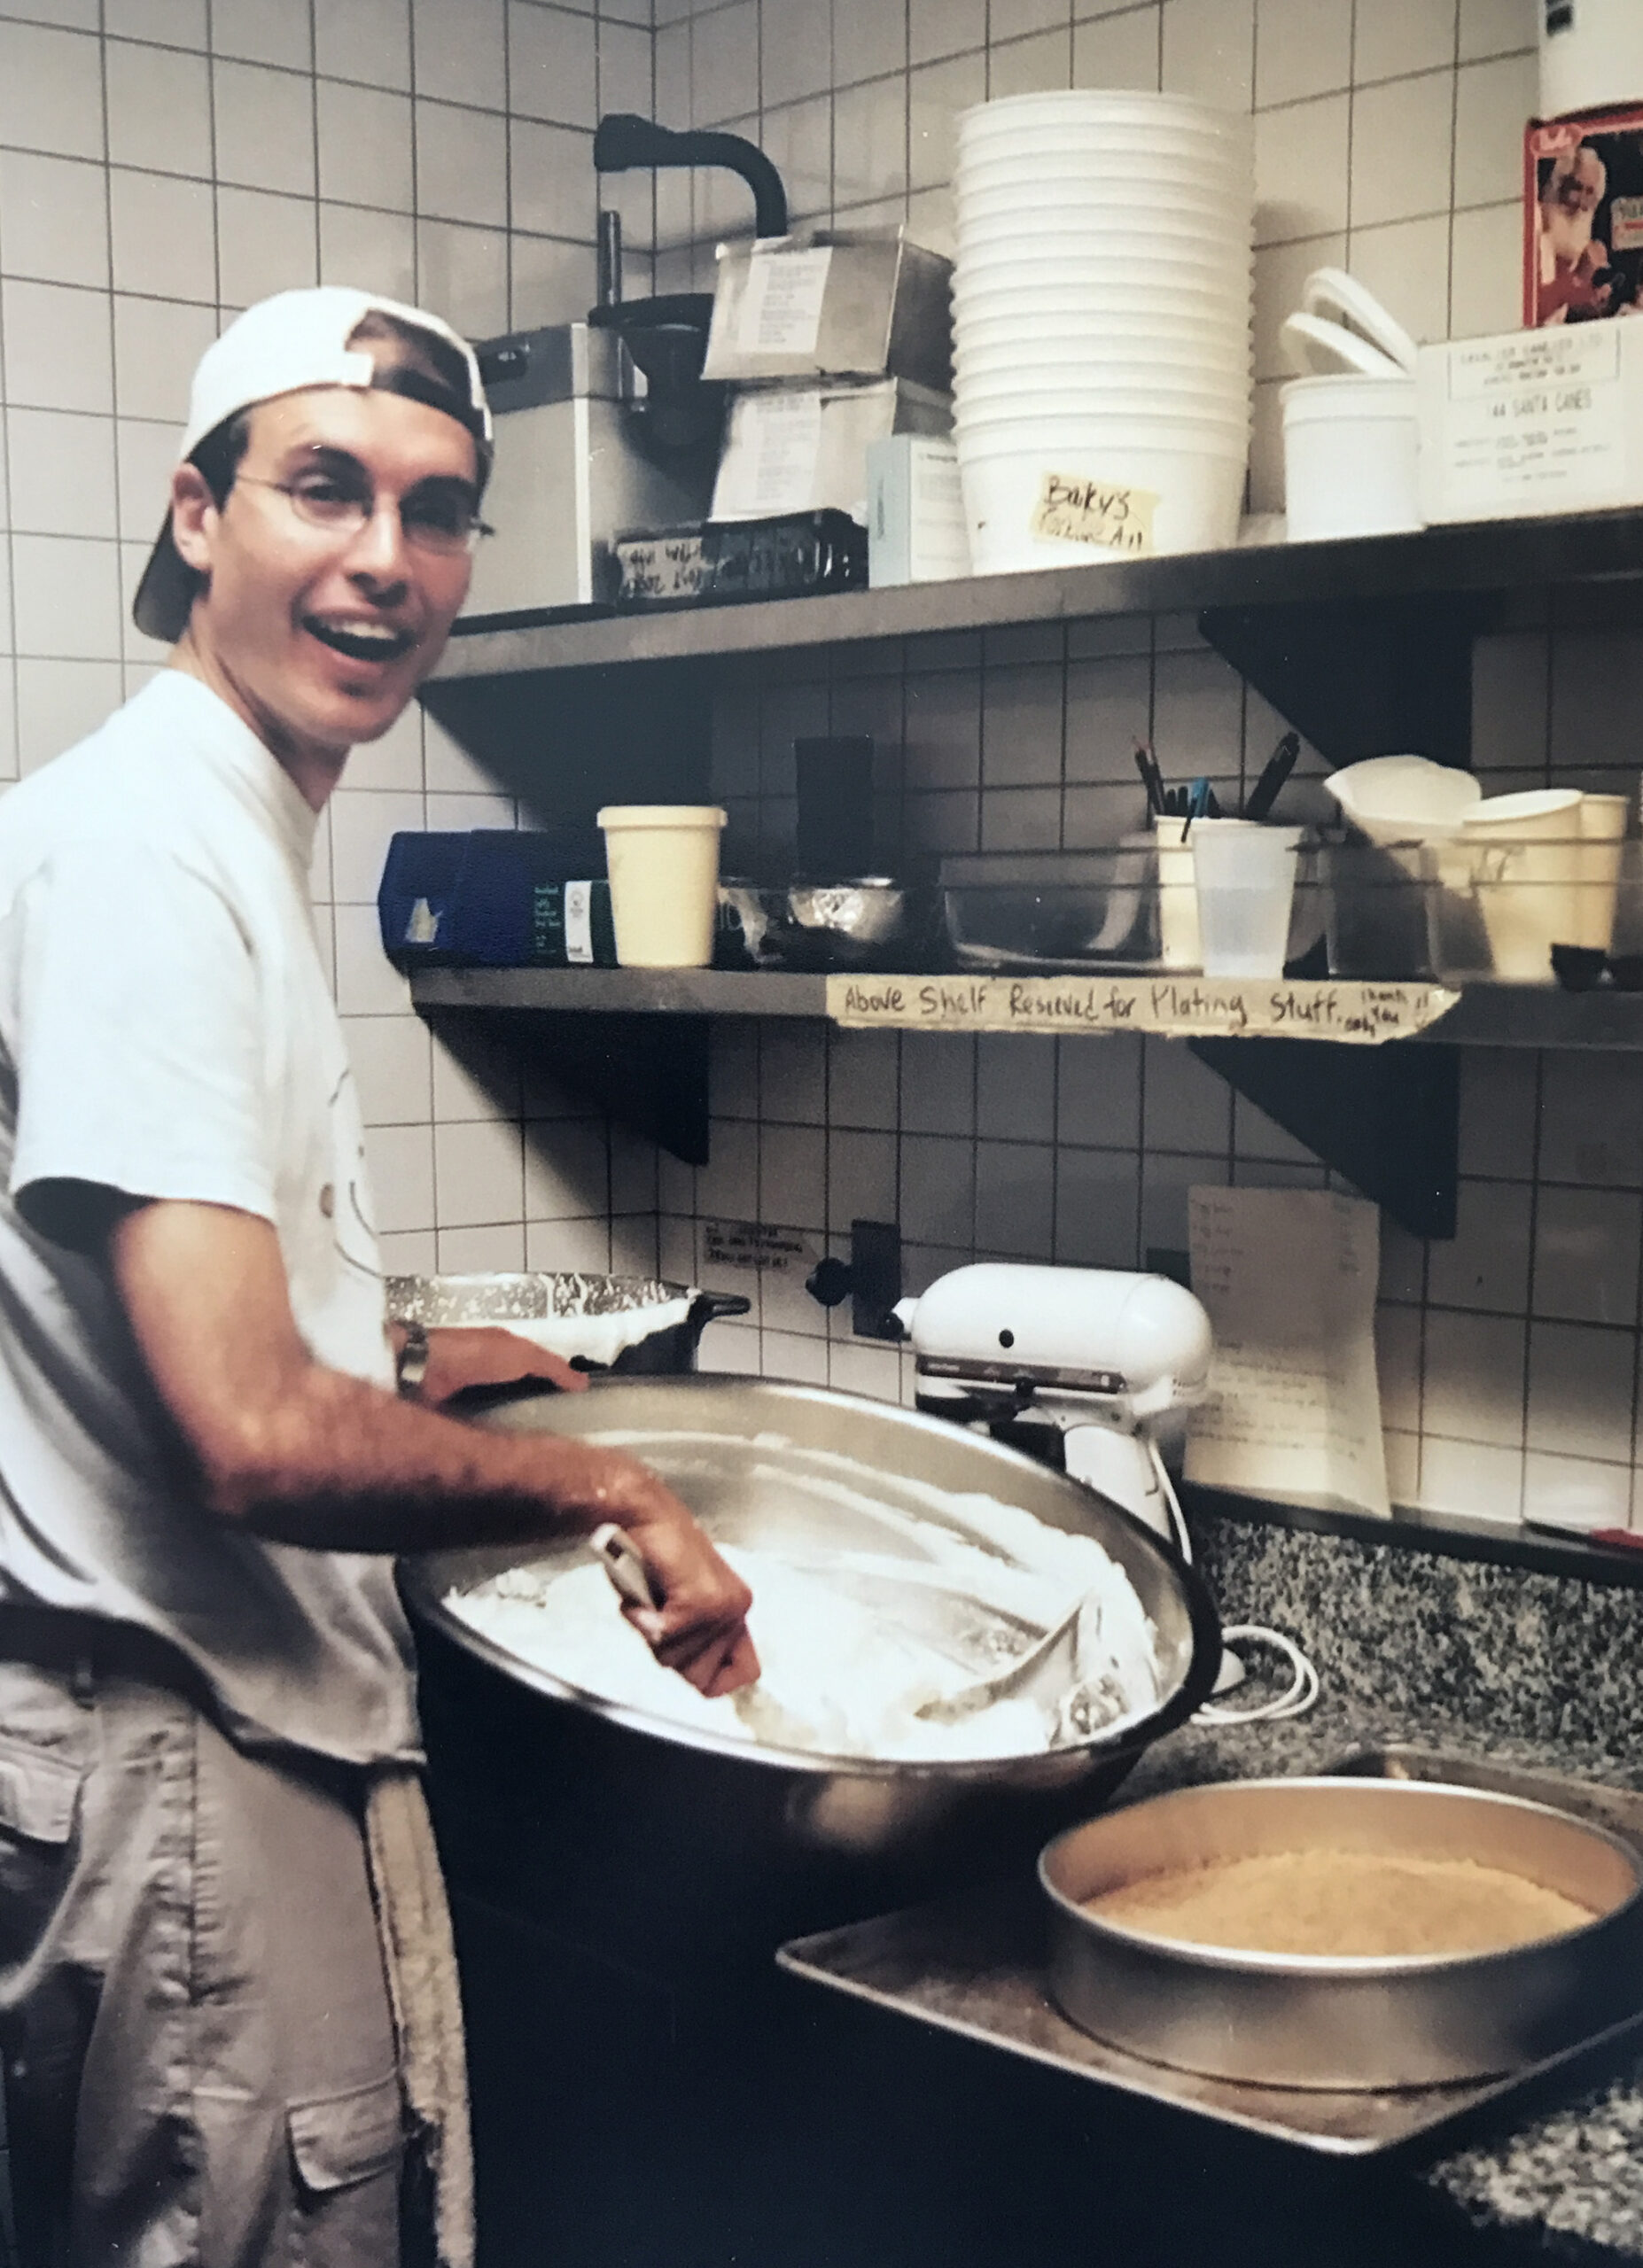
Already successful and financially secure at age 27 when he and his brother sold Zip2, the tech company they founded together, Mr. Musk decided to pursue cooking. He enrolled in the French Culinary Institute in New York, thinking that the experience would be an exotic endeavor. Instead, it was a lot like the high-stress cooking shows on television.
“I thought of going in and it being somewhat romantic. And it was like the movie ‘Full Metal Jacket.’ It was screaming at you, all the time, breaking you down, in a boot camp kind of mentality.” Of the 25 students who enrolled in that class, only six made it through the year-and-a-half course, he recalled.
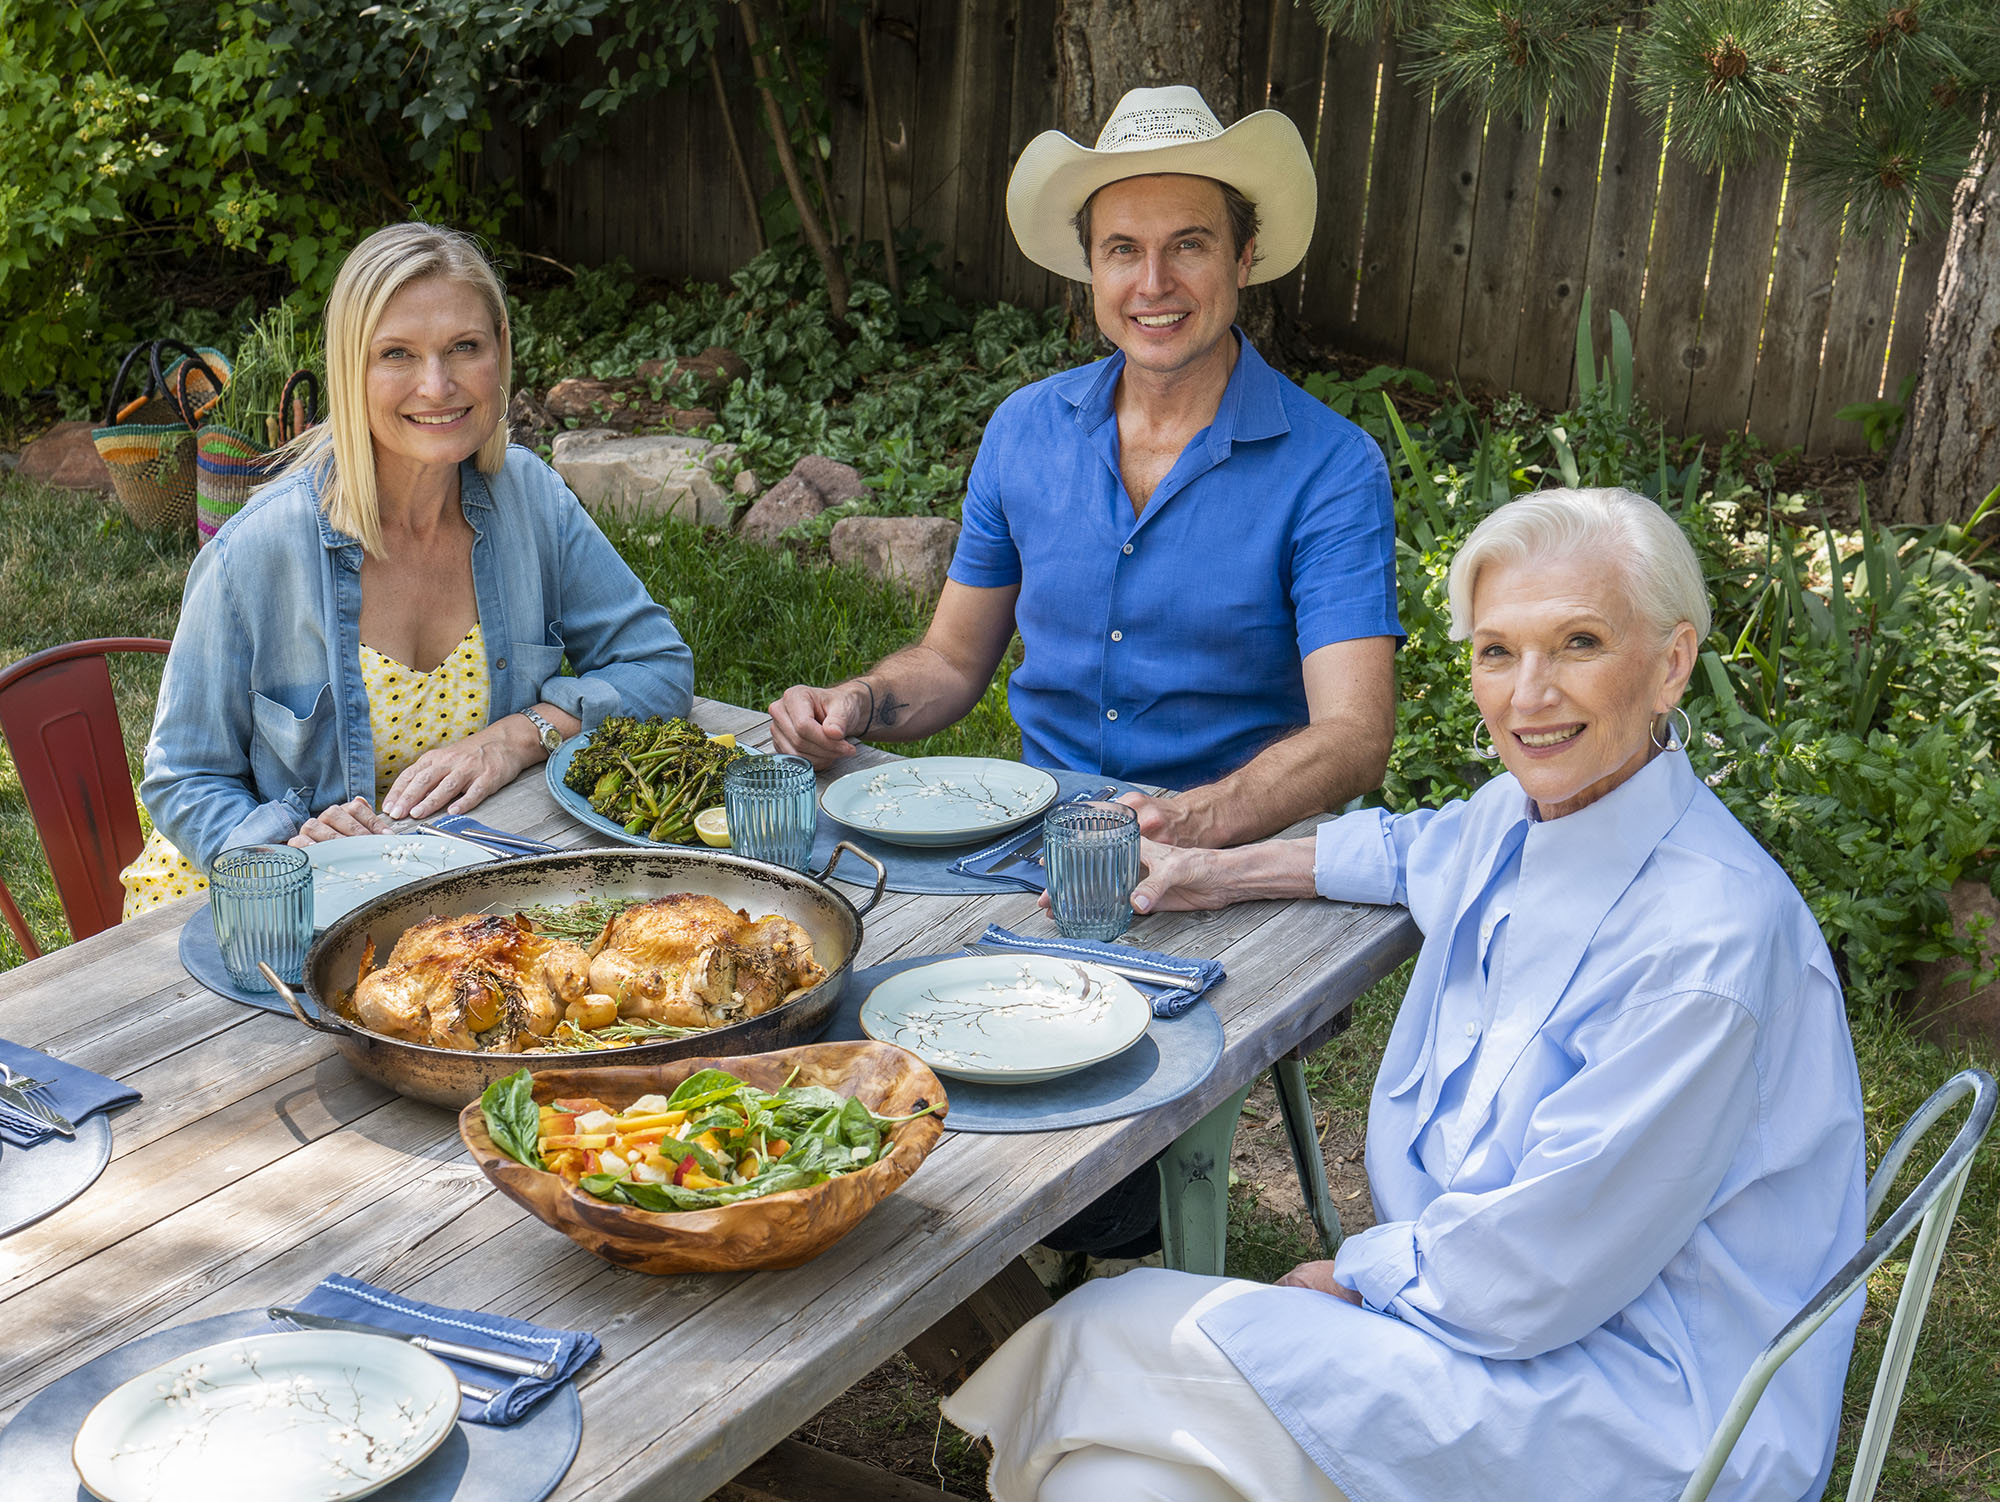
Mr. Musk bakes a cake in New York, in 2000. (Maye Musk)
Timing is often everything in life, and this case was no different. Shortly after Mr. Musk completed his training, the 9/11 terrorist attack devastated New York. The city needed its firefighters, police, and first responders more than ever; it also needed people to cook for them as they worked around the clock in rescue and relief efforts. “It started out with me peeling potatoes, and I was there for six weeks, through the end of October.” Top chefs from around the world gathered to cook meals for the rescue workers. Eventually, Mr. Musk worked his way up to the point where he was preparing the dishes.
He enjoyed serving firefighters dishes they probably didn’t get on a regular basis, like sautéed salmon in a creamy dill sauce. During this time, he saw the effect good food had on people as he watched the exhausted, emotionally spent rescue workers renew their spirits as they ate. “We would feed them some of the best foods I think they’d ever eaten in their lives. … We were putting so much love into the food. And the color was circling back to their faces. They never stopped talking to each other. And by the end of that 45-minute break, the room would be full of energy and joy.” His immediate thought: “Wow. I can’t imagine a life without this. I have to do a restaurant.”
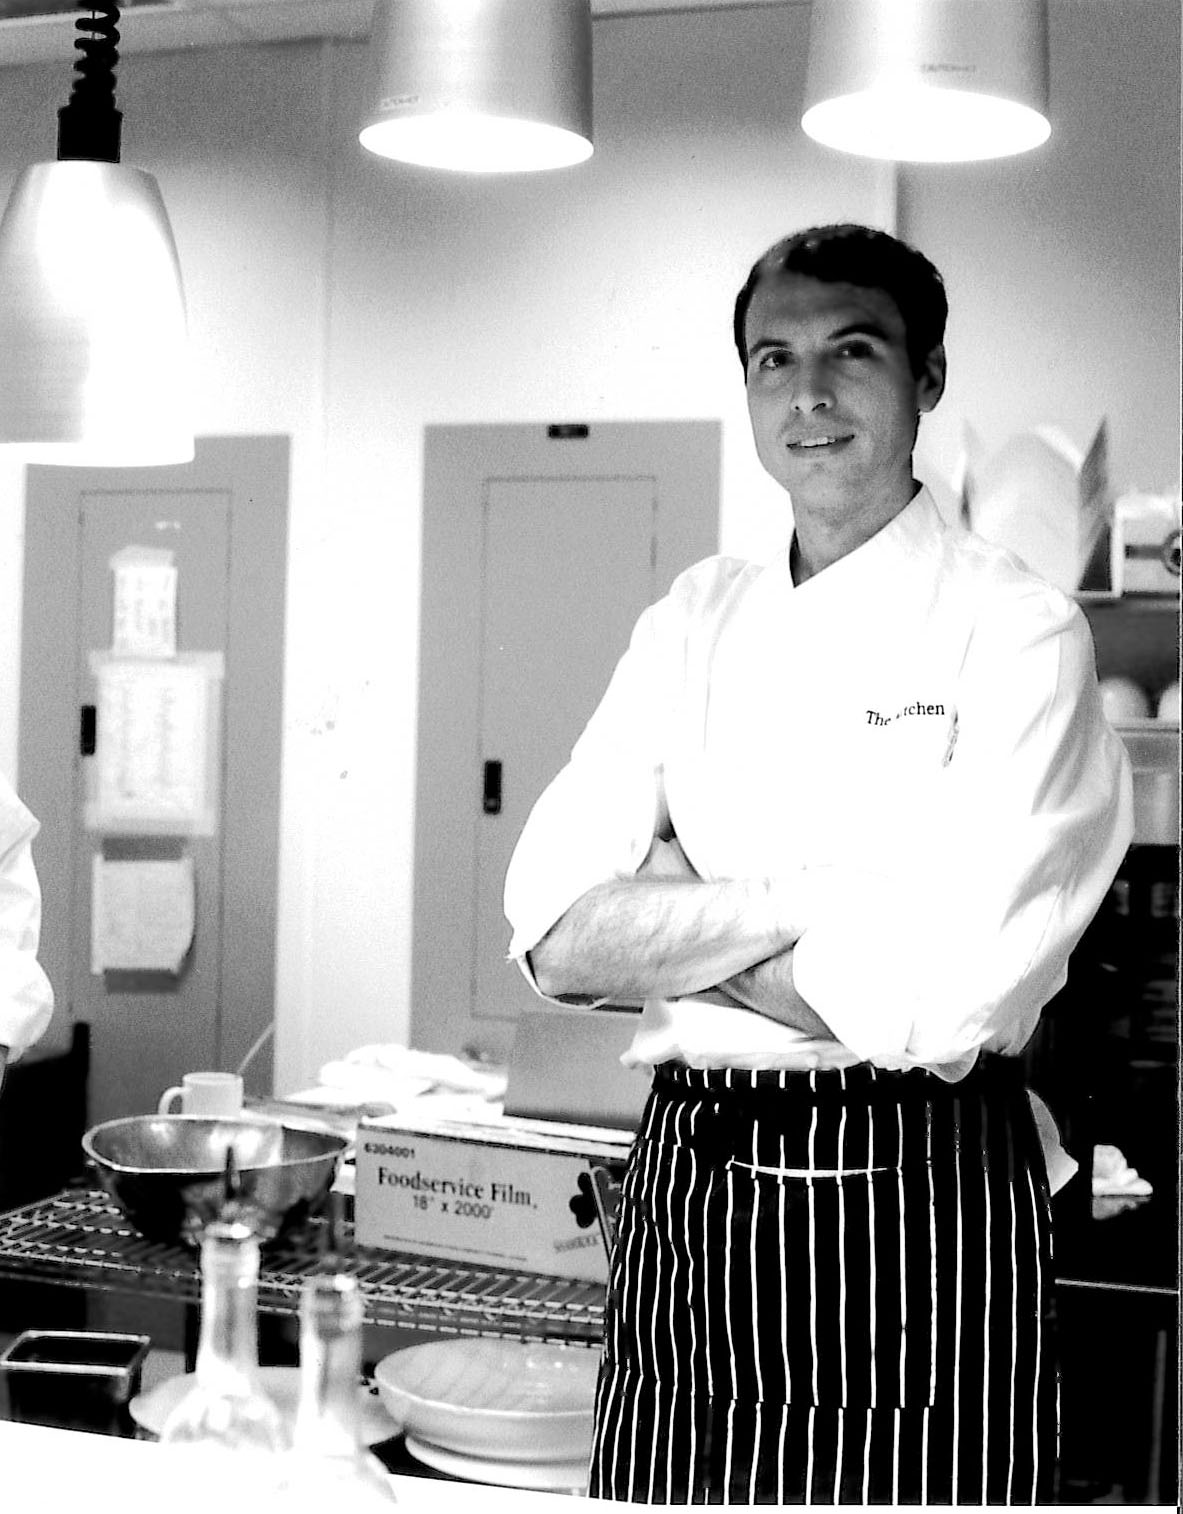
Mr. Musk knew that the best quality ingredients come from local growers, so around 2004, he started working with farmers to supply his first restaurant, The Kitchen in Boulder, Colorado. At about the same time, he wanted to do something to change the trend in America whereby “your average 10-year-old wouldn’t be able to tell you what a tomato looks like.” He provided financial support for school gardens, so children could learn the value and science of growing food. But he was a “checkbook philanthropist,” he said, basically letting others do the work.
Mr. Musk opened his first restaurant in Boulder, Colo., in March 2004. For the first year, he was sous-chef in the kitchen, working the line 5 to 7 days a week. (Maye Musk)
A ski slope changed all that. Along with a voice.
In 2010, Mr. Musk slid down a ski hill on an inner tube and landed on his head. He ended up with a ruptured spinal column that paralyzed the left side of his body. He thought he was going to die. While waiting for surgery, he heard a voice that led him to his current calling.
“I really had this profound voice in my head that I can only describe as God. … And it told me that I would go work on kids and food. It wasn’t specific instructions. It wasn’t like, you’re going to do school gardens, you’re going to do restaurants. It’s just kids—you’re going to help kids connect to food. And I was going to be fine.”
Surgery was successful. “I also got my movement back in my body. And the voice didn’t go away. It wasn’t like a flash of light or anything like that. It was a beautiful, clear voice.”
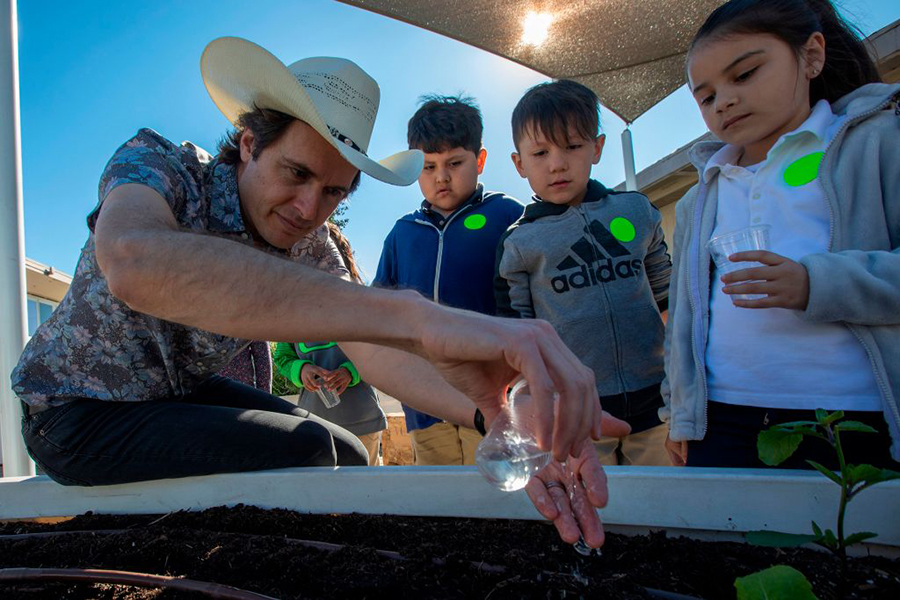
That experience led to the creation of more than 650 “learning gardens” in schools around the country through Big Green. Teachers can incorporate gardening into the science and math lessons that are part of their curriculum, allowing students to learn outdoors. Mr. Musk hopes that every American will eventually learn to grow food. “You’re going to get a whole new appreciation for the flavor of things, the seasons of things,” he said.
Mr. Musk teaches students at Eucalyptus Elementary School to plant a vegetable garden in preparation for Plant a Seed Day in Hawthorne, Calif., March 13, 2019. (David Mcnew/AFP/Getty Images)
The Future of Food
Mr. Musk is already seeing the trend of American farming changing toward becoming more sustainable. More farmers are embracing regenerative farming, which is designed to improve the quality and health of the soil. It’s not a new concept, as Native Americans have applied regenerative farming principles for centuries.
A farmer might plant corn and beans together: The corn provides a natural trellis for the beans, while the beans put nitrogen into the soil, which helps the corn grow. A rancher might move cattle around and let grazed land “rest” for a while. Periodically rotating the land on which crops are grown can reduce or eliminate the need for pesticides and fertilizer, on which many farms have become reliant.
While many farmers still need time to learn and adapt to these concepts—“it’s a very risk-averse community,” he said—it is catching on around the country. “It grows food better and more nutritionally. And then the farmer can also charge more for their product. So that’s a win for them, too.”
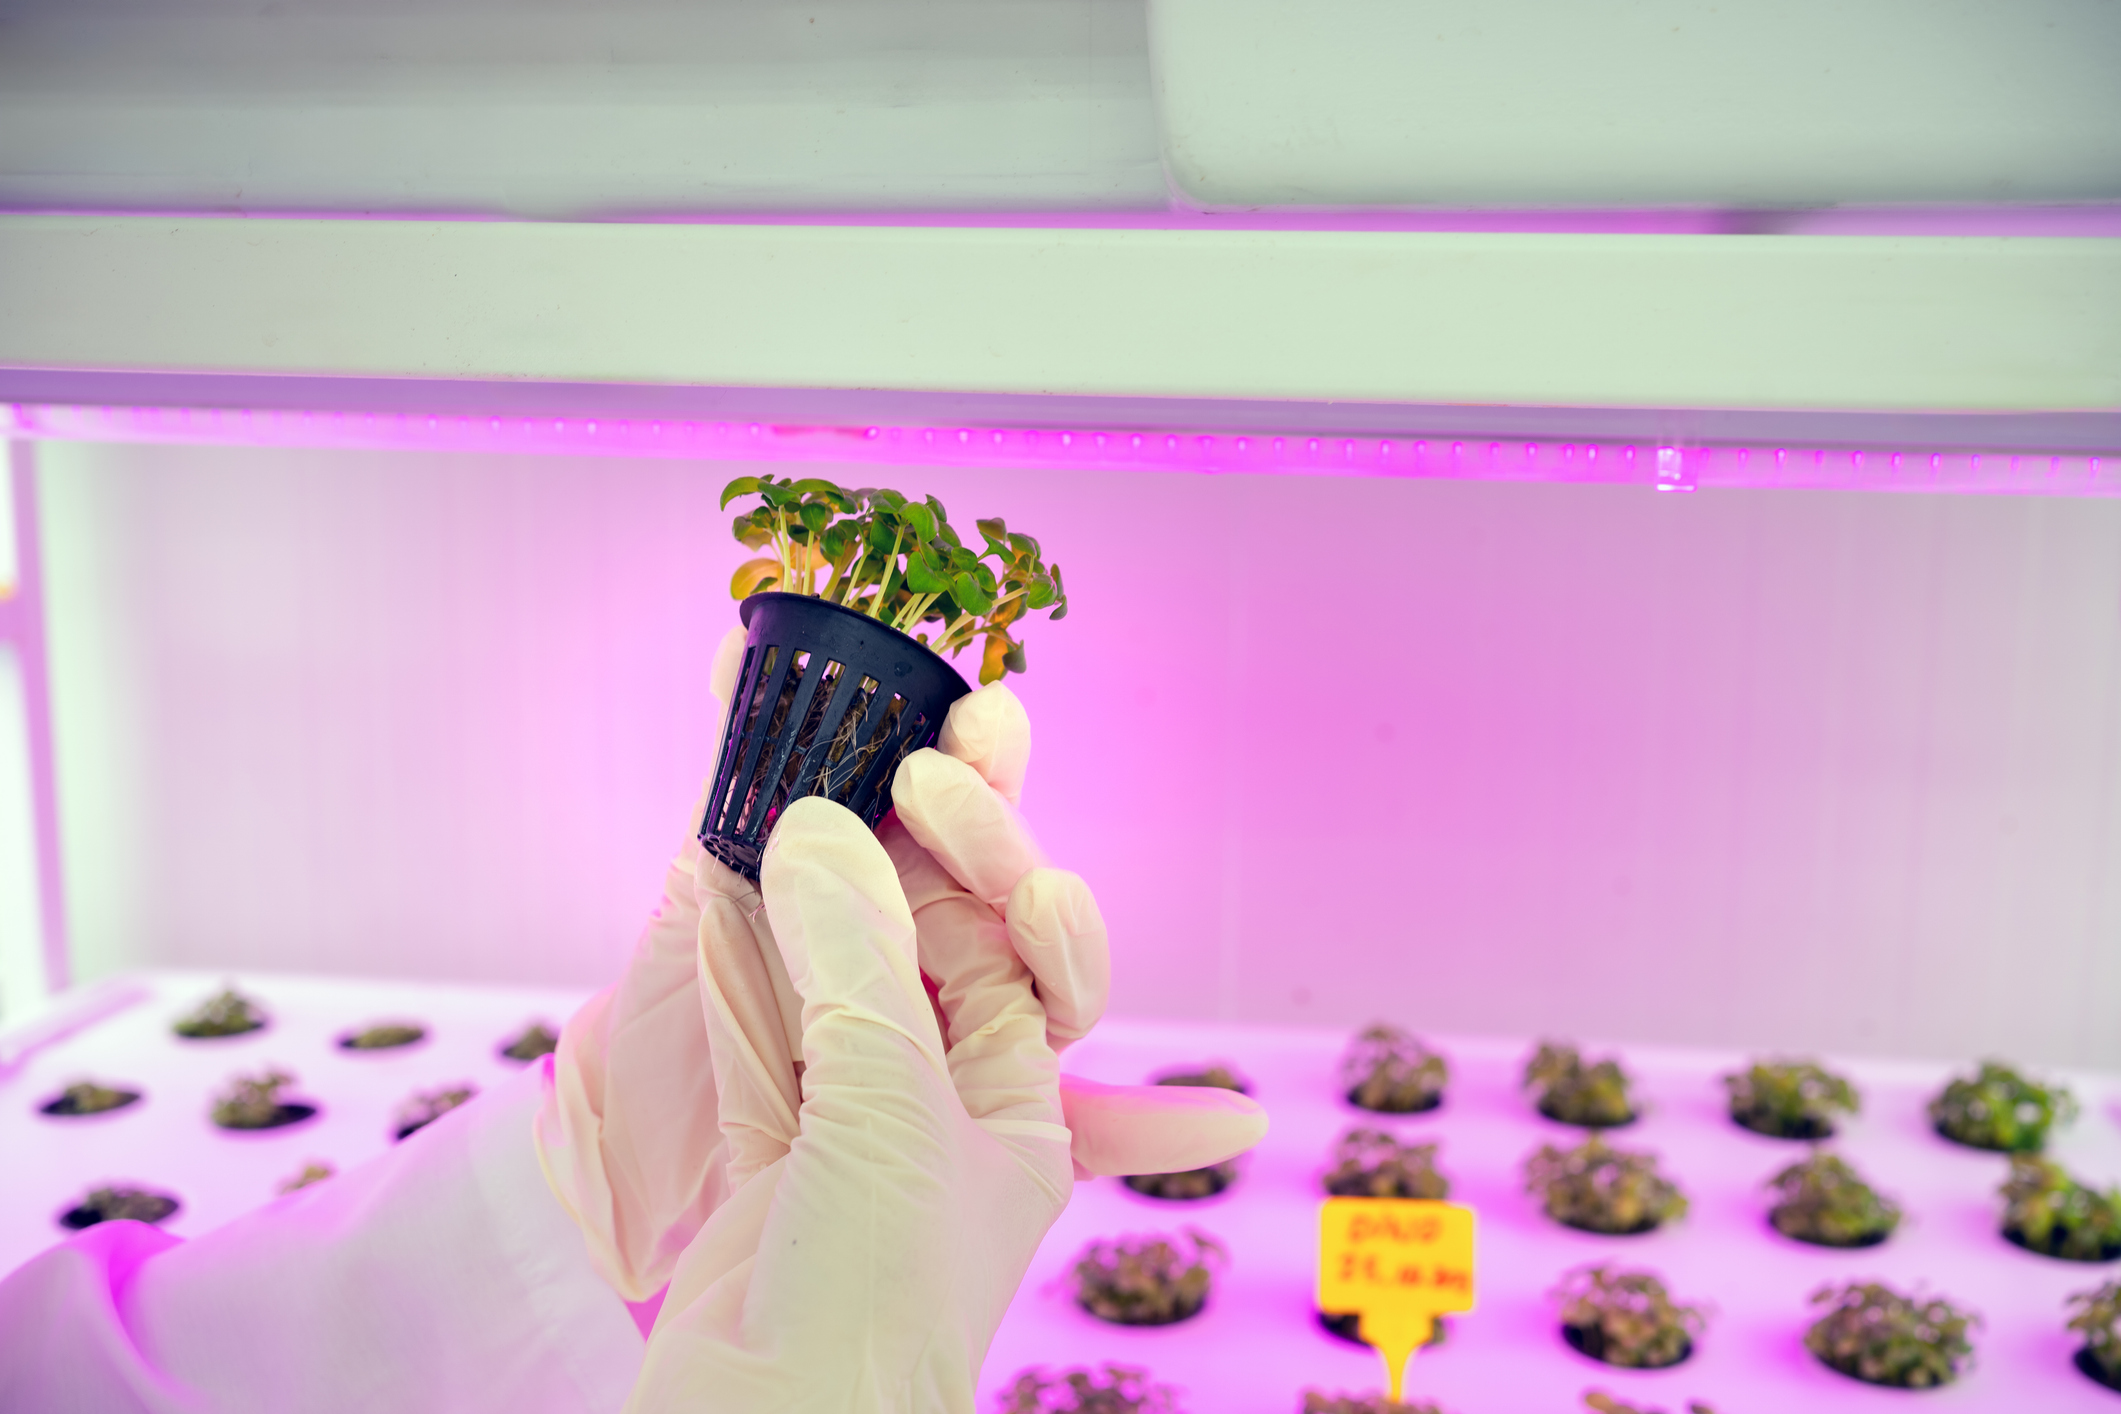
Looking toward the distant future, his vision lies with his Square Roots company, which has nothing to do with math, but focuses on growing food indoors with less energy, such as through hydroponic systems inside upcycled shipping containers. That will become useful if, say, humanity starts living on Mars. The red planet will have less sunlight and fertile ground than Earth. Technology to grow food with fewer resources “will be critical for our expansion on Mars,” he said.
Mr. Musk has ambitious plans to develop hydroponic farming for future food production on Mars. (Phynart Studio/Getty Images)
A Family Legacy
The creative spirit within the Musk family traces back to his grandfather, who moved the family from Canada to Africa in 1948. “My grandfather was a cartographer mapping Southern Africa. He mapped the Kalahari Desert, and pioneered understanding geography down there.” He tells of a unique family trip in family lore: On a single engine plane, his grandfather, his wife, and their daughter, Mr. Musk’s mother, went from South Africa to India, Indonesia, and down to Australia. Mr. Musk describes his grandfather as a real adventurer, and that the innovative spirit of the family is “in our bones. In America, that translates into being an entrepreneur, but whatever it is, it’s some sort of a pioneer breaking new ground.”
Maye Musk, mother of Mr. Musk, cooking in the Kalahari Desert, 1956. (Maye Musk)
Mr. Musk, who became an American citizen in 2004, talks about how grateful he is for this country, having lived through the apartheid era in South Africa. “My kids, I love them to death. They’ll critique America if we let them,” he said, but he often tells them, “Maybe you should try somewhere else first, before you dive in on the criticisms.”
Mr. Musk with his sister Tosca and mom Maye. (Laurie Smith)
Mr. Musk feels a need to give back to the country that has given him so much. It hit him five years ago during a family trip to the Rocky Mountains. “We were just going for a hike and spending a day in the mountains. And I just had this epiphany—that I have the American dream. I have my wife, I have a beautiful home. I’ve got wonderful kids, and built beautiful businesses that make a difference in this community.”
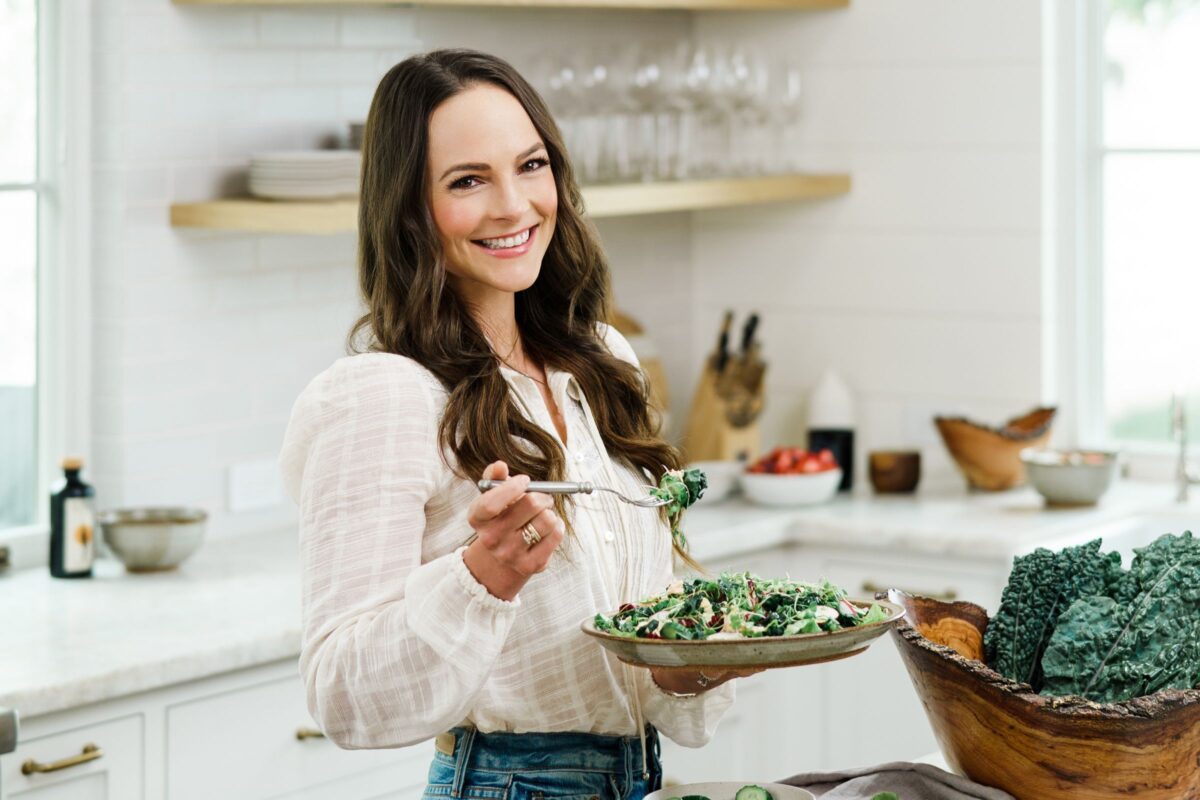
As a celebrity holistic nutritionist, she spends a lot of time digging into the latest nutrition and metabolic health research and distilling it into information people can easily understand. Often, “our media will take whatever the latest study is and find a scary headline to get readers,” she said. Rather than peddle doom and gloom, she focuses on the good: how easy it is to take action.
Before starting her own health consulting business, Be Well by Kelly, Ms. LeVeque worked in cancer research for Fortune 500 companies. “Not all diseases are preventable, but I was inspired by spending so much time in cancer centers and seeing the benefits of taking care of ourselves and developing holistic habits,” she said. Now, she’s passionate about helping her clients, which have included A-listers like Jessica Alba and Jennifer Garner, do just that.
Her ultimate goal for her clients—and herself—is to make wellness an intrinsic part of daily life, and to see it as a fun adventure. That especially applies to mealtime.
Kelly LeVeque makes smoothie bowls that balance blood sugar levels by using ingredients high in protein, fat, and fiber instead of loading up on sugar. (Courtesy of Kelly LeVeque)
“Every single meal is an opportunity to show up for yourself,” she said. She loves seeing a plate filled with a rainbow of real, nutritious foods. “How we nourish our bodies really plays a role in how we show up in our lives—mood and temperament, tolerance of stress.”
Ms. LeVeque spoke to American Essence about the easy-to-remember formula she follows for eating well; dealing with “mom guilt” as she balances her business and three young sons; and her research-backed advice for getting picky kids to eat their vegetables.
This interview has been edited for clarity and brevity.
(Courtesy of Kelly LeVeque)
I wake up: around 5:30 to 6 a.m. My boys are early risers, so I am up early every morning. First, I’ll have a glass of water with electrolytes; I use a high-sodium electrolyte mix with magnesium and potassium. Having electrolytes makes sure you’re fully hydrated, and I tend to drink less caffeine when I’m fully hydrated. Then I’ll have a black coffee or a coconut milk latte.
When it comes to diet: I’ve always prioritized blood sugar balance. The research there is so robust. We know that dysregulated blood sugar affects mood; it increases your chances of heart disease, diabetes, Alzheimer’s, and a myriad of other diseases. If we understand the science of blood sugar balance, it’s really easy to implement: Eating whole foods will elongate your blood sugar curve [the changes in your blood glucose level over time].
One of the principles I live by is the “Fab Four”: protein, fat, fiber, and leafy greens or vegetables deep in color [in every meal].
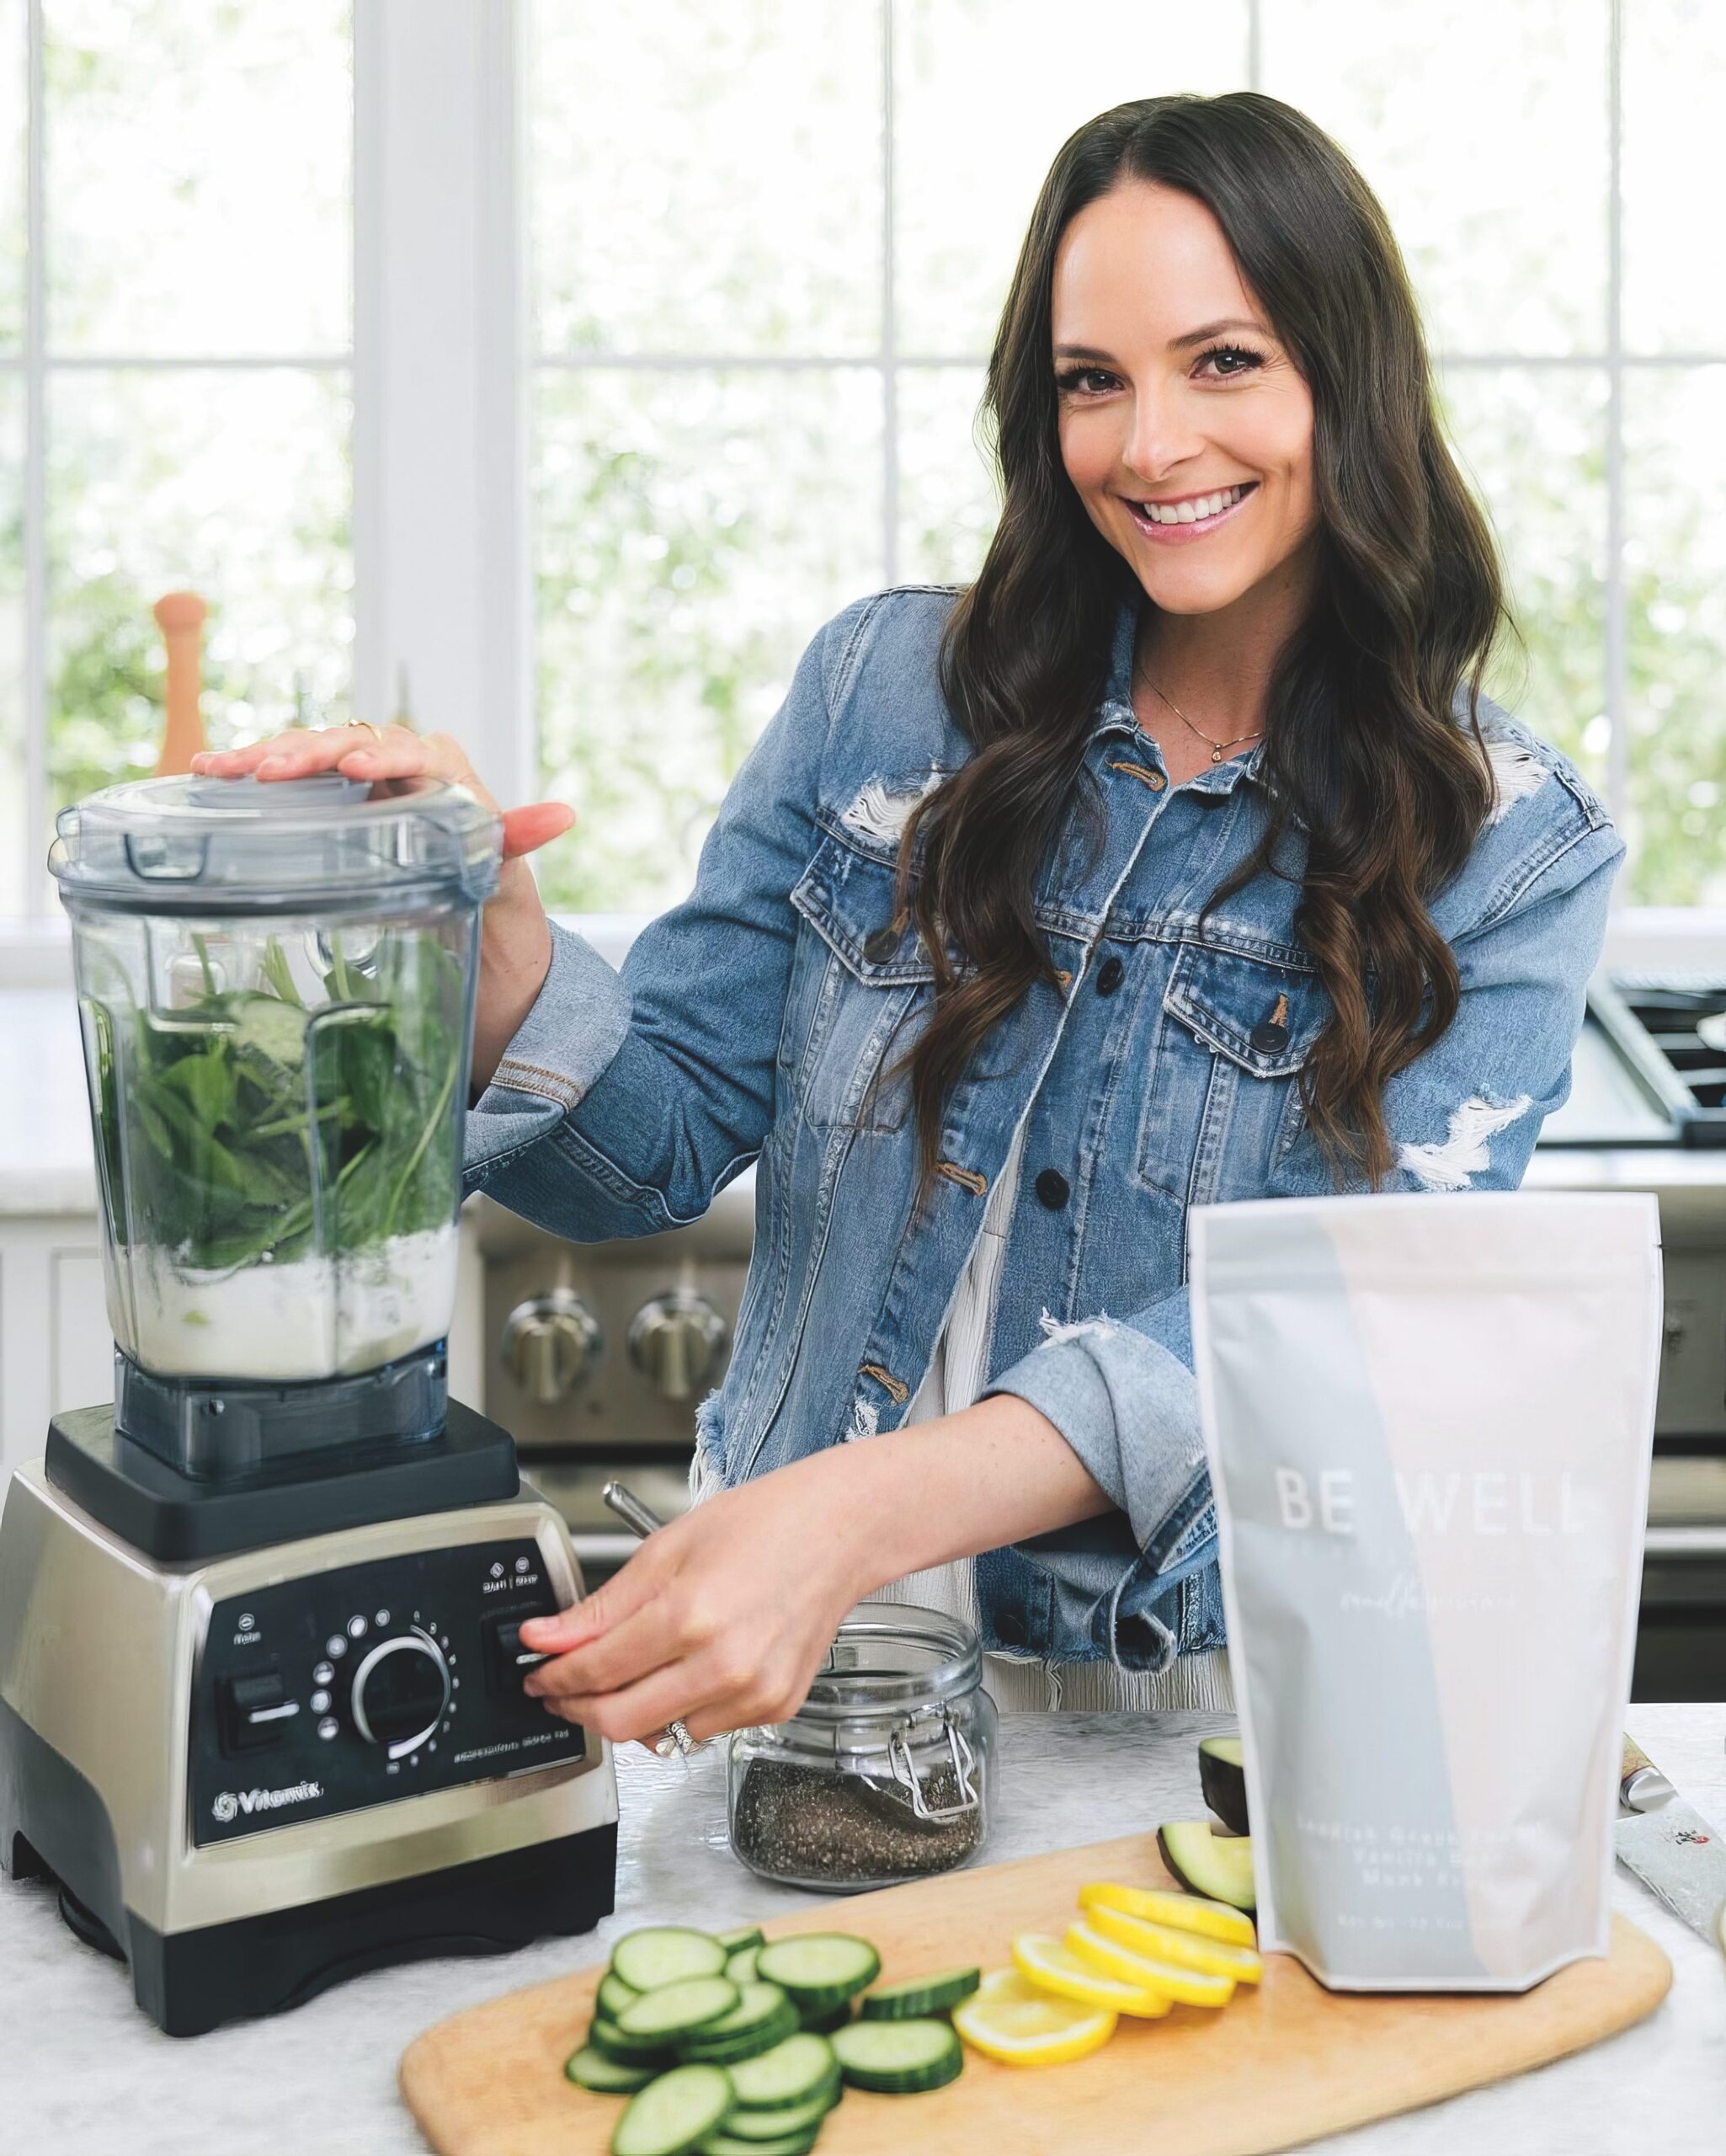
For breakfast, I make a Fab Four smoothie. I’m using a scoop of both of my [Be Well by Kelly] protein powders—a vegan plant-based protein powder and a grass-fed beef protein powder—to get 40 grams of protein. Protein satisfies most of your hunger hormones, and it’s needed for many facets of health: your neurotransmitters, hormones, gut lining, collagen production, and muscle mass. Most women drastically under-eat protein, and they feel it. My fat of choice is avocado. For fiber, I use psyllium, which is great for cholesterol and phenomenal at upping your insoluble fiber intake. I add leafy greens—spinach, kale, romaine, basil—and berries.
My lunch and dinner also follow the Fab Four—roast salmon, chicken, roasts with veggies on the side. I never limit the quantity of vegetables.
When I meet my body’s protein requirements and eat real, whole meals, I don’t even think about snacking. It’s counter-intuitive, but if I’m helping a client meet a weight requirement, I’ll have them eat more. Whenever a client has a bad habit of snacking, it’s not about removing those things they’re used to doing; it’s about replacing them.
(Courtesy of Kelly LeVeque)
My best skincare secrets are: sweat and sleep. If you sweat and get good sleep, you see it in your skin.
The more antioxidants in my diet, the more they improve my skin; those are fighting oxidative stress. I try to avoid seed oils because they oxidize under high heat. Those oxidated omega oils become part of your cell membrane.
I do splurge on One Skin products; I’ve noticed a huge improvement in my skin health since using them. I also use a vitamin C product from my dermatologist, and I use a skin brush all over my body.
The wellness equipment I swear by are: my infrared sauna and Peloton. Before kids, I loved going to yoga classes with other people; I love the community aspect. As a mom, carving out that time is hard. I had to become OK with home workouts, and I got a Peloton.
I love my Vitamix. If you get one, you’re investing in something that helps you make healthy food faster.
I also love my red light. I used it on my son when he had eczema; my husband used it for a toe infection. If I’m working on my computer, I turn my panel on.
I use a Yogasleep Dome sound machine in our room and wear a Cozy Earth eye mask. My emotional and mental health depends on whether I’m sleeping well. I have all these screen time limits on my phone, and I can’t get into a single app after 8:30 p.m.
I’m constantly trying to be: outside. We go to our local beach once or twice a week. We take our dinners down there; we watch the sunset. Our boys are used to being in the sand and surf. We put in the effort [to do this], and what we get is our kids being in nature, us being off our phones. It lowers our stress levels in a way that just being at home can’t.
Ms. LeVeque with her two sons. (Courtesy of Kelly LeVeque)
Finding a balance between my business and family life is: hard, but really important to me. You can’t replace Mom, and I don’t want anyone to. I was so blessed to have my mom there for everything when I was growing up, and I do have a level of mom guilt that I’m not showing up for my kids in the same way. But I’m also learning to have boundaries with my work to be able to show up for them in the way that I want. It’s constant negotiation and learning. I have changed my business drastically to prioritize the life and flexibility that I want; that sometimes means turning down big brand contracts.
One thing my husband and I do over the weekend is have a cup of coffee together and make a schedule for the next week, plan recipes, and try to get excited. We work together to make sure we each have time to ourselves so there’s no resentment. Asking what’s really important, and having the strength to set boundaries, are key to making healthy decisions.
My work is most rewarding when: I see long-term beneficial changes in my clients. I once had a client who was a type-A overachiever. She was engaged to be married but not taking care of herself. We took an entire year leading up to her wedding to help her change her lifestyle. She lost over 30 pounds, and her confidence skyrocketed. She was amazing on her wedding day, but what excites me is that she went on to have two daughters, and she now inspires her daughters to take care of themselves through food. To see that generational change feels really good.
My best advice for parents of picky eaters is: to model healthy eating to your children and don’t give up. Research tells us that exposure and modeling are the biggest drivers of instilling a mature palate in a young child. Exposure doesn’t always have to be eating food: Get kids to help with simple tasks in meal preparation or take them shopping to see the food at the grocery store.
It can take 12 to 15 exposures to a new food before a child under 18 months will like it. From 18 months on, that number [of exposures needed] can double. Most parents give up after the third or fourth attempt, but don’t lose hope. Do not stop making that food, plating it up, and eating it in front of them. Don’t put pressure on them, but don’t stop exposing and modeling.
Lately, I’ve been especially excited about: creating content to help moms involve their kids in the kitchen and feed them blood sugar-balancing meals. I’ve learned a lot in the last five years that I want to share with other moms who feel overwhelmed. I feel like my wheels are really turning to support that community.
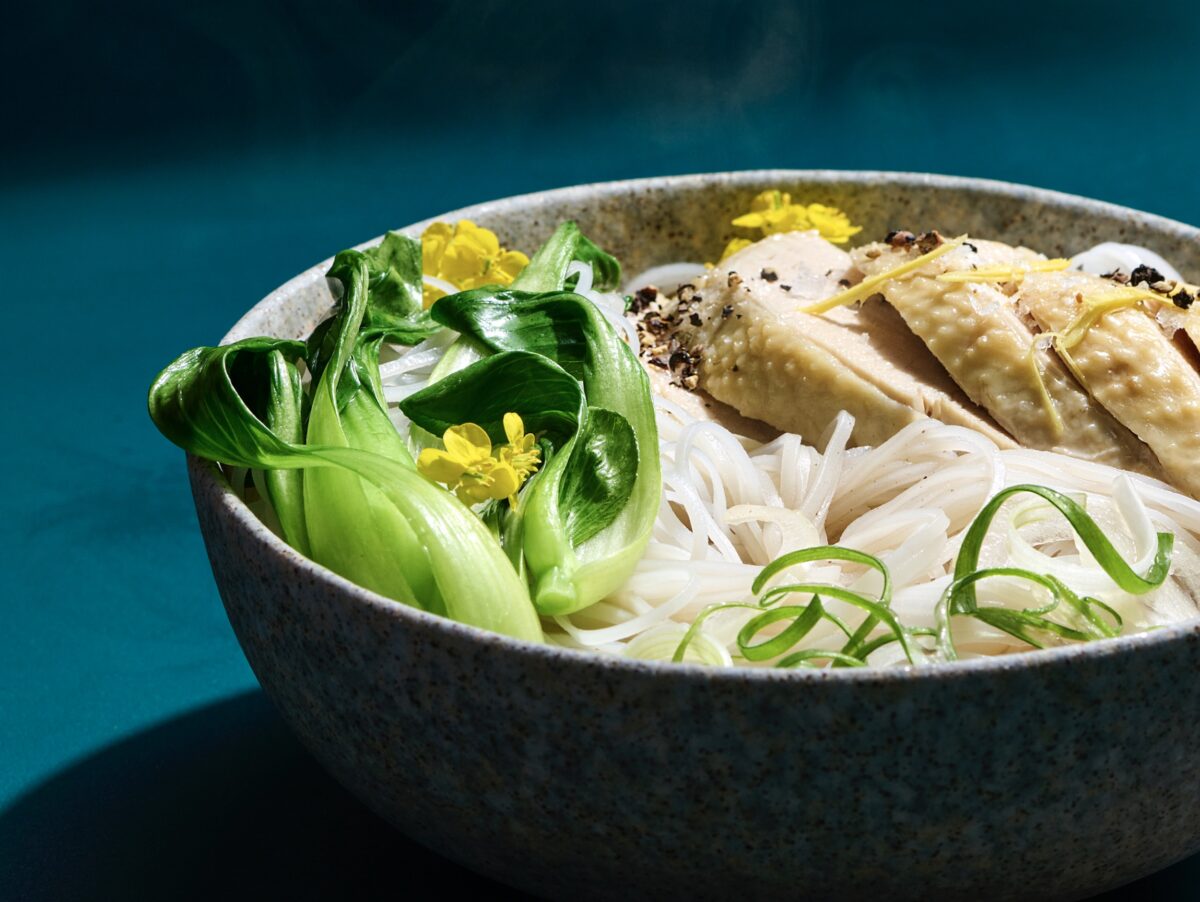
The children tell me that they could eat this every day, so it’s something we have at least weekly, even in the heat of the summer. This is a much lighter variation of beef pho, and my mother’s secret is to always have some black cardamom on hand. If you were out of all your spices, this is truly the only one you would need for a good bowl of pho ga. I also use dried jujubes and daikon for a natural and medicinal sweetener.
You can substitute zucchini noodles or homemade tagliatelle for the rice noodles. For increased nutrient density and an extra crunch without affecting the flavor profile of the soup, I quickly blanch some bok choy and cut it up for the family to enjoy.
Serves 4 to 6
For the Soup
10 cups spring water, or more as needed
1/2 daikon, peeled and quartered (optional)
10 dried jujube apples or 1 (4-ounce) Fuji apple
1 (4- to 5-pound) pasture-raised chicken
5 star anise pods
3 whole cloves
1 cinnamon stick
2 tablespoons (36 g) black cardamom seeds
1 tablespoon coriander seeds
1 tablespoon fennel seeds
1 large onion, halved
1 (4-inch) piece fresh ginger, halved
1 tablespoon sea salt
5 tablespoons fish sauce or fermented anchovy sauce
3 tablespoons maple sugar or coconut sugar (optional)
1/2 small yellow or red onion, very thinly sliced, or pickled red onions
4 to 6 Thai basil sprigs
4 to 6 mint sprigs
Bean sprouts
Lime wedges
Fresh Vietnamese culantro or sawtooth (optional)
Bird’s eye chiles, sliced (optional)
Hoisin sauce
Sriracha or sambal oelek
In a large pot, combine the water, daikon (if using), and jujube apples and bring to a boil. Add the chicken, plus more water if needed to cover the chicken, and return to a boil.
Meanwhile, in a small skillet, combine the star anise, cloves, cinnamon, black cardamom seeds, coriander seeds, and fennel seeds and toast over high heat for 3 to 4 minutes. Transfer the toasted spices to a spice bag or tea strainer. (Alternatively, you can put the spices directly in the pot of broth and strain them out before serving.)
To char the onion and ginger, turn a gas stove burner to high heat or a grill to medium-high. Using tongs, carefully place the onion and ginger directly on the burner or grill grates. Allow them to cook undisturbed for a few minutes, until the bottom is charred and blackened. Use the tongs to flip the onion and ginger to char the other side. Once charred, remove the onion and ginger from the heat and allow to cool slightly. Using your fingers or a knife, peel off the blackened outer layers of the onion and ginger and discard. (Alternatively, you can place the onion and ginger on a rimmed baking sheet and broil them in the oven. Keep an eye on them so they don’t burn!)
Add the spice bag, onion, and ginger to the broth. Simmer for 1 hour, occasionally skimming off the scum that rises to the top.
Remove the chicken from the pot and pierce through the thigh with a chopstick or fork to check if the juices run clear. If not, return it to the pot to simmer for a while more, until fully cooked. Set aside to cool.
Remove the daikon, apples, spice bag (or whole spices), onion, and ginger from the broth. Season the broth with the salt, fish sauce, and sugar, if using.
Remove the chicken meat from the bones and cut it into 1/2-inch pieces for easy handling with chopsticks. Alternatively, you can hand-tear the chicken pieces and add them directly to the bowls.
Bring a large pot of water to a boil. Add the bok choy and blanch for 1 to 2 minutes. Drain the bok choy and cut into bite-size pieces.
Cook the rice noodles according to the package instructions until chewy. Rinse under cold running water and drain.
To serve, divide the noodles into each serving bowl and top with chicken meat and bok choy. Ladle in the hot broth and top with your choice of garnishes. Offer hoisin sauce and sriracha or sambal oelek at the table.
Store leftovers in an airtight container in the refrigerator for up to 4 days or in the freezer for up to 6 months; if freezing, make sure to leave at least 1 inch headspace in your jars.
Time Hacks
You can start with chicken bone broth and simmer for 1 hour with the spices, onion, and ginger and serve with chicken meat.
Alternatively, use the carcass from a rotisserie chicken to make the broth, then serve the meat with the soup.