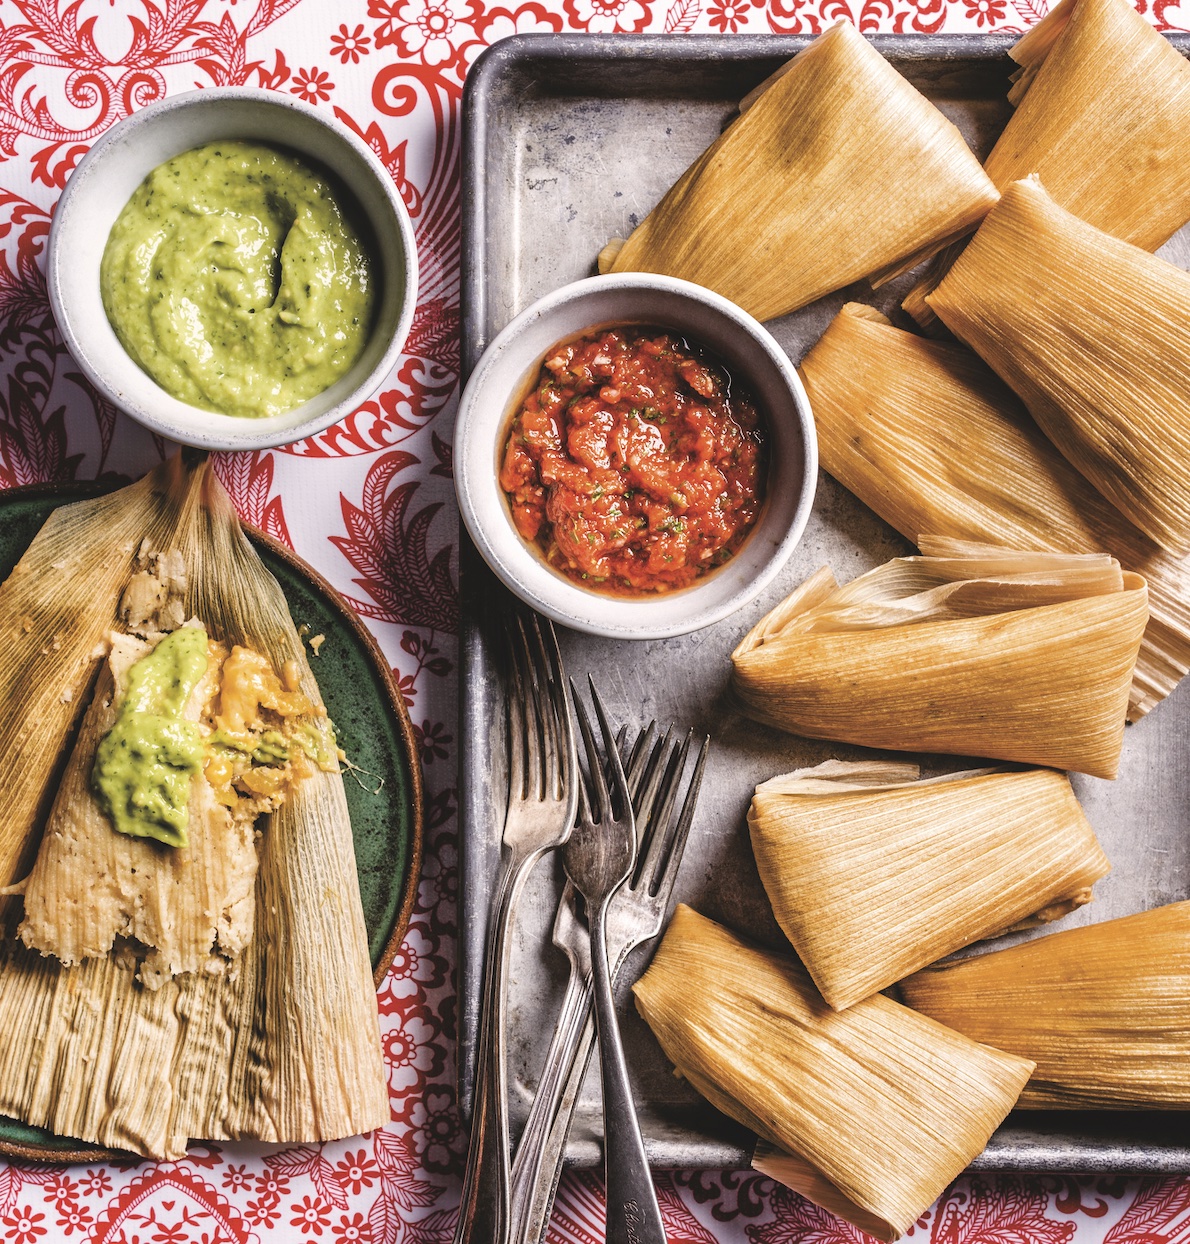
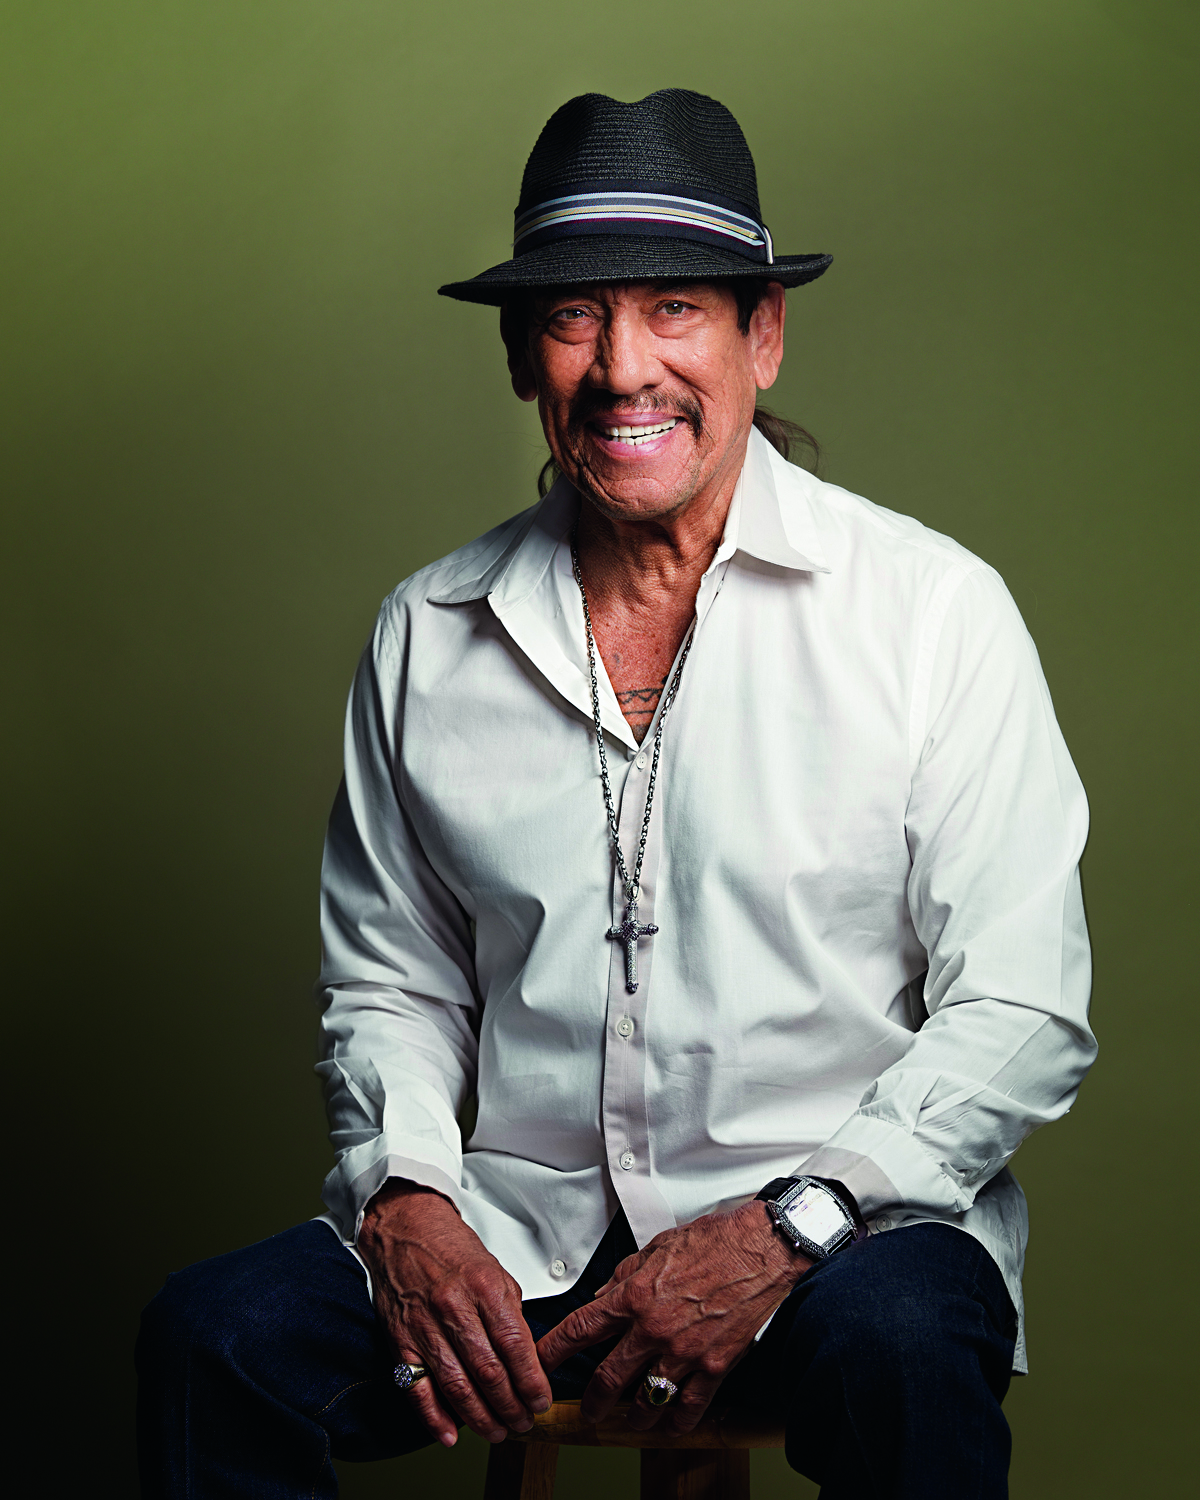
“I know for a lot of families, Christmas means a roast, but in my neighborhood, Ebenezer Scrooge wouldn’t be giving out a grand turkey. He’d be giving out tamales,” said Danny Trejo. “To me, Christmas has always meant a full table of tamales.”
The legendary “Machete” star might be most recognizable from his villainous, tough-guy roles on-screen—but he also makes a mean chef. Food and hospitality have always played a major role in the actor-turned-entrepreneur’s life, and Mr. Trejo now has a growing restaurant empire that spans multiple locations of Trejo’s Tacos, Trejo’s Cantina, and Trejo’s Coffee and Donuts in Los Angeles; and two cookbooks, “Trejo’s Tacos” and “Trejo’s Cantina.” He shared a recipe from his latest.
“If you’ve never made tamales because you think they’re difficult, this recipe will change your mind,” he writes. “With just an hour of prep, you’ll have two dozen fluffy, amazing tamales to eat for dinner, lunch the next day, with leftovers to freeze and eat down the road.” His recipe uses a classic cheese and chile filling, but he says it works well with other fillings, too: Try chicken or jackfruit tinga, or beef birria.
(Hernan Rodriguez)
Super-Easy Tamales
Makes 30 tamales
30 dried corn husks
1 1/2 cups olive oil
10 cups (2 pounds) masa harina, such as King Arthur
2 (10-ounce) cans roasted chiles, such as Hatch, roughly chopped
Soak the corn husks in a large bowl filled with water until soft, about 1 hour. Place a few cans of beans on top to keep them submerged.
In another large bowl, combine the olive oil, masa harina, baking powder, salt, and broth. Mix with your hands until a pliable dough forms. Knead until smooth, 3 to 5 minutes.
Place a corn husk on a cutting board with the wide end toward you. Using a large spoon, spread 1/4 cup of dough in the center. Shape it into a rough round about 4 inches in diameter. Place 2 tablespoons of cheese lengthwise in the center of the dough. Sprinkle 1 tablespoon of chiles on top of the cheese.
Lift the two sides of the corn husk in toward the center like a book so the two sides of masa meet and cover the filling; then, holding the excess corn husk together, fold and wrap it to one side around the tamale. Fold the top and bottom ends over the tamale and turn it over to hold the folded sides down. Repeat until you have about 30 tamales.
In a large pot fitted with a steamer basket, add enough water to just come up to the level of the steamer basket. Working in batches, arrange the tamales vertically in the steamer basket and turn the heat to medium. Once the water starts to steam, cover the basket and cook until the tamales are fluffy and tender and the cheese is melted, from 30 minutes to 1 hour, depending on how many you cook at a time. The tamales are super tender when they come out of the basket, but will firm up as they sit. Let them cool for 30 minutes before serving. You can also let the tamales completely cool and freeze for up to 1 month.
(Penguin Random House, LLC)
Reprinted with permission from “Trejo’s Cantina” by Danny Trejo with Hugh Carvey, copyright 2023. Photographs by Larchmont Hospitality Group LLC. Published by Clarkson Potter, a division of Penguin Random House, LLC.
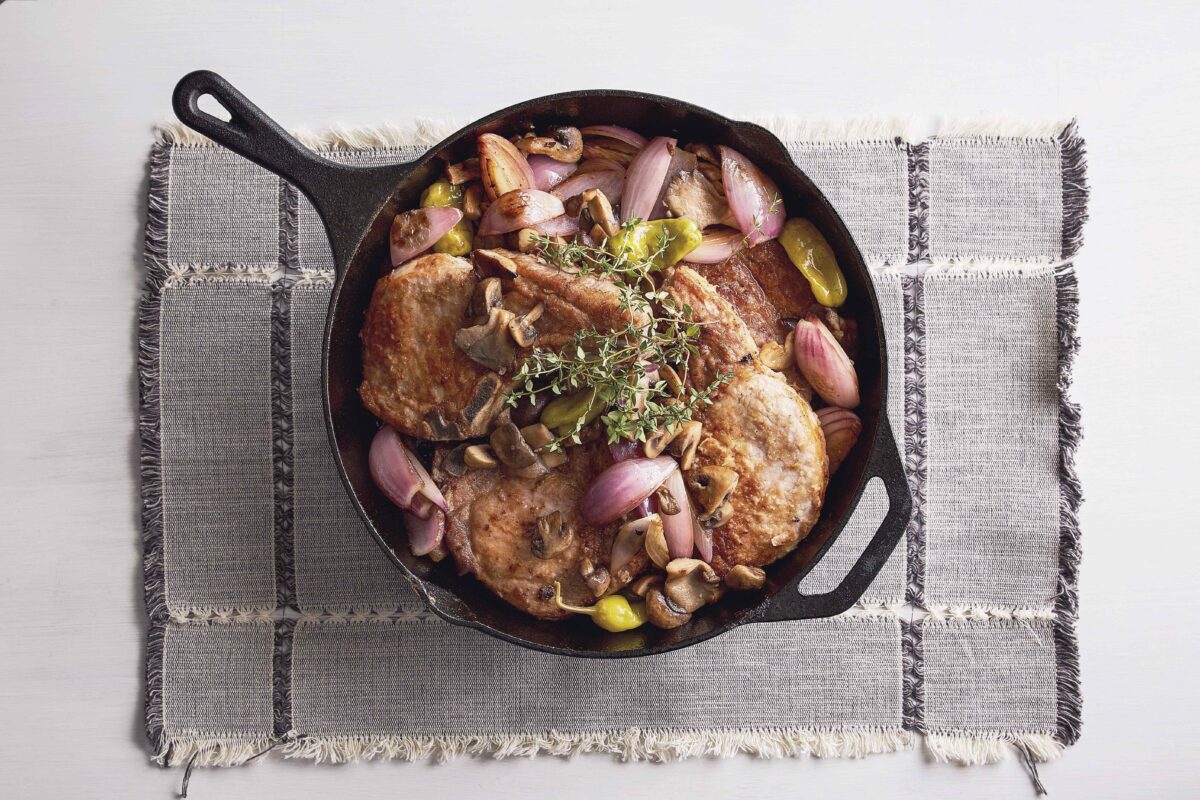
My family loves this dish. The pork is relatively low-fat for meat, and the pickled peperoncino peppers give the whole thing a bit of spicy kick. You can prepare this dish with rib pork chops, as called for in this recipe, or loin pork chops, which look like T-bones and are often less expensive. The one important thing to pay attention to is the size of the chops: Make sure they are all about the same size, so they take the same time to cook.
I really like pickled Tuscan peperoncini. I use them in an antipasto, in sandwiches, to make spicy pasta sauces, and I especially love to cook them with pork or chicken. They are a greenish-yellow color, about 1 to 1 1/2 inches long, usually pickled whole with the stem on. You can find them in the Italian or Greek section of the grocery store, usually in a long cylindrical glass bottle.
Serves 4
4 bone-in pork rib chops, 1 inch thick
Kosher salt
All-purpose flour, for dredging
3 tablespoons extra-virgin olive oil
8 pickled Tuscan peperoncini, plus 2 tablespoons brine from the jar
1 large red onion, cut into 8 wedges, left attached at the root end
3 sprigs fresh thyme
1 pound mixed mushrooms (such as cremini, shiitake, button), thickly sliced or quartered
1/2 cup dry white wine
1 cup low-sodium chicken stock
1/4 cup chopped fresh Italian parsley
Season the pork chops with 1/2 teaspoon salt. Spread some flour on a plate, and dredge the chops on both sides. Heat a large cast-iron skillet or low Dutch oven over medium-high heat. Add the olive oil. When the oil is hot, add the chops, and brown on one side, about 3 minutes. Flip, and brown the second side, 2 to 3 minutes more. Remove them to a plate.
Add the pickled peperoncini and brine. Let them sizzle for a minute; then add the red onion wedges and thyme sprigs and brown the onions on both cut sides, about 3 minutes. Add the mushrooms, and stir to coat them in the pan juices. Season with 1 teaspoon salt. Once the mushrooms have begun to wilt, add the white wine, and simmer to reduce it by half. Pour in the stock, and return the liquid to a simmer. Arrange the chops on top of the mushroom mixture, and cover. Adjust the heat to simmering, and simmer until the chops are just cooked through, about 10 minutes.
Uncover, and remove the chops to a platter or plates. Bring the sauce to a boil to reduce and thicken it slightly, about 1 minute. Stir the parsley into the sauce, then pour the sauce over the chops to serve.
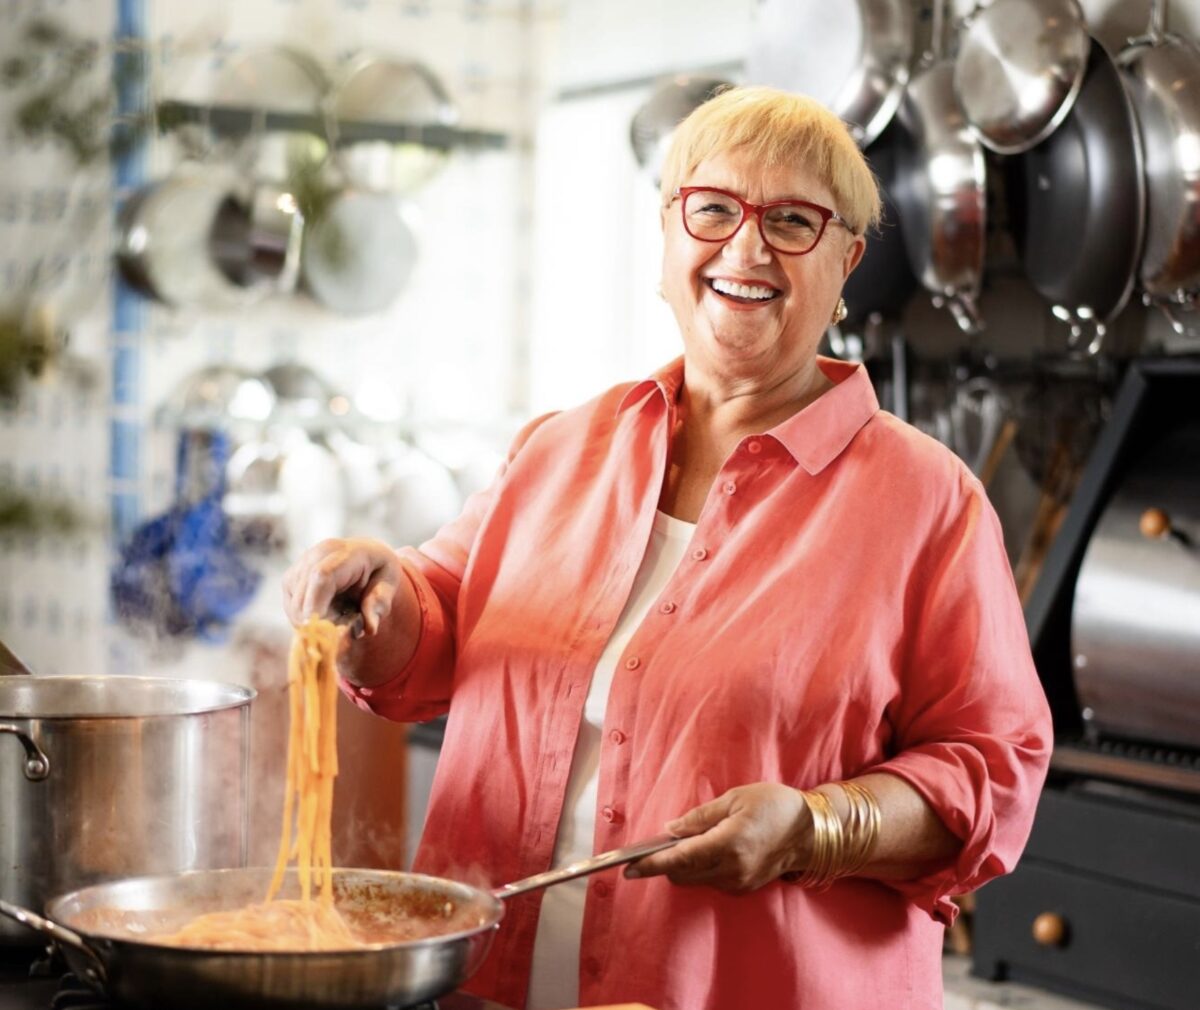
Chef Lidia Bastianich cooks up a quick pasta at her home in Queens, New York. (Samira Bouaou for American Essence)
At her home in Queens, New York, Lidia Bastianich cooks with a view of the water. Opposite her sprawling kitchen and dining table, wall-to-wall windows look out over her garden to the idyllic Little Neck Bay, where sailboats bob serenely under blue skies.
Here is where the Italian refugee turned James Beard and Emmy Award-winning chef, restaurateur, TV personality, and author raised her children and her grandchildren; where she taught Julia Child how to make risotto; where she filmed the PBS shows that introduced millions of Americans to traditional Italian home cooking, inviting them around her table with her signature phrase: “Tutti a tavola a mangiare!” “Everyone to the table to eat!”
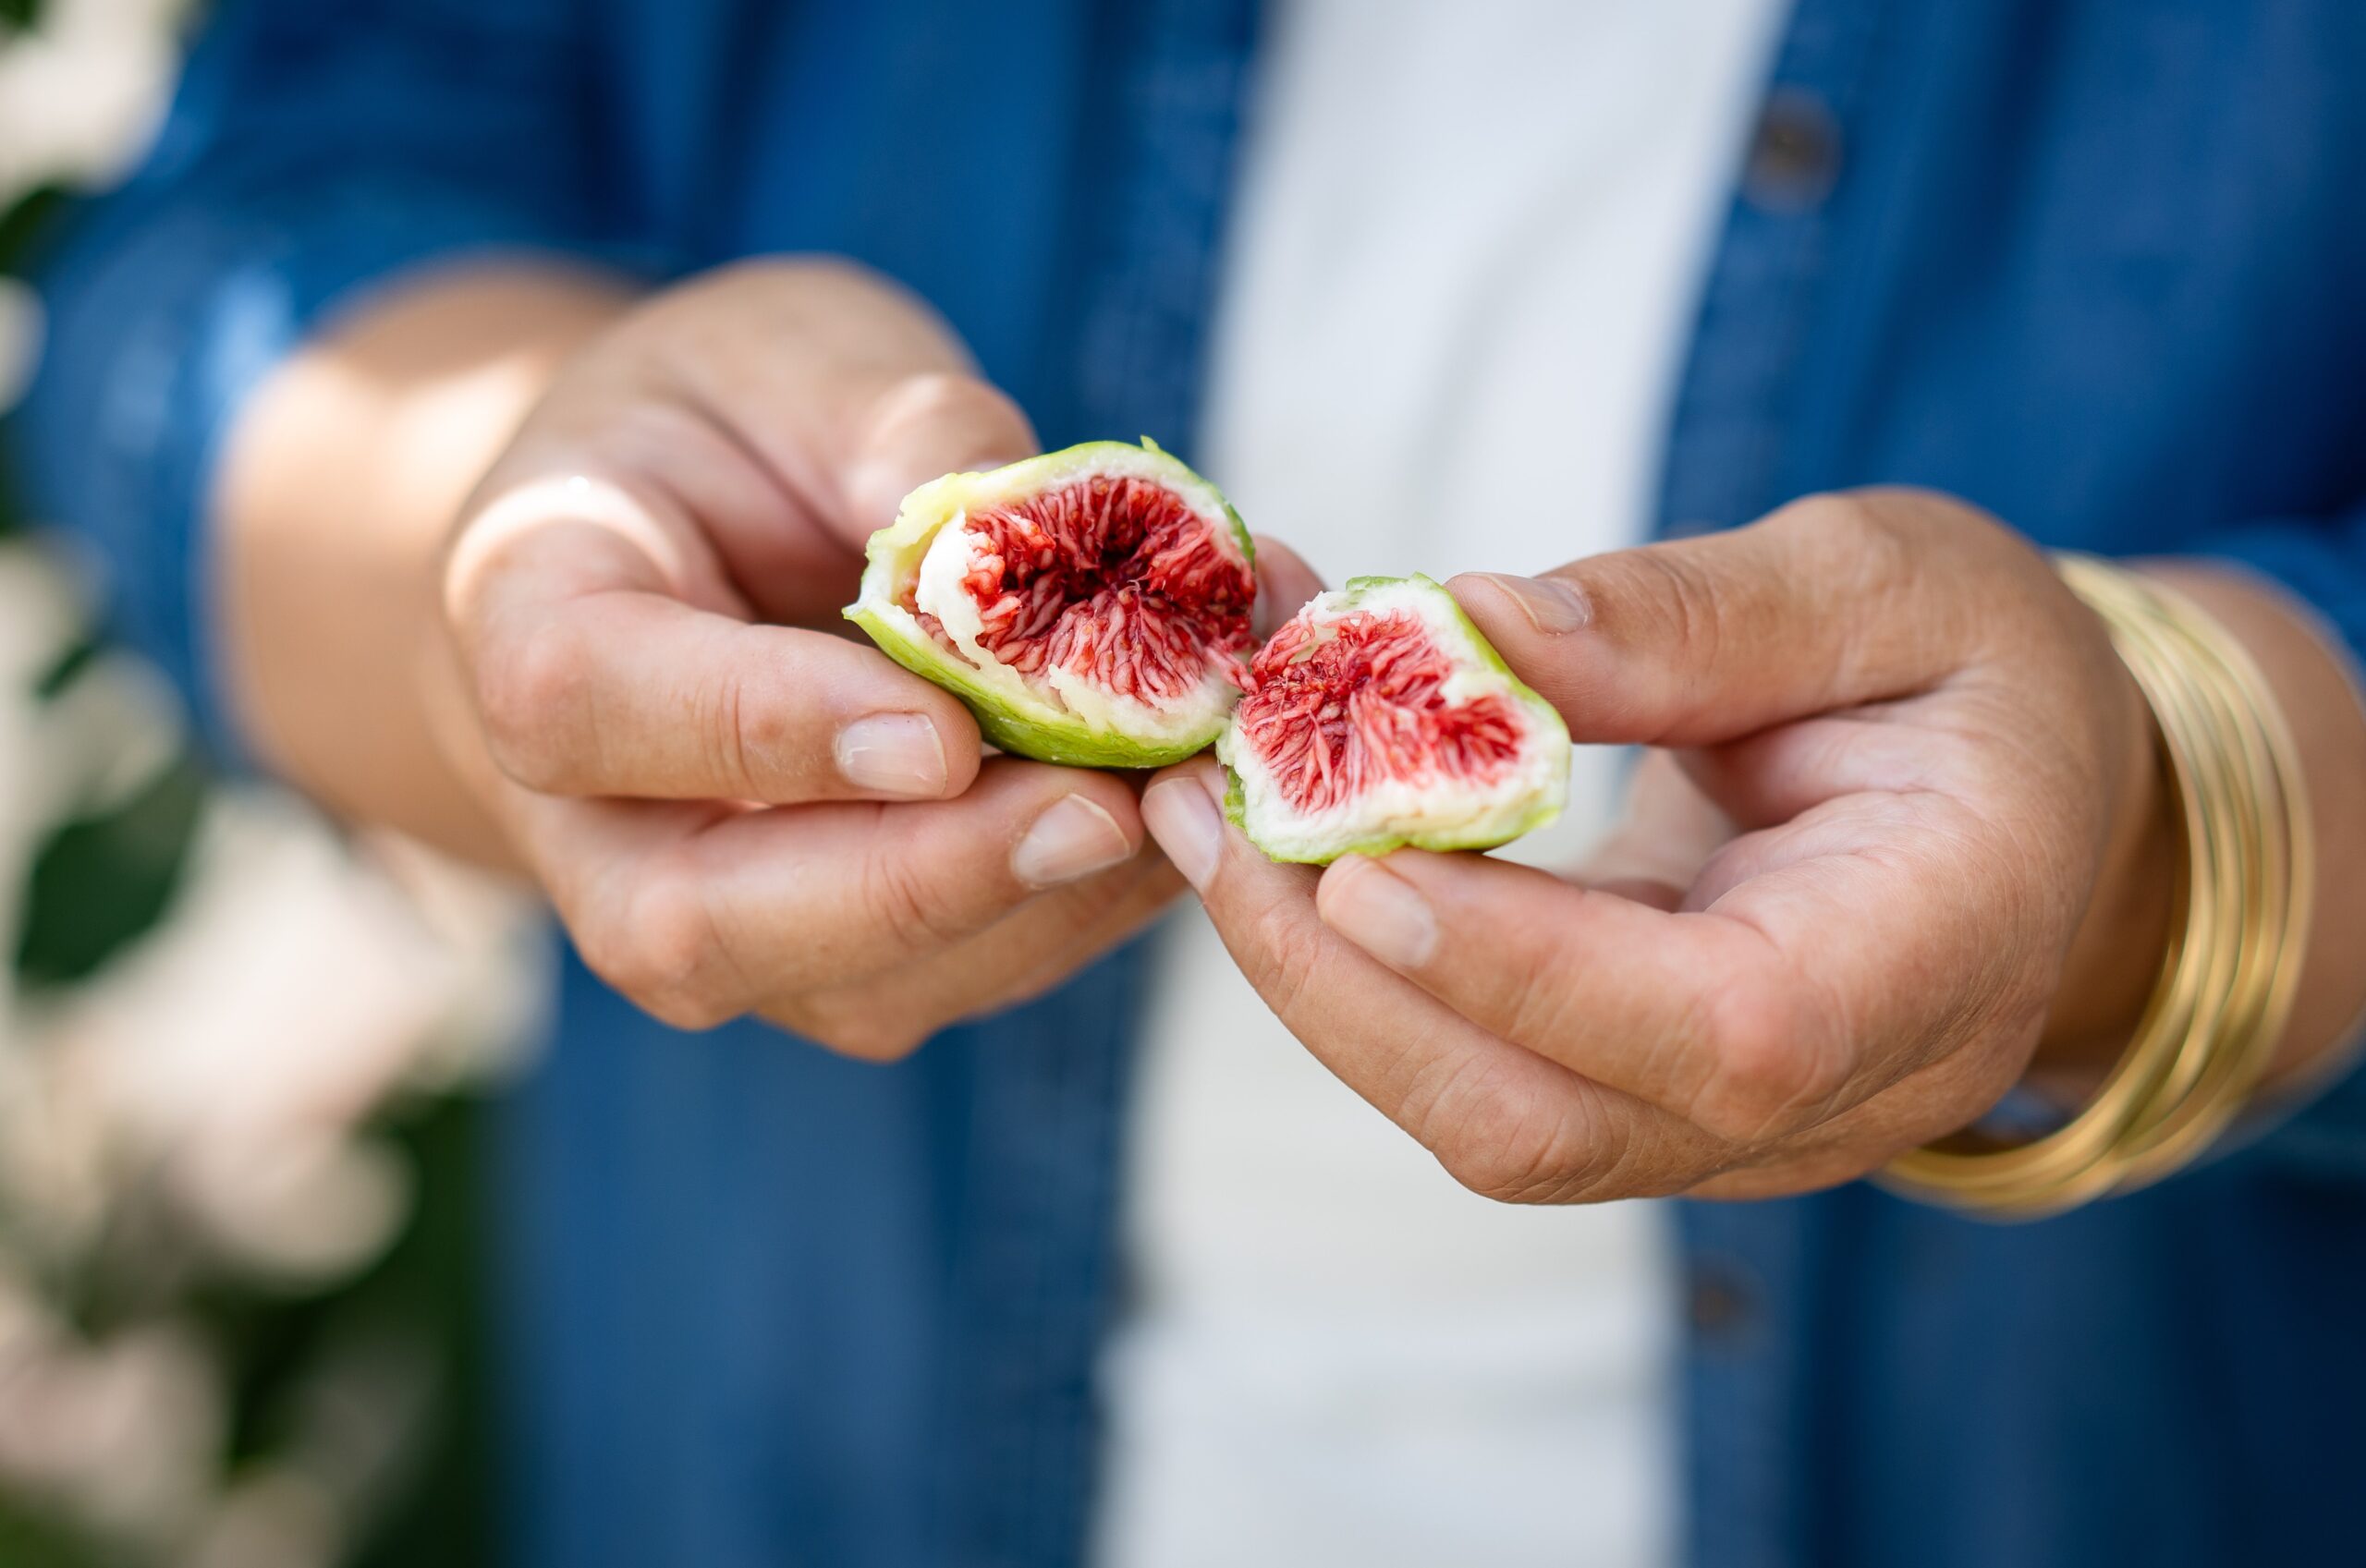
“I feel very American, and I feel very Italian here,” Ms. Bastianich told American Essence on a recent visit. There’s the proximity to the water, what drew her to buy the house in the first place 38 years ago—“since I came from the Adriatic, my dream was always water,” she said—and the garden lined with Italian fig and lemon trees, rosemary and wild fennel, grape trellises, and potted tomatoes—all echoes of the Mediterranean. “And at the same time,” she said, “I see the Empire State Building from my house.”
A perfectly ripe fig from Ms. Bastianich’s backyard. (Samira Bouaou for American Essence)
It’s a dual identity that she’s embraced from a young age. When she was 10, she and her family fled their home in communist-occupied Istria, a peninsula in northeastern Italy handed over to Yugoslavia in the aftermath of World War II. They waited two years in a refugee camp in Trieste, Italy, before finding freedom in America in 1958.
Since then, Ms. Bastianich has built her own version of the American Dream: a veritable culinary empire dedicated to sharing her cultural heritage with her new home. It has spanned several restaurants with her former husband, Felice, and now her children, Joe and Tanya; 25 years on air with more than a dozen companion cookbooks; a partnership in opening Eataly, an Italian food emporium, in New York and locations across the United States; and her own lines of pastas, sauces, and cookware.
She’s also made it her mission to champion the place that took her in and gave her the opportunity to succeed: “There’s no better country in the whole world,” she said. For an ongoing series of annual, hour-long specials, “Lidia Celebrates America,” she travels to meet, cook with, and share the stories of inspiring people across the country.
And at 76, Ms. Bastianich has hardly slowed down. Her latest cookbook, “Lidia’s From Our Family Table to Yours,” was released in September. The 11th season of her PBS show “Lidia’s Kitchen” premiered in October, and a special, “25 Years With Lidia: A Culinary Jubilee,” will premiere nationally on December 18 at 8 p.m. EST. Squeezing in our interview on a brief day home between travels—next, to Canada, for her book tour—she talks at the confident, no-nonsense clip of a matriarch and businesswoman who knows how to get things done, and fast.
What keeps her going? “I love what I do,” she said matter-of-factly. And indeed, she softens, both tone and expression taking on a grandmotherly warmth, when she speaks about her passions: food, family, and how the two have always been intertwined in her work and life. She spoke with American Essence about her immigrant journey, her sense of responsibility to her adopted home, and the extraordinary power of sharing a meal.
The following interview has been edited for clarity and brevity.
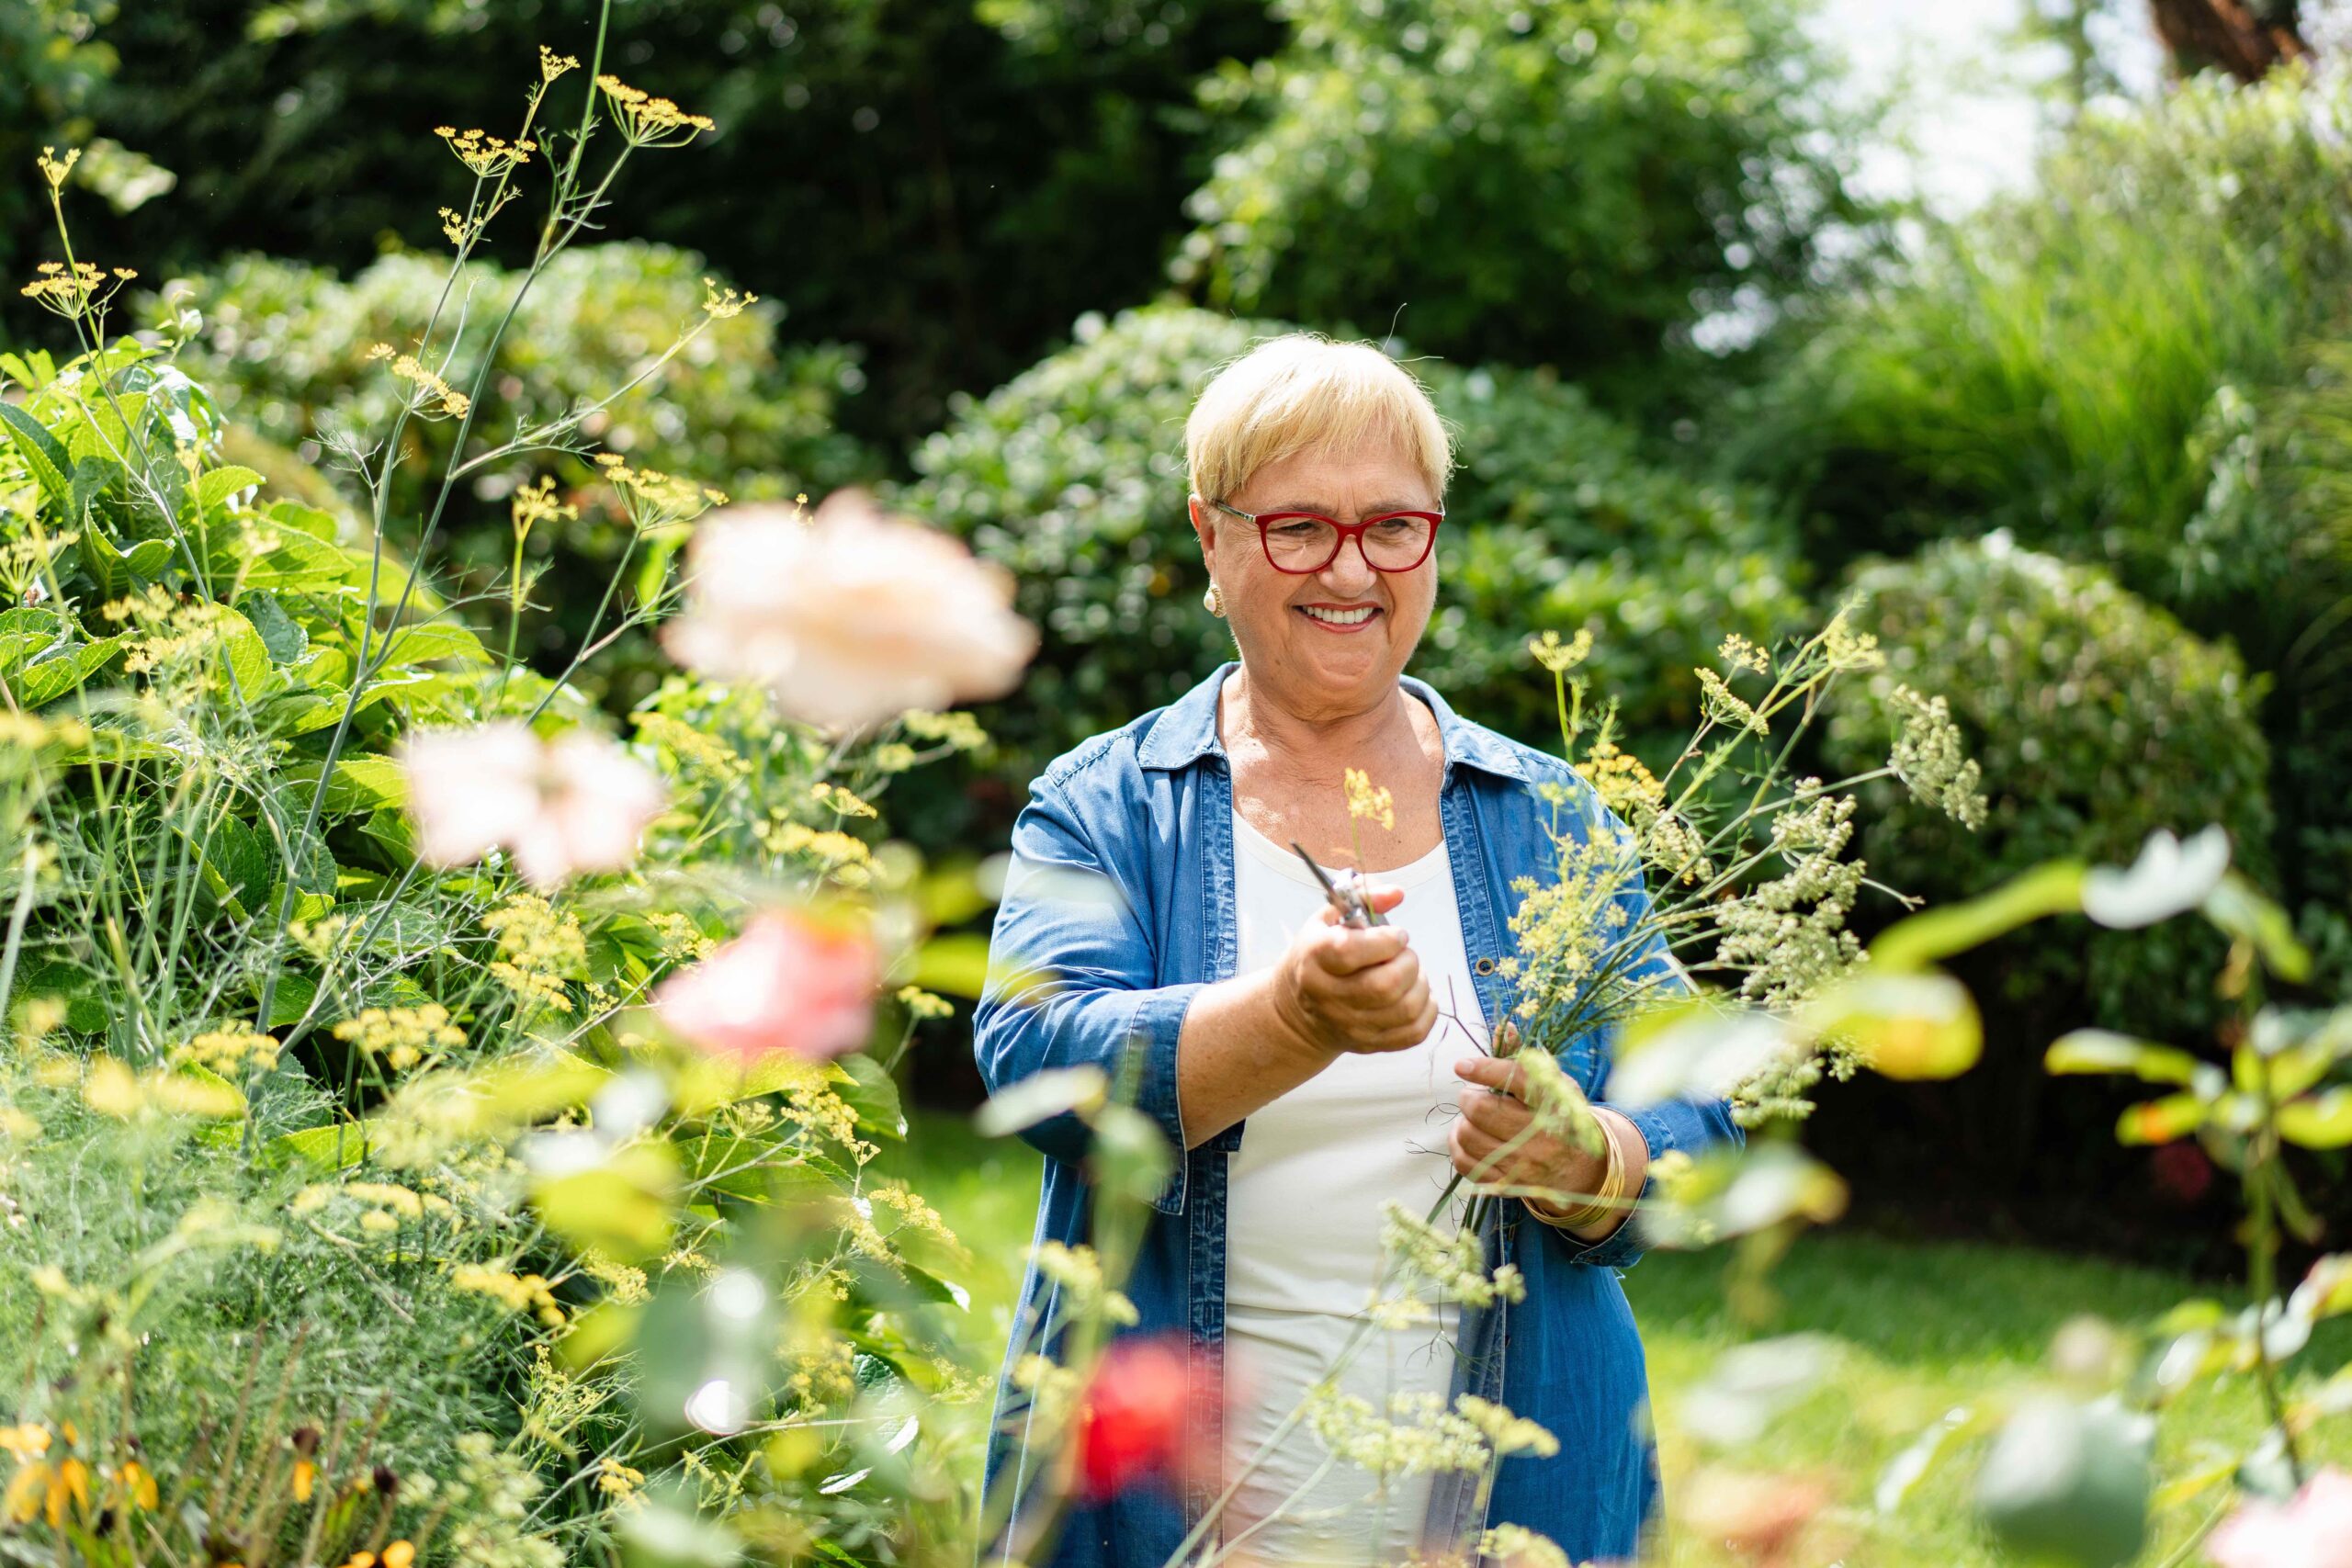
Ms. Bastianich harvests her homegrown fennel. (Samira Bouaou for American Essence)
American Essence: What are your strongest food memories associated with the different places in your life’s journey—from your birthplace of Pola, Istria [now Pula, Croatia], to the refugee camp in Trieste, and finally, to America?
Lidia Bastianich: I have to go back to when I was born: 1947, after the war. The Paris Treaty was in the same month, February, and the border came down: Trieste was given to Italy, and Istria and Dalmatia were given to the newly formed communist Yugoslavia.
We grew up in a country of radical change. Once the communists came, you could not speak Italian, they changed our name, we couldn’t go to church. My mother was a schoolteacher; my father was a mechanic, and he had two trucks. They took the trucks and deemed him a capitalist; they put him in jail for it. So life wasn’t that easy. Even food was scarce. My grandmother, who was in a little town, Busoler, outside of Pola, she raised food and animals to feed the whole family, so my mother took my brother and me out of the city and put us with Grandma. And I think that’s where my first basic food connections happened.
Ms. Bastianich around age 5. (Courtesy of Lidia Bastianich)
With my grandmother, we had chickens, we had ducks, we had geese, we had rabbits, we had goats, we had pigs, we had pigeons. Now and then it was a chicken that went into the pot, then it was a rabbit, then it was a pigeon. I would be feeding these animals. In the springtime, the rabbits loved clover, so I would go and harvest clover in the woods. We would milk the goats, make ricotta. We had two pigs every year, and slaughter was in November, so you had to feed them to get them nice and fat. After the slaughter, we made the sausages, the prosciutto, the bacon.
The garden was the extension of the house—we had the immediate vegetable garden, and then we had a little wheat field. We had olive trees. I was involved in harvesting the olives in November when the olive oil was made; I remember I would dip the bread in there and taste it. The wheat didn’t get all milled at once; Grandma kept the wheat kernels in a cantina, and she would go to the mill every month or two. We would brine the vegetables and the fruits for the winter; we’d pickle cabbage.
Everything had a season: the wild asparagus in spring, the nettles, and then, in the fall, the mushrooms and the squash. I helped my grandmother work the land, so I was aware when things would blossom. I was in tune. The small baby peas, Grandma let them grow because she would get more when it’s a mature pea, but as I would go and collect them, I ate them. I used to chew on the pods; they’re sweet, too. The figs, in August when they were plentiful, we would dry them in the sun so we would have them in the winter. I was involved in all of this—and not because she wanted to teach me, but because I was there as a little helper, that’s just the way it was. My grandmother would say, “Go get some rosemary,” and I would run to the rosemary bush, or to the bay leaves. I grew up with all of that. I knew all the smells, and that stayed with me. When you’re in your formative years, that stays with you.
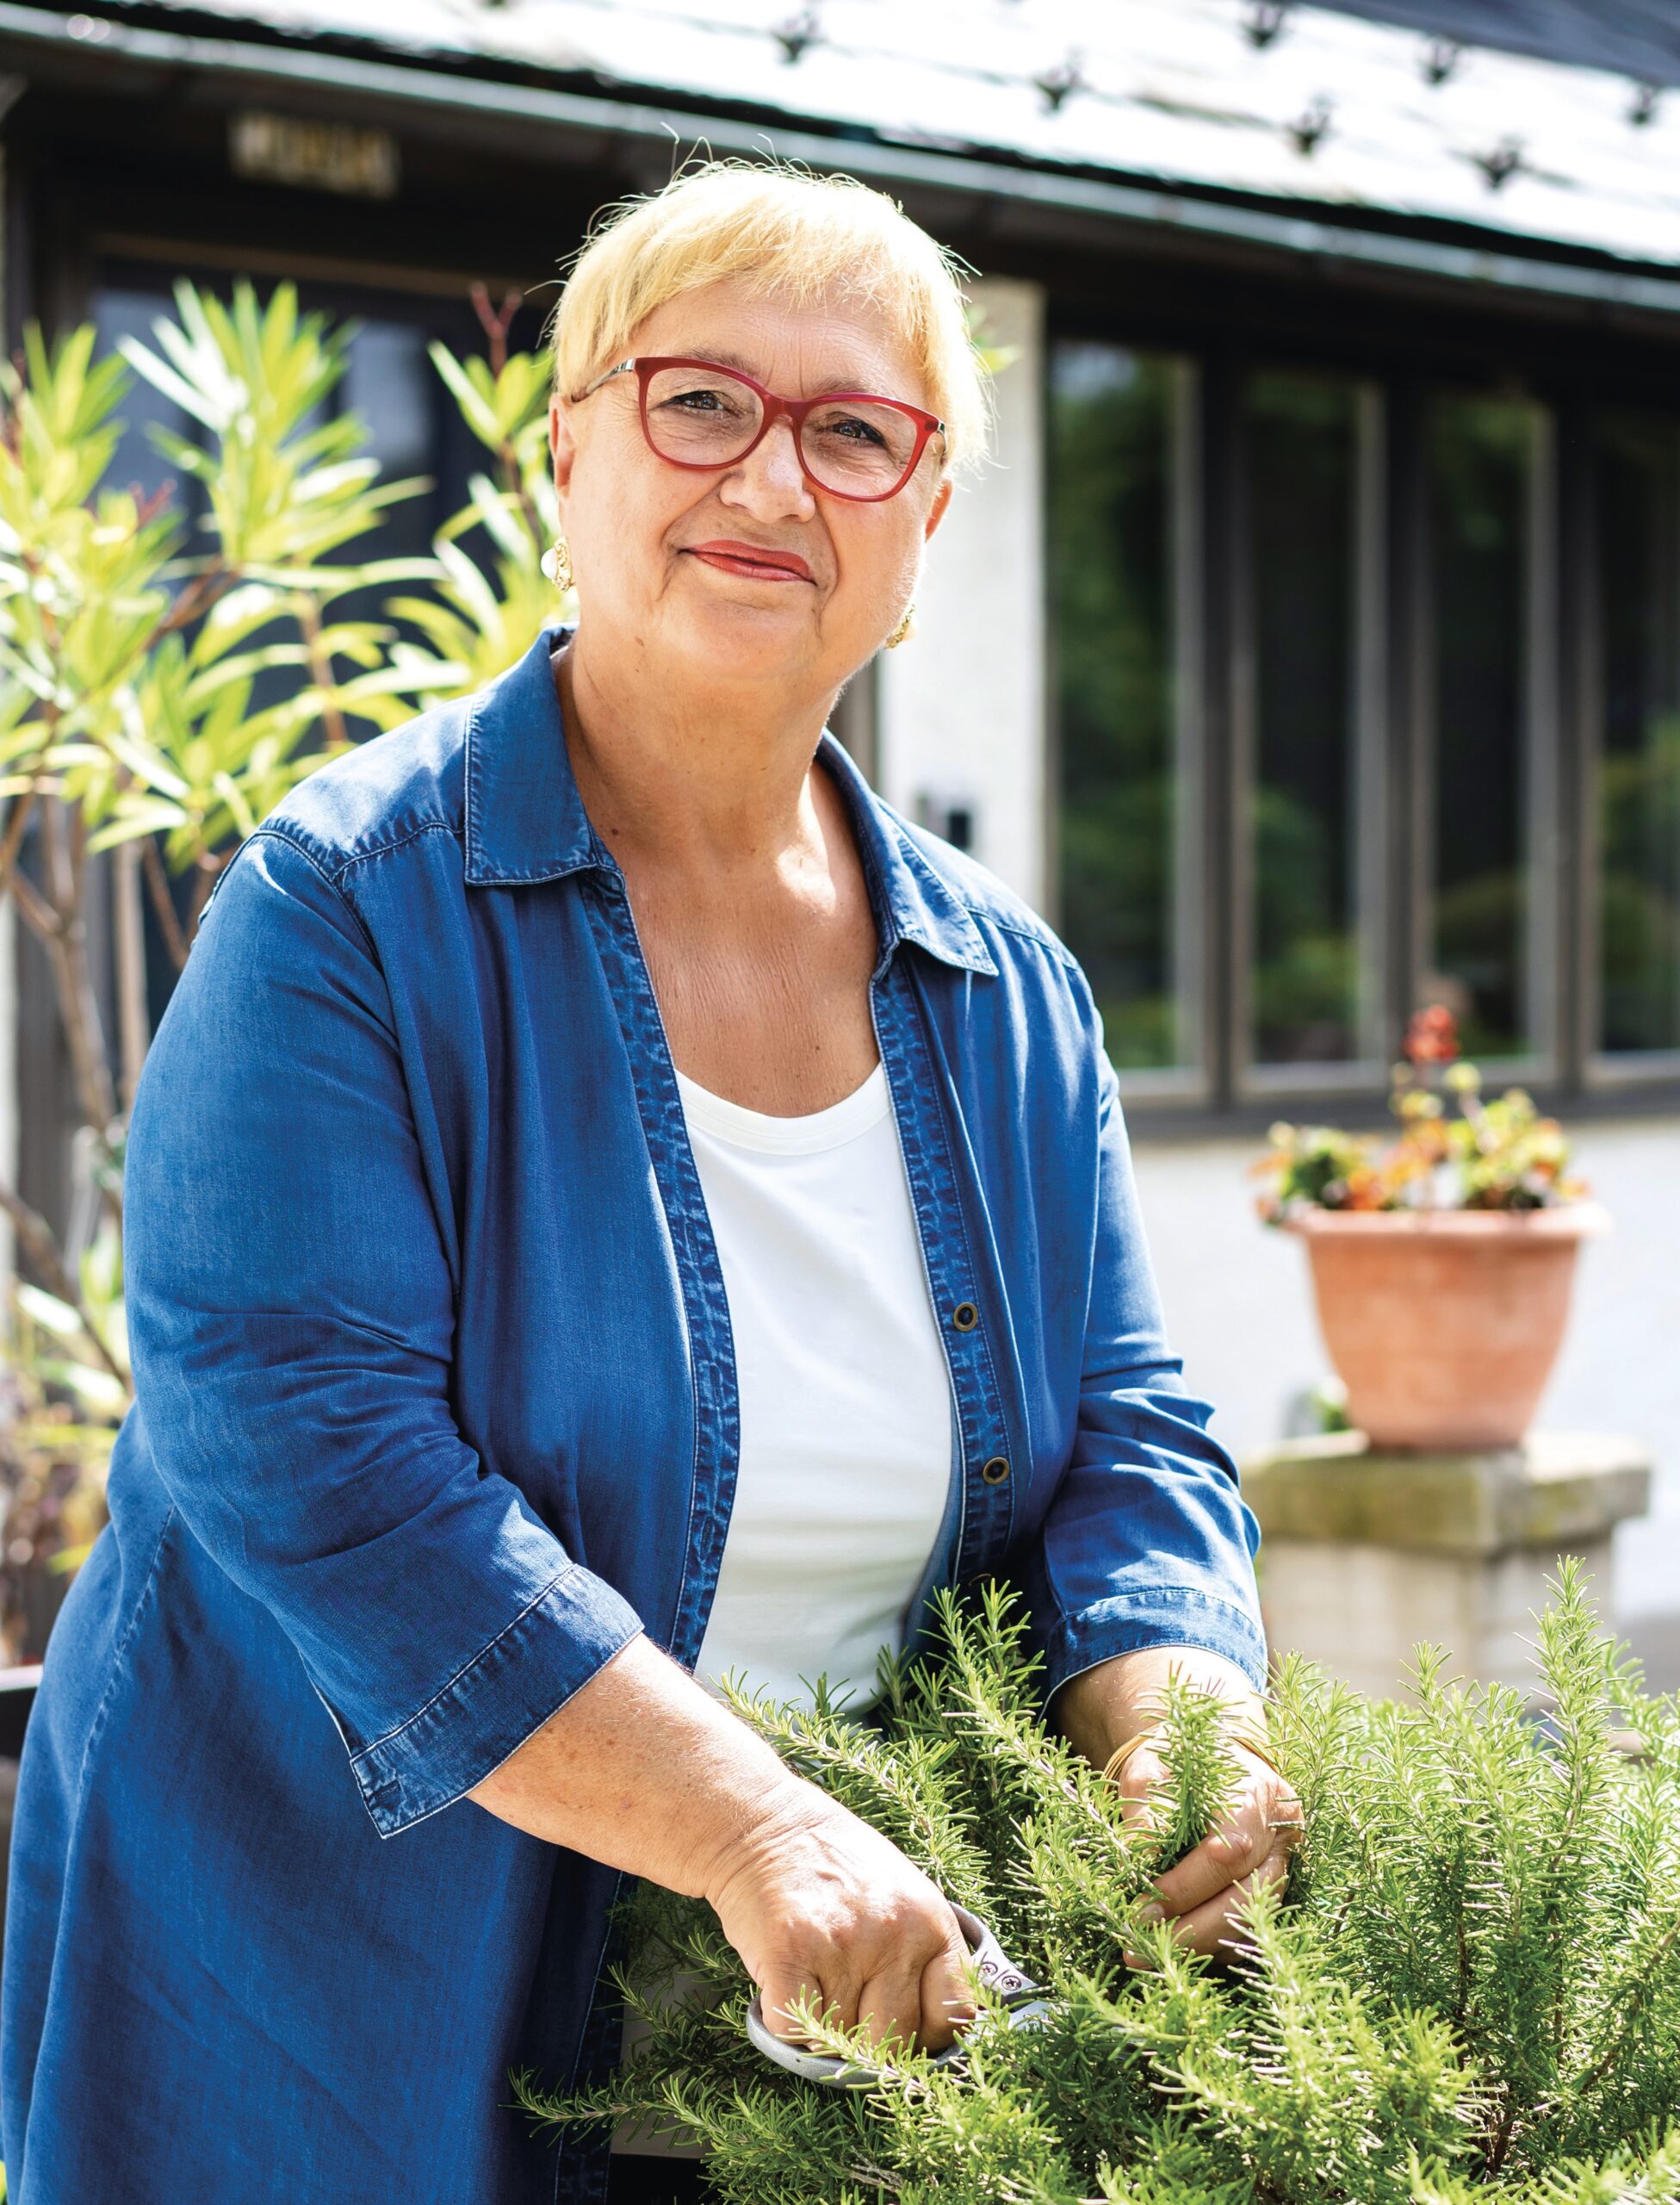
Ms. Bastianich harvests sprigs of fresh rosemary from her garden. (Samira Bouaou for American Essence)
But the real recall moment for me came in 1956. I was 10 years old. When the border went down in Trieste, some of my family was left on the Italian side. Supposedly, my aunt [in Trieste] wasn’t feeling well, so my mother and my brother and I went to visit her. They wouldn’t let the whole family go; they held someone as hostage because they knew we wouldn’t come back [otherwise]. The three of us went. The aunt was fine. But two weeks later, at night, my father appeared: He’d escaped the border. Then I realized that I’m not going to go back to see my grandmother. That’s when I really felt that need: I wanted to be connected, and food and smell built that connection. I think that my love and passion for food, my connection with food, goes back to those memories of wanting to be connected with Grandma, who I didn’t know when I was going to see. So I would cook things that I remembered with my aunt, the flavors that my grandmother was cooking.
We didn’t have Italian papers because we were under communism, so my parents went to the police and asked for asylum. For two years, we were in a political refugee camp, awaiting where to go. I remember in camp, we had a little cubby hole, and we had beds on top of each other.
I would recall all the beautiful times I had with Grandma that I maybe couldn’t have anymore, and I think that’s why it’s so embedded; it’s so vivid even to this day. People say, “Gee, Lidia, you remember the details.” I do, because I recalled them so many times in those years. Even when I came to the United States, the excitement of being free and having your own home and the greatness of America—still, your roots are your roots.
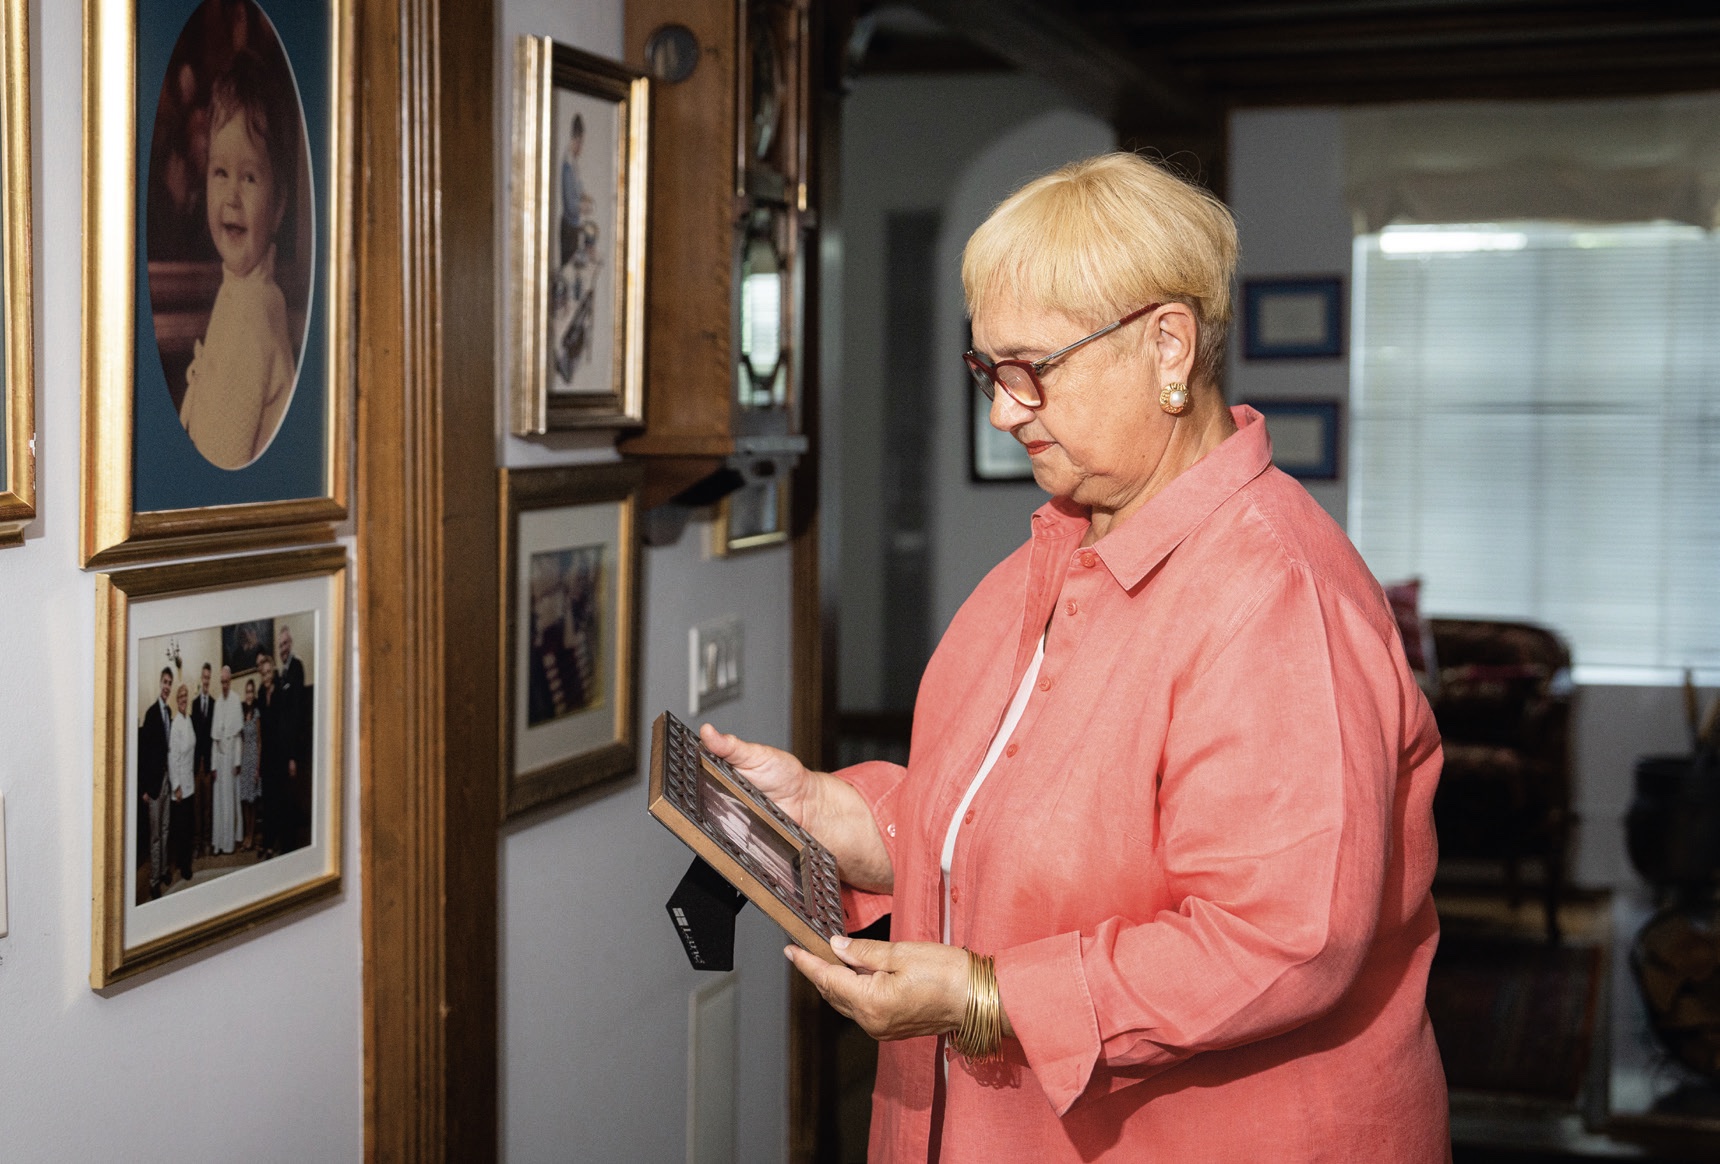
Family photos line the walls of Ms. Bastianich’s New York home of 38 years. (Samira Bouaou for American Essence)
AE: After you came to America, how did your experiences with food change?
Ms. Bastianich: [I remember] the excitement of American food. The Twinkies. Hostess. Jell-O. I’d never had a grapefruit. All these foods—they’re delicious! When we settled, my mother worked late, so she would leave me to do the dinner, and every night [I made] a cake. Those pre-mixes—I couldn’t get enough of them! I was watching the Ed Sullivan show, Elvis Presley, all of that. I wanted every single thing that was American; I wanted to become American as soon as I could. We didn’t speak English when we came, but my brother and I, within a year, we began to.
Then, of course, as I went on into my profession, I realized that maybe the connection to real food was the way it’s supposed to be. Big industry took a lot of liberties with creating our foods. What is amazing is that from my formative years to my professional years, I reverted back to what we did [in Busoler] and how important it was. It’s like 360 degrees, now and then. I think us chefs, we have a big role to play, and I think that’s why with my show and my books, I feel that I share the authenticity that I grew up with.
AE: In addition to your regular show, your series of specials celebrates America. How did the idea for these specials come about?
Ms. Bastianich: I wanted to share my gratitude and my curiosity in understanding America better from my point of view, having been a young immigrant, having been given the opportunity to come to America. America has been sort of knocked down. You’ve got to rally against this. So it’s my way, as an immigrant, of telling Americans, “Listen, there’s no better country, I can tell you that.”
Food opens all the doors. Food is a common denominator, no matter what culture you are: You sit at the table, you begin to cook together, and you become friends. And when you talk with food, the conversation is mellow. So I use food to sort of penetrate messages.
I did two veteran specials, because I don’t think people realize how our soldiers are out there giving their lives to protect our freedom. I visited with veterans, and we cooked together. I did one thanking all the first responders.
The last one was on immigrants, because I think immigrants are maligned now, but we’re all immigrants. I went around to different ethnic communities: I went to South Carolina, to a Ukrainian son and mother; then I went to Houston, to the Afghan community. My Vietnamese friend Christine Ha, she’s a blind chef, she was born here but her parents were from Vietnam. She says, “At home, I was Vietnamese, but outside, I was American.” As an immigrant, you’re lucky enough to have these cultures on top of being an American.
America is made out of different ethnicities: It’s like a quilt, and it’s beautiful, and it’s strong. And what’s amazing about this is that within this context, we can all be who we are culturally: We can practice our religion, speak our language, sing our songs, have our social gatherings.
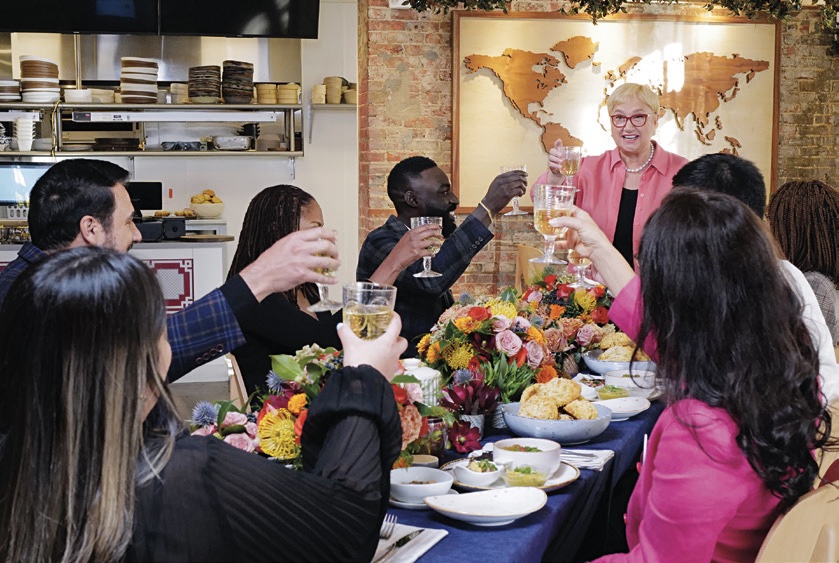
A scene from Ms. Bastianich’s latest PBS special, “Lidia Celebrates America: Flavors That Define Us.” (Meredith Nierman for GBH/Tavola Productions)
But what immigrants need to also understand is that they’re given this great opportunity, and you need to take opportunities that you think fit, and you need to work hard at that. You need to make it happen, and really be responsible, and at the end, you need to give back to this country. [In the special] there’s this family from Bhutan, where they were persecuted, so they were in Nepal as immigrants for over 18 years. When they came here, he [Bhuwan Pyakurel] was still a young man. He ultimately became an assemblyman for his community [in Reynoldsburg, Ohio].
You have to become part of society, and you have to appreciate it. Certainly, I feel that way: As an immigrant, I feel very grateful for the opportunities that my family was given. In turn, I had my children here, my grandchildren, and I never stopped telling them that. I took them back to the refugee camp and the trip that I took—and not just I, but many other people, whether from Europe, from Africa, from Asia, to escape dire conditions. What parents do to better the lives of their children! Kids need to know, immigrants need to understand the gifts that they’ve been given and make the most of it.
AE: You’ve written a new cookbook of your own family’s favorite recipes, in part a tribute to your late mother, Erminia Motika, known to your family and fans as “Grandma.” Can you talk about who she was to you?
Ms. Bastianich: My mother passed away two years ago at 100. We lived together; she lived upstairs, I lived down. She was matriarch. She helped me raise my children, and in turn, we helped to raise my children’s children. They all remember her vividly—we all do.
When you think about this woman, 30-some years old with two young children, going into the world not speaking the language, not having anybody in the States, not having money—how much strength it took for her and my father to do that so that our lives could be better. She was a strong woman who appreciated, loved America. She realized what America could be to her family. She was the pole that held everything together.
Nothing was done without Grandma, so she automatically came right into the shows and articles; the viewers loved her. People said, “She’s my grandma, she’s the grandma I lost.” She became kind of everyone’s grandma. We still give her a tribute, I want her in the show: At the end, we have little clips where we sing together, and people love that.
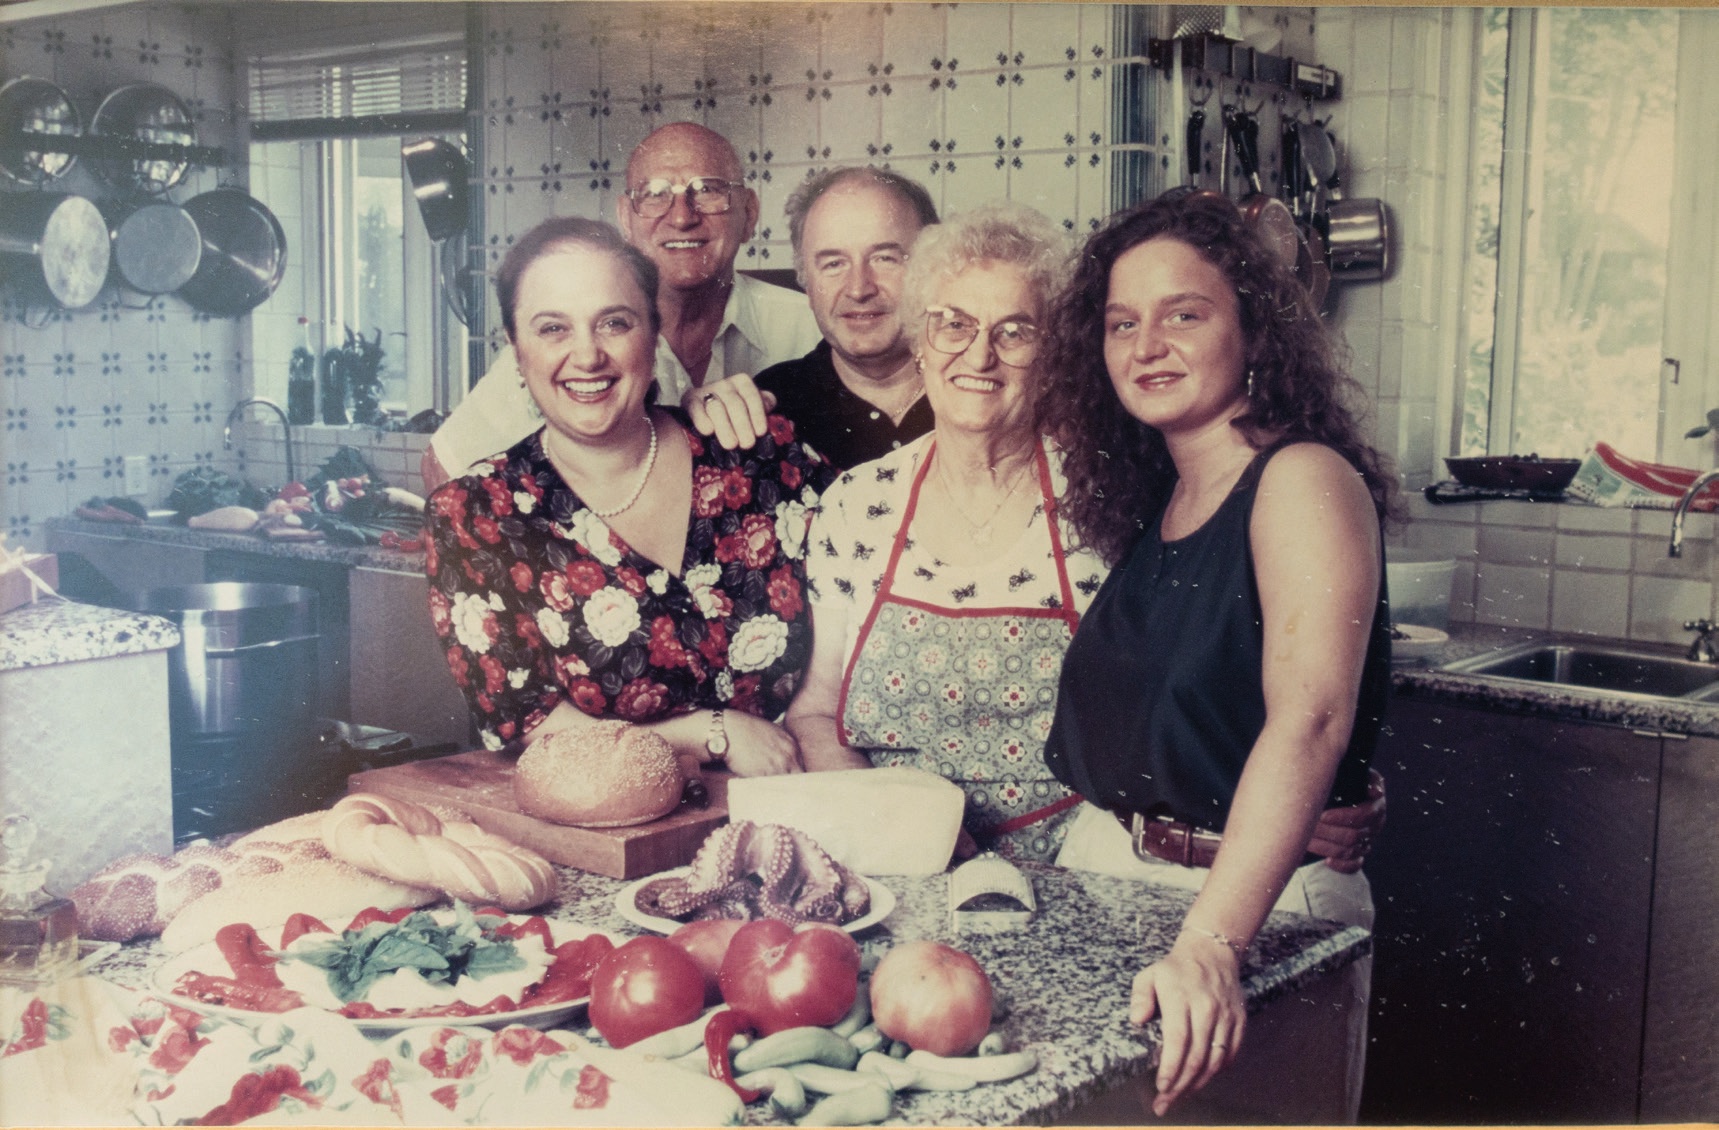
(L–R) Ms. Bastianich; her mother’s companion, Giovanni Bencina; her former husband, Felice Bastianich; her mother, Erminia Motika; and her daughter, Tanya Bastianich Manuali gather in her home kitchen in this old photo. (Courtesy of Lidia Bastianich)
AE: What upcoming projects are you most excited about?
Ms. Bastianich: The continuation of my show. I pulled back a little bit from the restaurants—my kids are running the restaurants, and I have new projects going on. I have more freedom. We’re just finishing my 25-year special, and then I’m working on another book. The next one is all about pasta: fresh pasta, dried pasta, making it, cooking it. I’m excited about it.
AE: What is the most important life advice you want to pass on to your grandchildren, and other young people?
Ms. Bastianich: Eating together at the table is an extraordinary place to be. Because when you’re eating, your defenses are down, you can talk. As human beings, we’re smart, we’re defensive, we are protective. But when we’re eating, that’s one of the few things that we take into our bodies—food—and our defenses are going to be down to take it in. Especially when parents want to talk to children about life, the table is the ideal place because children are open, are receptive, and they’re taking in what you’re saying, too. You don’t need to make a festive meal. A nice plate of pasta, it’ll get people to the table.
Thanksgiving 2017 at Ms. Bastianich’s home, with all of her grandchildren. (Courtesy of Lidia Bastianich)
Lidia’s Loves
Three ingredients you’d bring to a deserted island: Olive oil, pasta, and garlic
One thing you do every morning: Make a cappuccino
Someone you’d most like to cook with: My maternal grandmother
Favorite hobby when you’re not cooking: Sailing
Favorite way to relax: Listening to classical music
Best advice you’ve ever received: Be humble, listen well, and take a pause before responding
Thanksgiving at Lidia’s
For Lidia Bastianich, Thanksgiving is a holiday about “celebrating the country that took us in,” she said. Her family gathers in her New York home, joined by a few regulars who have no family of their own and have been part of the Bastianich holiday celebrations for years.
“We fill the whole house,” Ms. Bastianich said—and of course, she does the cooking. “For me, cooking for 20, 30 people? Not a big deal.”
The meal starts with a “never-ending” antipasto buffet: “We like fish, so it’s octopus, it’s mussels, it’s calamari, it’s baccala. … And then, of course, all the cold cuts—mortadella, prosciutto, gorgonzola, parmigiana. Then all the cured olives and roasted peppers, lots of roasted vegetables, salads, a lot of greens, cured anchovies, mozzarella.”
Then comes a soup or pasta course (“We make it a little Italian,” Ms. Bastianich said) followed by the turkey with all the fixings, served family-style at the dining table. Dessert is again buffet-style: The kids usually bring pumpkin pie and bread pudding, while Ms. Bastianich makes an apple strudel or cheesecake.
Tips for Home Cooks
Use your oven space wisely: The turkey gets priority, with some sides delegated to cook on the stovetop instead. “Us Italians, we do a lot of garlic-and-oil vegetables in the pan.”
Glaze your bird: Ms. Bastianich simmers balsamic vinegar with bay leaves, rosemary, a couple of garlic cloves, and honey in a pan on the stovetop until reduced by about half, then strains the resulting syrup and brushes it on the turkey in the last half hour of roasting. “That gives it a nice Italian touch and some sweetness.”
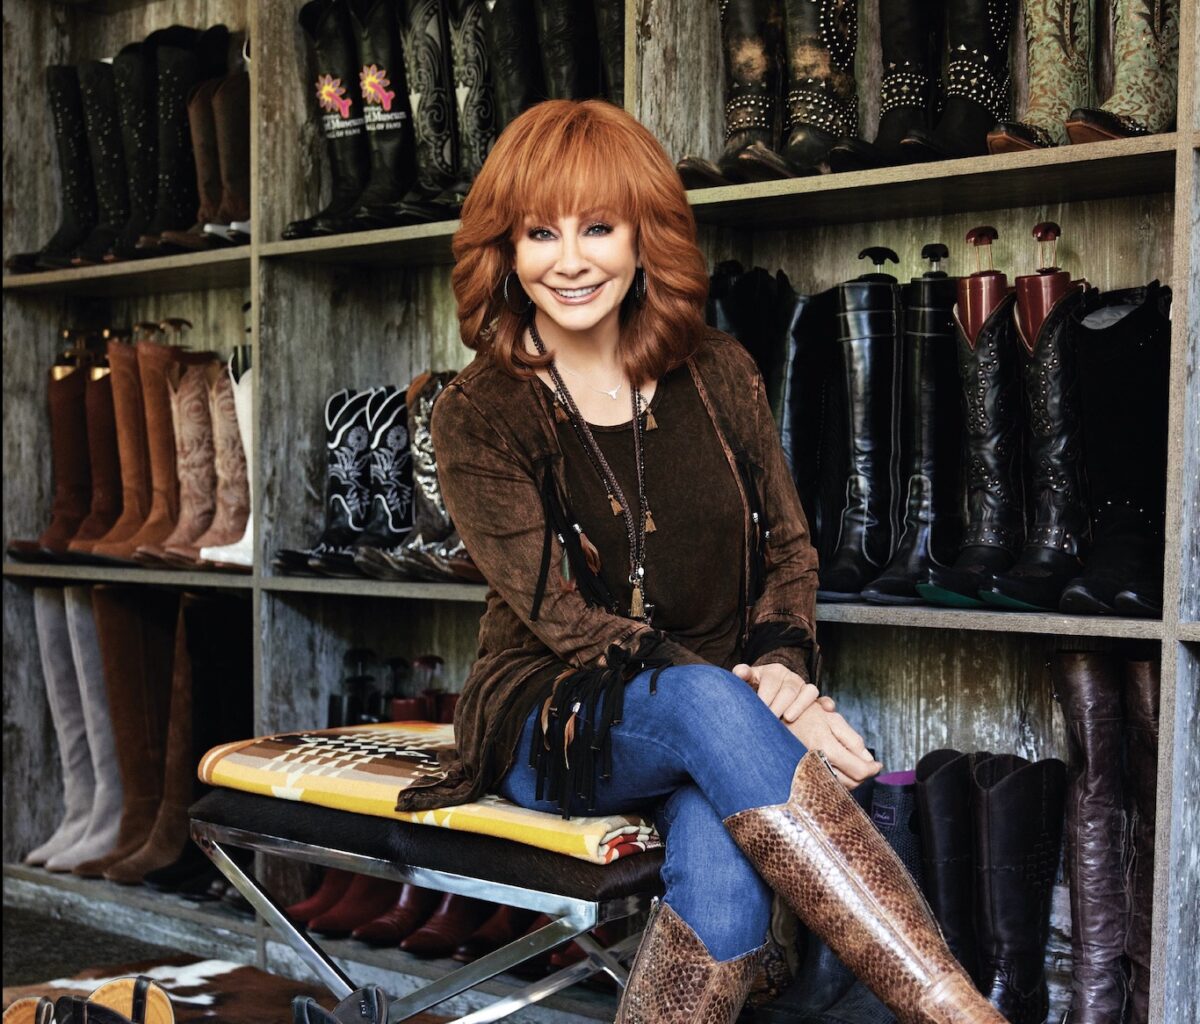
A cowgirl at heart, singer and actress Reba McEntire shows off her custom boot closet. (Courtesy of Reba McEntire)
Some would say the McEntires are a very set-in-their-ways, stubborn, hardheaded bunch of people. But I think that hardheadedness is what got Daddy to where he was, Grandpap to where he was, and his father, Pap, to where he was. Some might say it wasn’t all that far—but it was much further than where they started!
None of us McEntires came from money, but each generation’s been a little more prosperous than the one before it. My daddy, Clark, was determined to make a better life for himself than the one he’d been handed. Like Grandpap before him, Daddy had the rodeo bug. He knew that rodeo couldn’t pay all the bills, but it sure helped get him started.
Take, for instance, one time when Daddy won a roping competition. The prize was a new car and 500 dollars cash. He gave it all to Mama and sent her to swap it for 80 acres of land that Uncle Dale, Mama’s brother, owned. That gave Daddy enough space to expand his ranch with more cattle. It was the start he needed. A few years later, in 1957, Daddy and Mama were able to buy a much bigger plot of land in Chockie, so he moved the family and all the cattle over there. Not exactly the land of milk and honey, but little by little, he was moving on up.
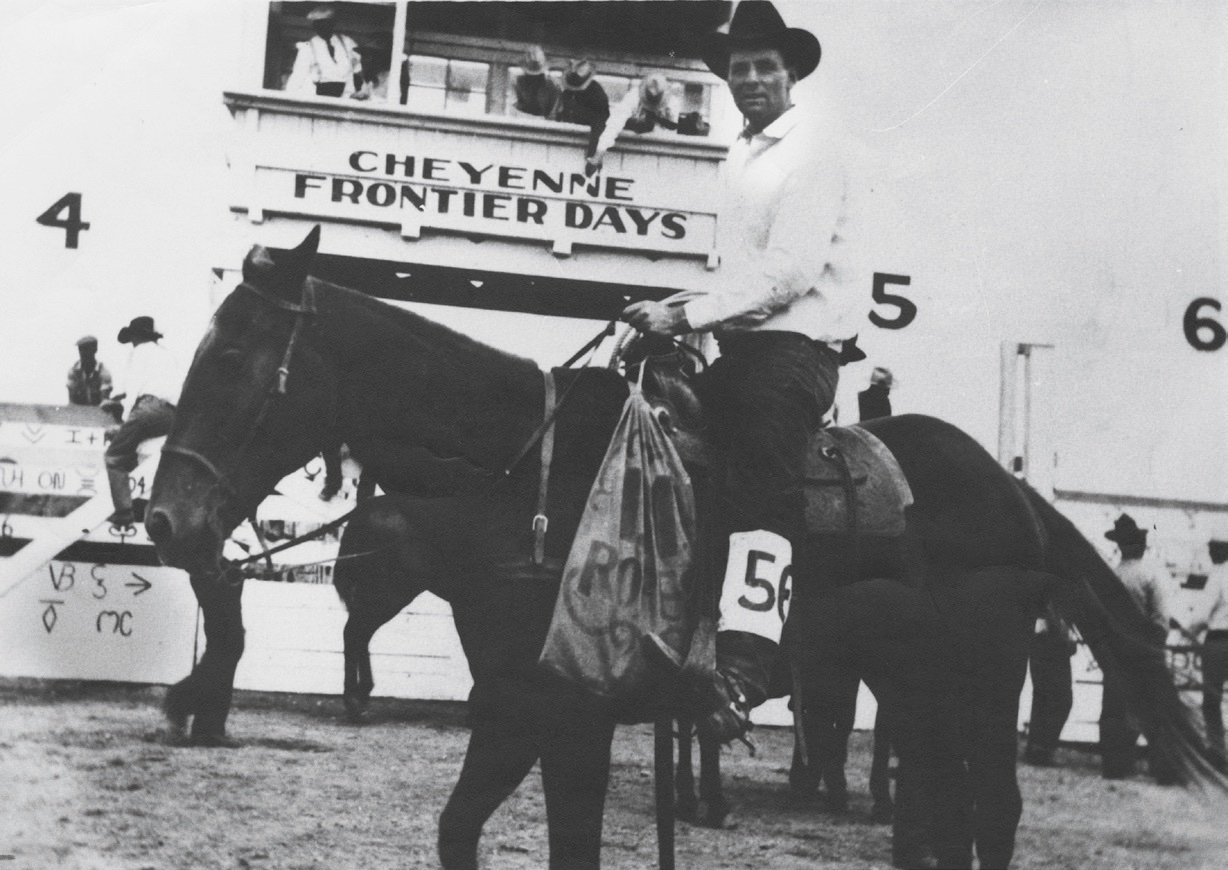
Ms. McEntire’s grandfather, John McEntire, competing at Cheyenne Frontier Days in Cheyenne, Wyo., 1934. (Courtesy of Reba McEntire)
Land in Chockie was only $6.40 an acre, and there was good reason for that! A lot of neighbors called it “sorry land,” and they warned Daddy not to buy it. It was rocky, hilly, and didn’t grow much except briars and scrub brush, but he saw something no one else saw in that “sorry land.” He turned a profit selling timber to the paper mill and rocks to the architects in Dallas. Then he struck gas.
That sorry land turned out to be worth more than anyone realized.
Daddy liked the rodeos, but he loved ranching. Rodeoing and selling timber, rocks, and natural gas all helped in the progression of our ranch. Daddy had to travel to compete in rodeos, but he wanted to be home on the ranch.
But ranch life is not an easy life. Maintaining the land and cattle takes time, and you can’t skip a day just because you’re worn out. Working the land was a whole family affair. The only time you wouldn’t find us kids helping out was when we were in school. I thought that going to college would give me a break. Nope. I was wrong. Daddy had leased some land halfway between home and the Southeastern Oklahoma State University in Durant, Oklahoma. So every other day, after my classes, I loaded 30 fifty-pound sacks of feed into my pickup truck and fed the 300 head of cattle.
Not quite the college experience everybody else had!
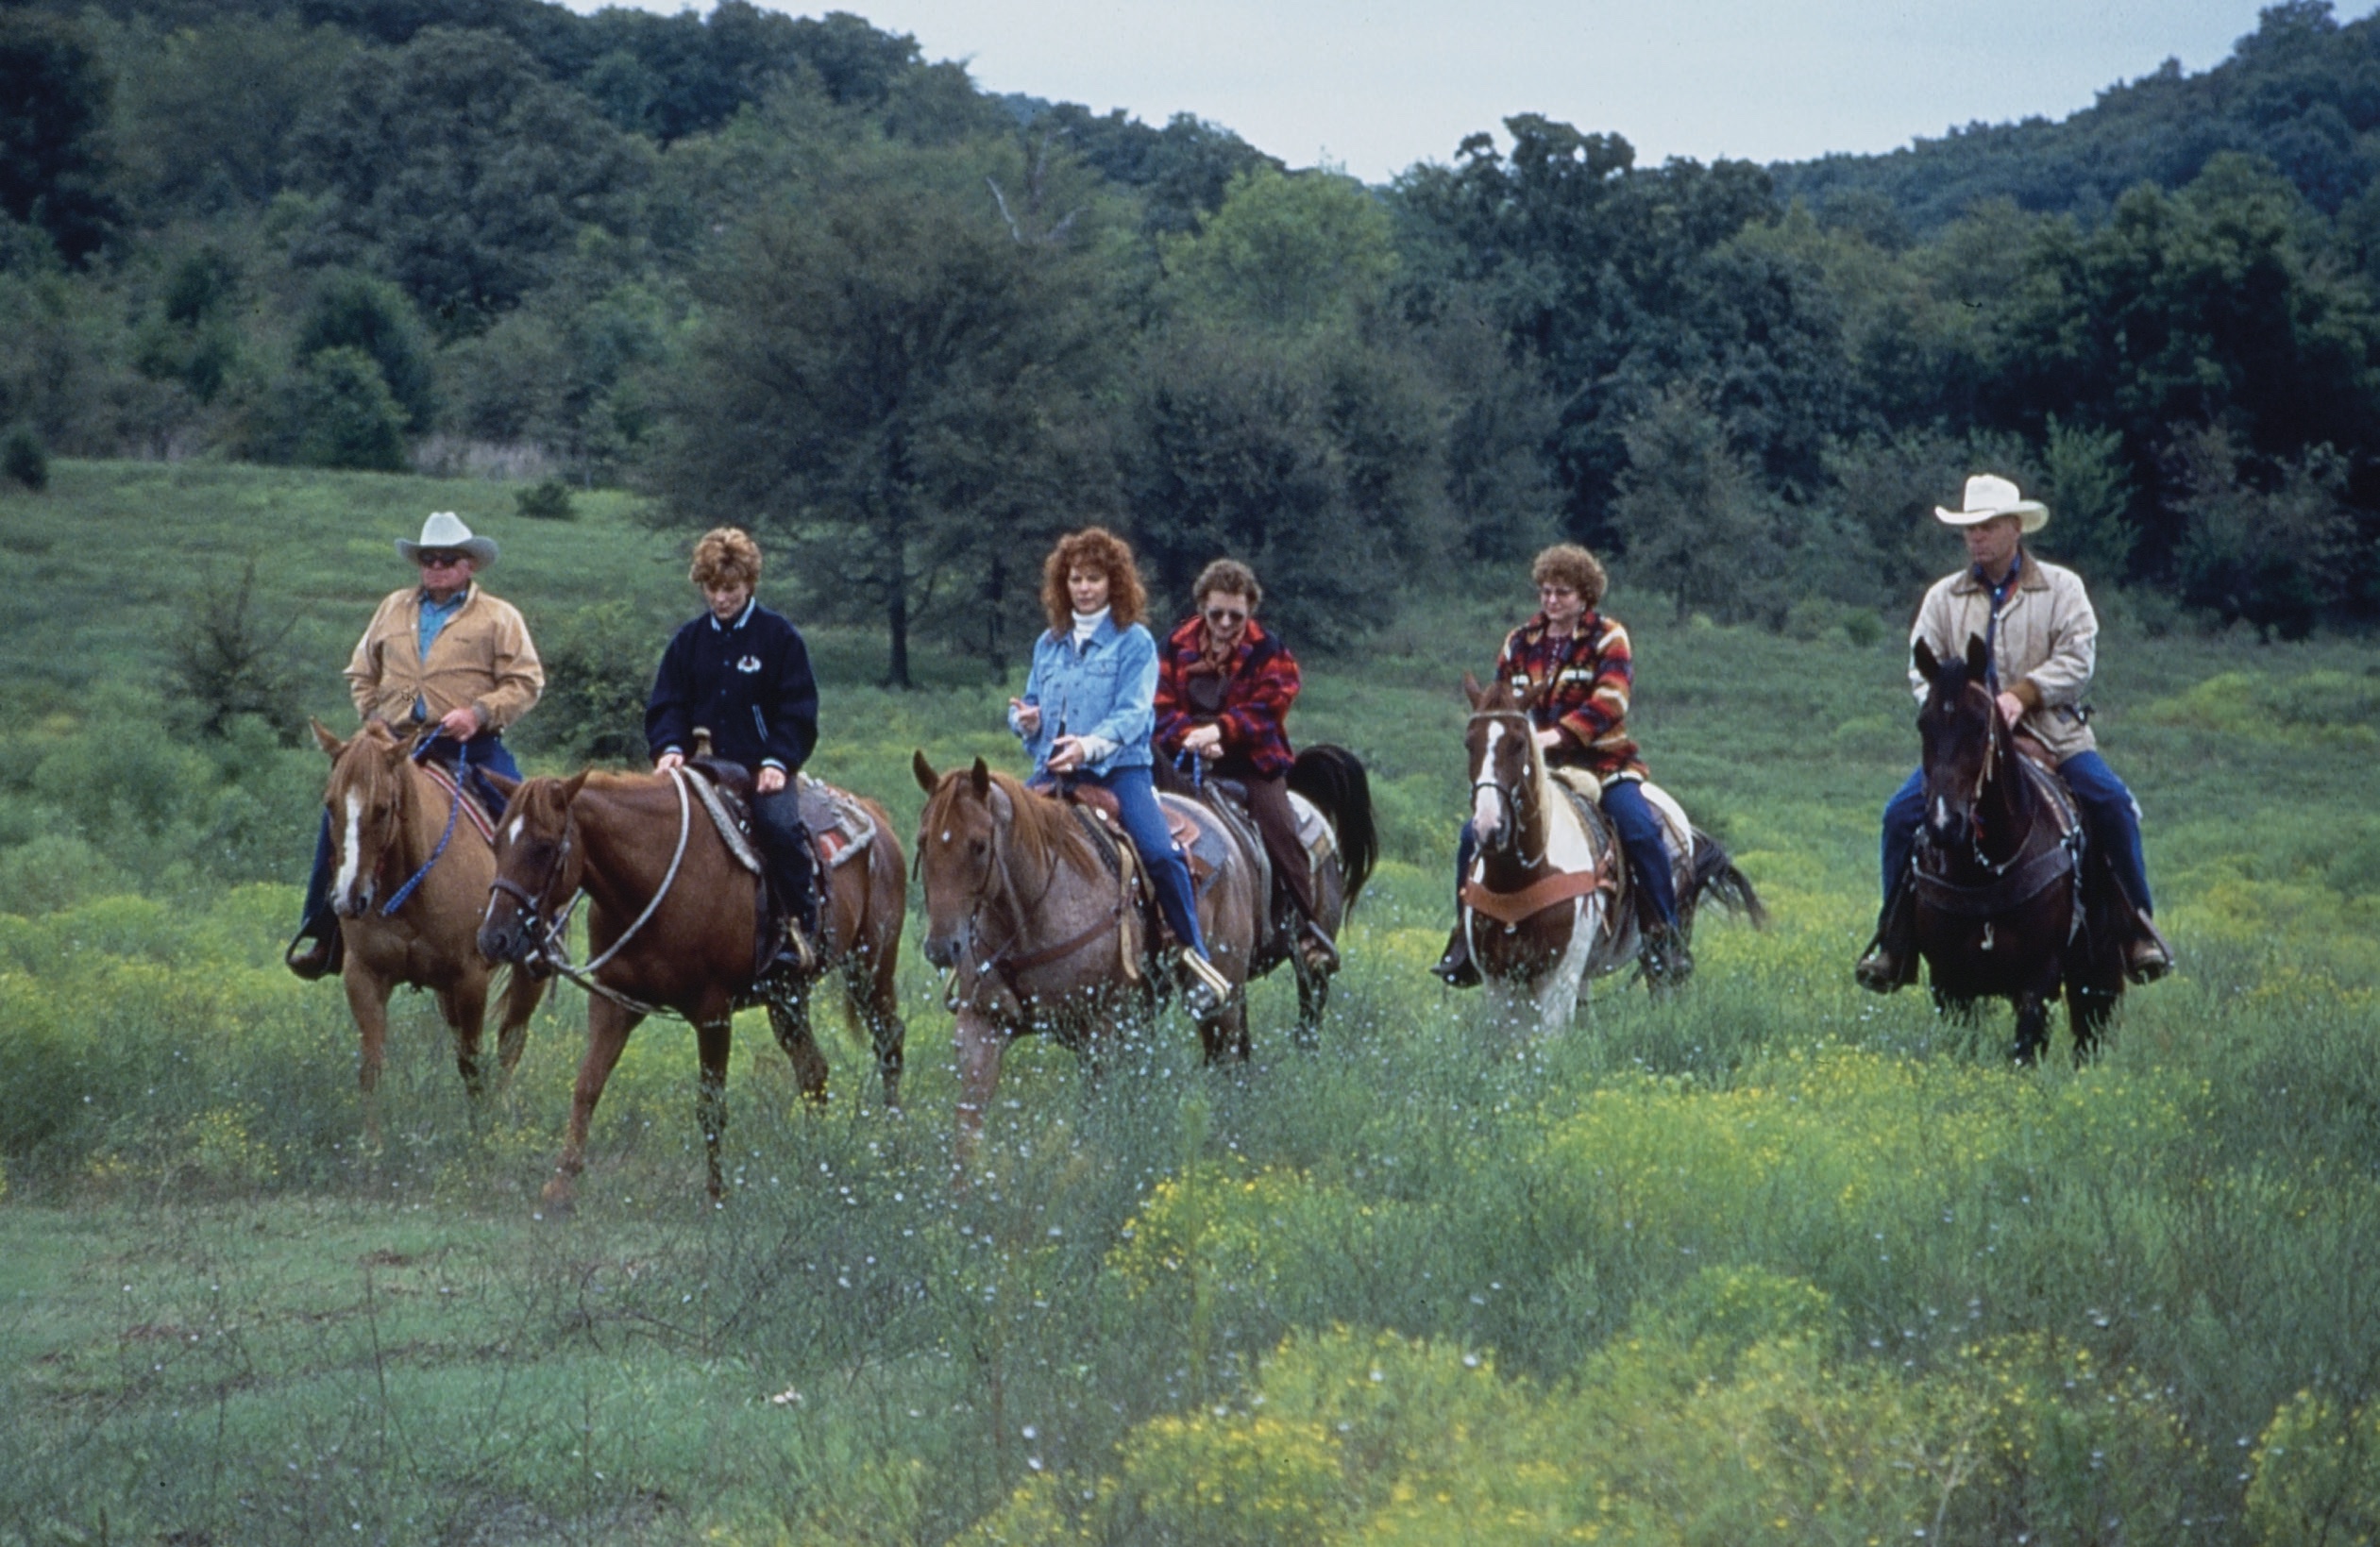
I didn’t really know anything else though. I had started pitching in before I could even sit in a saddle. I don’t remember exactly the first time I was on a horse, but it feels like I was born riding. Us kids spent a lot of time rounding up cattle. It was rough country, and often we’d have to ride through brush and briars taller than we were on the off chance we’d find even one lonely steer. There was always more work than hands to do it. We got cattle in the spring, straightened them up, and shipped them off to the feed lots in the fall.
Reba McEntire (center) rides on the family ranch in Chockie, Okla., alongside her parents and siblings Susie, Alice, and Pake, while filming the “Reba: Starting Over” CBSTV special in 1995. (Courtesy of Reba McEntire)
Daddy always had a plan to get the job done. Problem was, he wasn’t the best at relaying his plan to the rest of us. He was usually looking the other direction or doing three things at once when he was giving us our instructions for the day. Most of the time, we only got a quarter of what he was trying to tell us. We always looked to Grandpap for an interpretation. I’m sure glad we had him to help us out!
The most important thing about helping out on the ranch was getting in line, doing your part, and following instructions. If our instructions were to sit at a gate until Daddy returned, under no circumstances were we going to abandon our posts. You sat at that gate until Daddy came back and told you that you could leave. It could be several hours, but that didn’t matter. Hot or cold, rain or shine, you stayed glued to your saddle.
It was out there in those hills that I first learned that the work is in the waiting.
Fast-forward 15 years, when I got into the music business. I knew less than nothing about how it all worked. I thought that once your record got on the radio, you got a tour bus and a big ol’ check. You’d made it. You were a big star. Wrong!
I remember being so excited when I heard my debut single playing on our staticky, old radio for the very first time. Mama, Susie, and I were all sitting on the floor, crying with joy, thinking, “This is it.”
But then—not much happened. No fancy tour bus or big royalty check appeared. I felt pretty sure that God had called me to the dream of singing, but much like my daddy giving me instructions up in the hills, it felt like I had only gotten a fourth of what God said, and I knew I needed to wait for more information. So just like I learned as a kid, I stayed patient. And I kept working.
“Not That Fancy: Simple Lessons on Living, Loving, Eating, and Dusting Off Your Boots” by Reba McEntire (Harper Celebrate, 2023).
From hearing that first song on the radio, I spent the next seven years traveling around, playing everywhere I could, living on greasy burgers and corn dogs at truck stops and county fairs from Los Angeles to Boston—seven years of performing at fairs, rodeos, and honky-tonks, singing over bar brawls, tractor-pull competitions, and bull sales. Seven years of patience before I had a real hit, “Can’t Even Get the Blues,” in January 1983.
Even with that hit, the first time I headlined my own show, in 1984, only 800 people showed up, and I actually lost money. I had to write a check to get out of town because I didn’t sell enough tickets. And I thought, “Welcome to the big time!” I sure did appreciate the few who did show up, though!
Thank God for that McEntire determination.
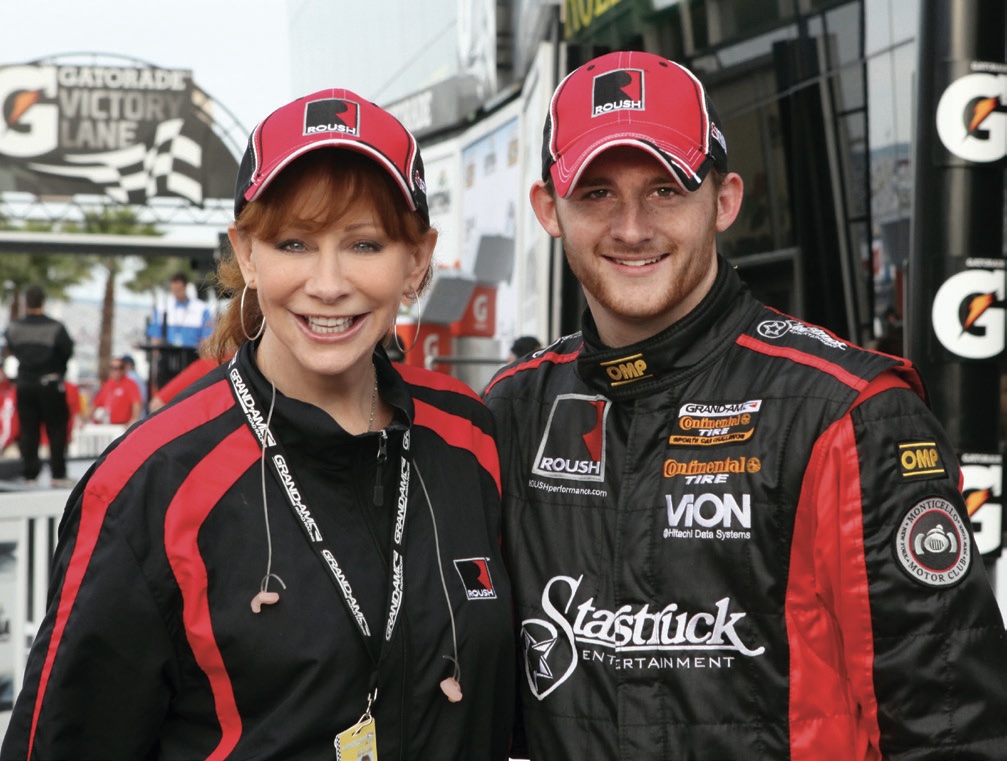
When it came my turn to be a parent, I was determined to teach my son, Shelby, how important hard work is too, but I didn’t need to worry. From an early age, Shelby was a very determined young man. He has a great work ethic. When it came time for him to start his own career, he put his nose to the grindstone. When Shelby told me he wanted to be a race car driver, I wanted to help but had no clue where to start. If there had been a “Racing for Dummies”book, I would have bought 10. I asked anyone I could think of for information, but no one I knew had much advice to give. Scott Borchetta, head of Big Machine Records and a former race car driver himself, told me to buy him a go-kart. But Shelby already had a go-kart! So, we bought Shelby a membership to the Skip Barber Racing School. It’s a school that teaches kids the racing business, and it allowed him to race in as many races as possible. You have to pay your dues in racing, just like you do in the rodeo and music businesses. Shelby raced in the Southern and the Western series. He drove eight to nine races a day for three days every weekend. I gave him my airline miles and hotel points from years of touring, and he flew on Southwest and stayed in the cheapest motels to make the most of it. Funny part was, he was too young to rent a car, so he had to get a taxi or bum a ride to the track.
Ms. McEntire with her son, Shelby, at the race car track. (Courtesy of Reba McEntire)
Shelby could have followed his daddy’s, Narvel Blackstock’s, footsteps into music management, but he chose to chart his own course. He’s now into real estate and developing property. You don’t think your kids listen to half of what you tell them, but Shelby did. I’m so proud of him. He’s kind and confident and is building a life that he’s proud of and that makes him happy. And he still wants me to be a big part of that. I am so grateful.
Most of what you hope for in this life takes time and some old-fashioned stick-to-itiveness. None of us in the McEntire family were overnight successes. From generation to generation, we just keep learning, dreaming, and working hard.
One thing I’m sure of: Good things won’t come if you give up and go home.
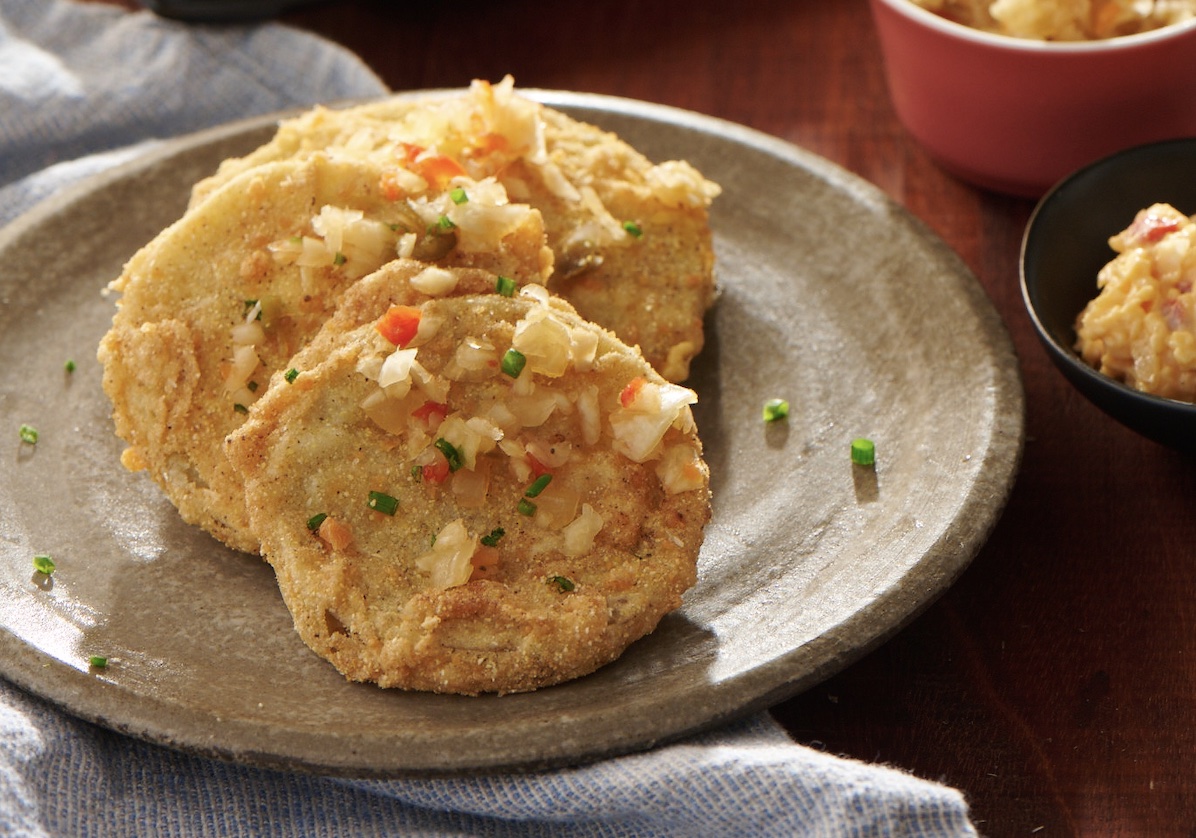
We top burgers at Reba’s Place with these crisp, warm, traditional Southern delights. But I like them alongside a big ol’ bowl of pinto beans and cornbread as well.
Prep Time: 20 minutes
Cook Time: 20 minutes
Makes 4 to 6 servings
1 quart peanut oil (or vegetable oil), for frying
4 large green tomatoes (very firm), sliced 1/2-inch thick
1 teaspoon kosher salt, divided
1 cup all-purpose flour, divided
1/2 teaspoon freshly ground black pepper, divided
2 egg whites
1 tablespoon water
1/2 cup masa harina (also called “corn masa” or “corn flour”)
1/2 cup fine yellow cornmeal
1/2 cup grated Parmesan cheese
1 tablespoon Cajun seasoning, divided
1/2 teaspoon granulated garlic
1/2 teaspoon granulated onion
1/2 teaspoon celery salt
1/2 cup Reba’s Place Pimento Cheese, for serving
1/2 cup spicy chow chow relish, for serving
2 chives, finely chopped, for garnish
Attach a thermometer to the side of a large Dutch oven and add the peanut oil. Heat the oil to 350°F and maintain the temperature within a range of 25°F. Line two baking sheets with parchment paper. Set a cooling rack on top of a third baking sheet and place it next to the Dutch oven.
While oil is preheating, arrange the tomato slices in a single layer on a cutting board and sprinkle with 1/2 teaspoon of salt.
Place 1/2 cup of flour, 1/2 teaspoon of salt, and 1/4 teaspoon of pepper in a shallow bowl. Whisk to combine. In a second bowl, whisk together the egg whites and water until lightly frothy. Place the remaining 1/2 cup of flour, masa harina, cornmeal, Parmesan, 2 teaspoons of Cajun seasoning, garlic, onion, celery salt, and remaining 1/4 teaspoon of pepper in a third shallow bowl. Whisk to combine.
Pat the tomatoes dry with a few sheets of paper towels. Dredge a slice in the flour mixture, flipping to coat both sides. Submerge the slice in the egg whites. Allow the excess to drip back into the bowl, then transfer to the cornmeal mixture. Press gently to adhere the breading and flip to coat both sides. Transfer the tomato slice to the parchment-lined baking sheet. Repeat with the remaining slices.
Fry the tomato slices 4 at a time until deeply golden brown, about 2 minutes on each side. Carefully lift them from the oil using a deep fryer skimmer and transfer to the cooling rack. Sprinkle immediately with a bit of Cajun seasoning. Repeat with the remaining tomato slices.
To serve, arrange the fried green tomatoes on a serving plate and spoon pimento cheese and spicy chow chow relish over the top. Sprinkle with chopped chives and serve immediately.
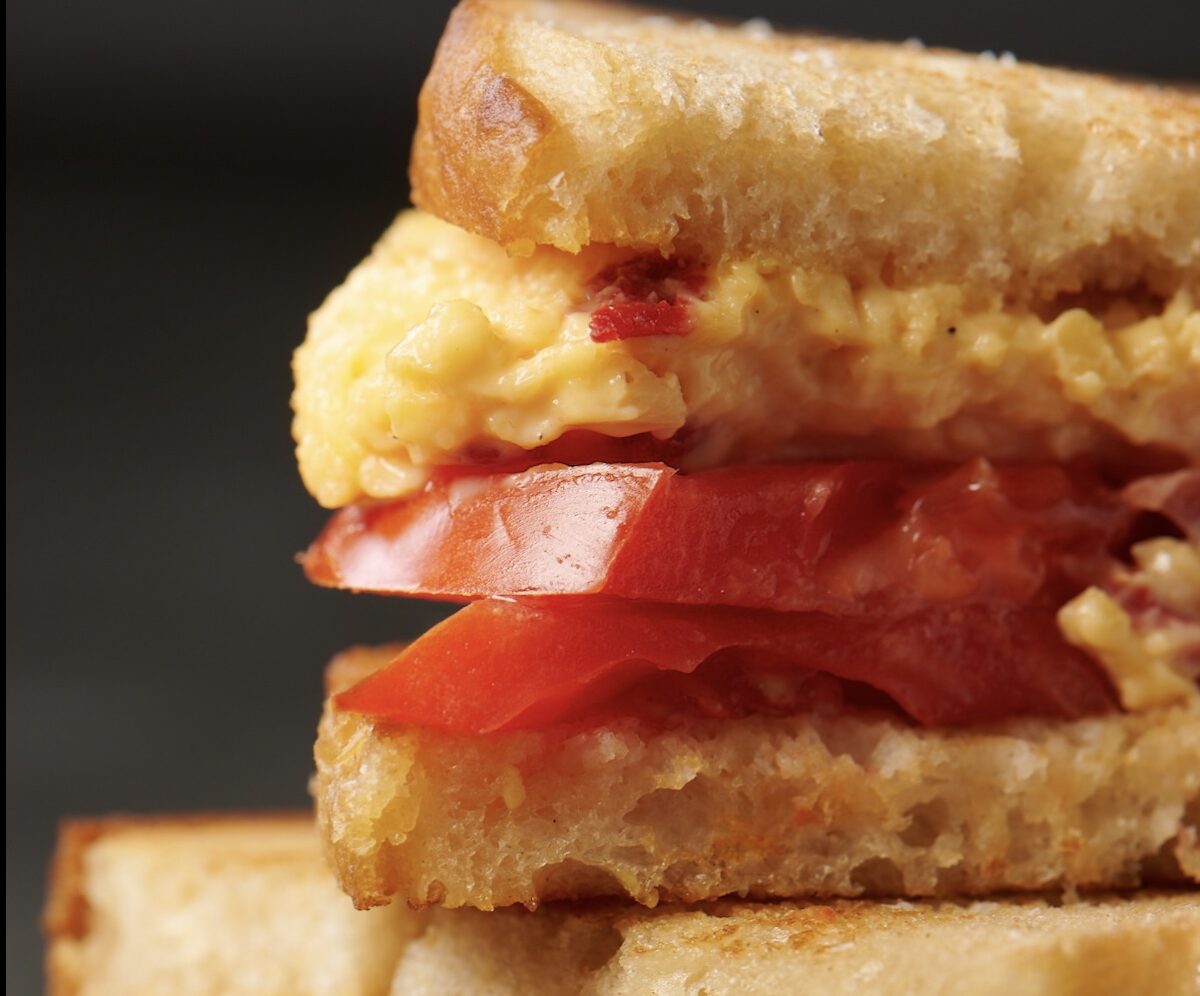
It would tickle Mama to know that she inspired a sandwich in my restaurant. I love that her tradition lives on. And with fresh-made pimento cheese, it’s even more special. At the restaurant, we prefer to grate blocks of cheese to avoid the additives used to prevent clumping in pre-shredded cheese. For this recipe, it’s especially important.
Prep Time: 20 minutes
Inactive Time: 1 hour
Makes 1 sandwich
2 tablespoons salted butter, softened
2 slices sourdough bread
1 tablespoon Miracle Whip
1/2 cup Reba’s Place Pimento Cheese (recipe follows)
2 thick slices heirloom or beefsteak tomato
Set a skillet or griddle over medium heat. Spread the butter onto one side of each slice of bread.
Grill the bread, buttered side down, until golden brown and crispy. Flip the bread to lightly toast the dry side, then transfer to a cutting board.
Allow the bread to cool for 1 minute, then spread the dry, toasted sides with Miracle Whip. Place the Reba’s Place Pimento Cheese onto one of the slices and gently spread it into an even layer. Top with the tomato slices, and close with the other slice of bread.
Cut the sandwich in half and serve.
Reba’s Place Pimento Cheese
Makes about 3 cups of cheese for 6 sandwiches
4 ounces cream cheese, softened (1/2 bar)
1/2 cup mayonnaise (I love Duke’s)
1 tablespoon Dijon mustard
1 teaspoon Worcestershire sauce
1 teaspoon hot sauce (like Crystal)
1 teaspoon paprika
1/2 teaspoon granulated garlic
1/2 teaspoon granulated onion
1 cup (about 4 ounces) sharp cheddar cheese, shredded
1 cup (about 4 ounces) pepper jack cheese, shredded
1 (4-ounce) jar diced pimento peppers, drained
Kosher salt, to taste
Freshly ground black pepper, to taste
Place the cream cheese, mayonnaise, Dijon, Worcestershire, hot sauce, paprika, garlic, and onion in a large mixing bowl. Beat with a hand mixer on medium speed until smooth and creamy, about 3 minutes.
Fold in the shredded cheeses and pimentos with a rubber spatula until combined. Add salt and pepper to taste.
Cover the bowl with plastic wrap and refrigerate for at least 1 hour before serving. Keep refrigerated in an airtight container for up to 1 week.
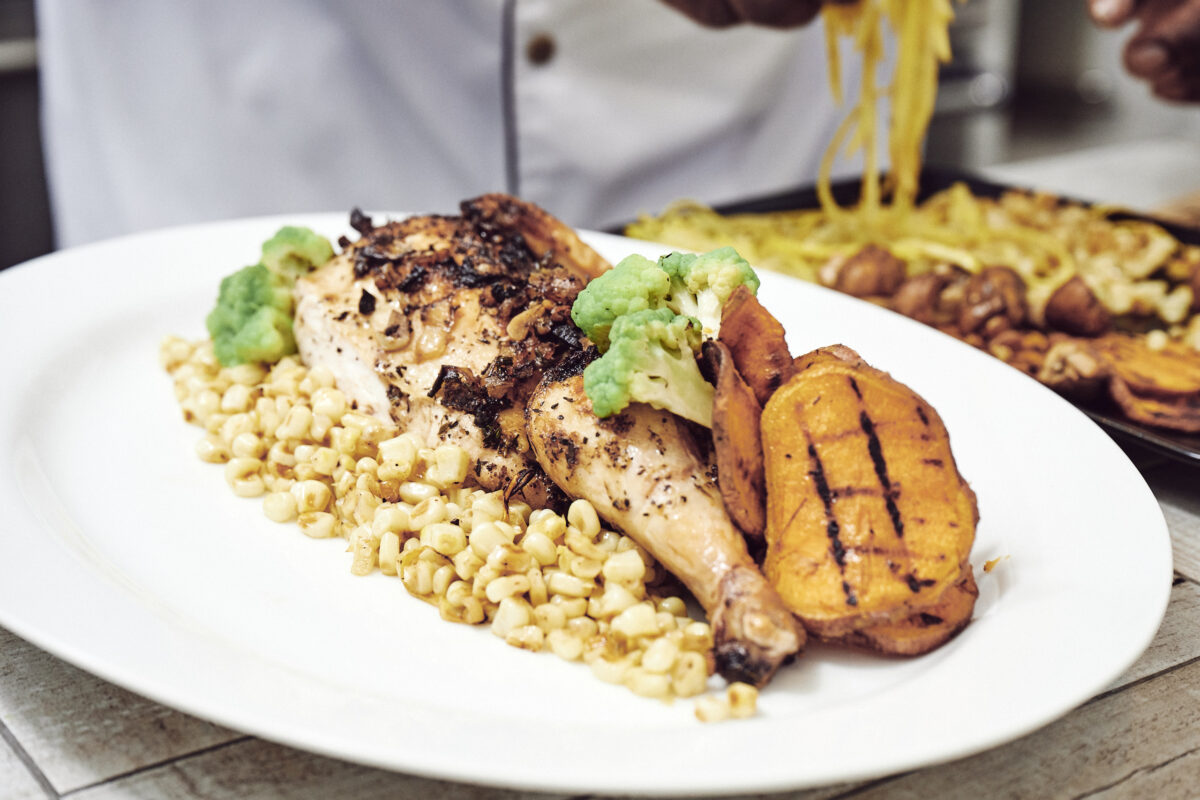
Chef Andre Rush’s favorite thing to cook for himself is chicken, he says, because “I can literally do it 101 ways.” Here’s one of them: spatchcocked, or butterflied, and grilled. The method calls for flattening the whole bird, which cuts the cooking time in half, helps the white and dark meat cook evenly, and ensures every inch of the skin becomes golden brown and crispy.
Serves 4
1 broiler/fryer chicken (3 to 4 pounds)
Olive oil
Thyme
Minced garlic
Salt and pepper
Preheat the grill with zones for direct heat and indirect heat.
Place the whole chicken on a cutting board with the breast-side down. Locate the backbone along the center of the chicken. Starting at the tail, use a sharp pair of kitchen shears to cut alongside the spine. Try to cut as close as you can to the backbone so you don’t risk cutting any other joints. You may feel a little resistance as you cut through certain rib bones of the bird; in this case, press down on the shears with both hands.
Rotate the chicken 180° so the uncut side is closer to your dominant hand. Cut along the bone again and remove the backbone from the chicken.
Flip the bird over so that the breast side is facing up. With two hands (and a little bit of hulk-strength), press down firmly on the center of the bird until you hear a crack. This is the wishbone breaking. Voila! Your bird is successfully spatchcocked.
Rub the chicken with olive oil. Season with thyme, garlic, and pepper (salt optional) to taste.
Place the chicken skin-side down over direct heat. Cover and let cook for 10 to 15 minutes. Take a peek. The bird should look nicely charred. However, keep a careful eye on the grill; any fat that drips from the bird can cause the fire to flare up.
Next, turn the chicken over (skin-side up) and move it over to indirect heat. Cover and grill for about 30 minutes longer.
Use a thermometer to check if the chicken is ready. The thigh should read between 170 and 175°F. Using a pair of long-handled tongs, carefully remove the bird from the grill. Be sure not to pierce the skin. Let the bird rest for at least 10 minutes before serving; the chicken needs to sit in order for the juices to lock into the meat. Don’t fret: Even after 10 minutes, it’ll still be plenty warm enough to serve!
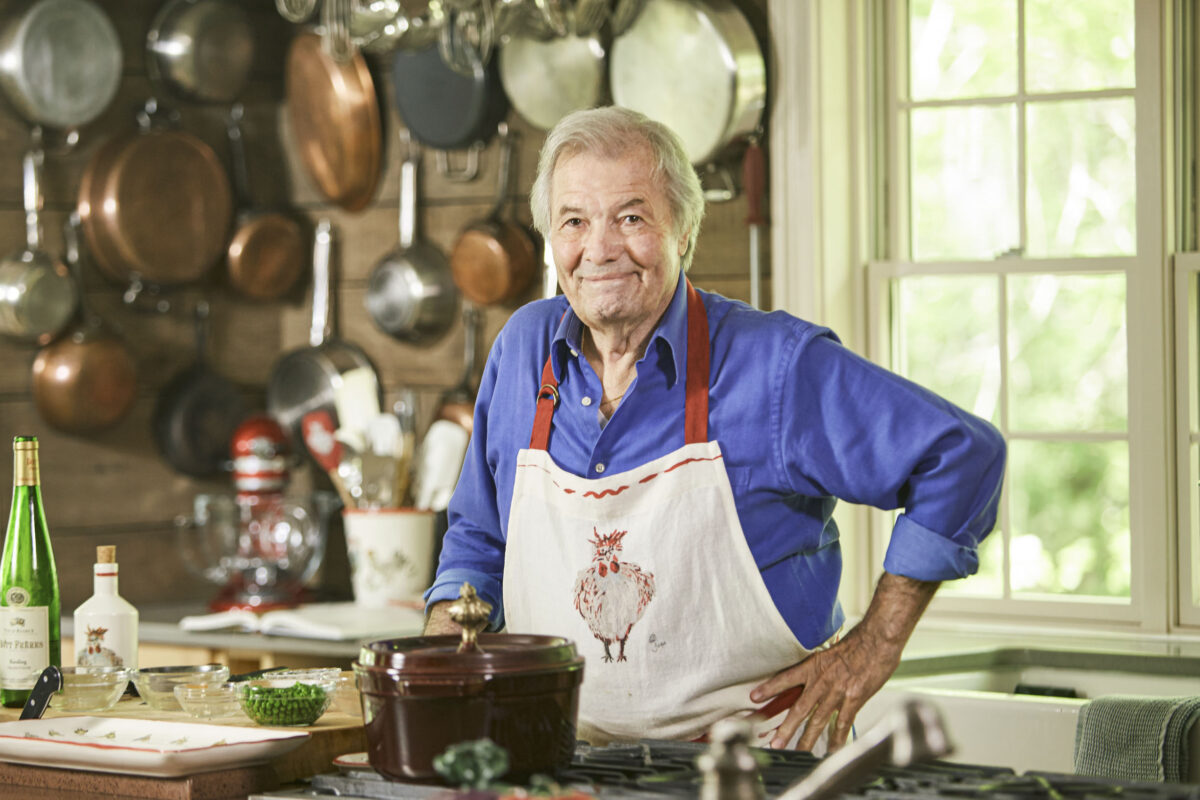
Jacques Pépin, 86, calls himself a
“quintessential American chef.” (Courtesy of Jacques Pépin)
If you’re inviting Jacques Pépin to Thanksgiving dinner, you’d better have turkey on the table.
How about something else this year, you might venture—a nice roast chicken, or a glazed ham?
“I don’t want to do something else,” the chef would kindly, but firmly, inform you. “I want to have a turkey for Thanksgiving; I want to do Brussels sprouts and sweet potato and an apple tart.” The bird has been a non-negotiable since Pépin’s first Thanksgiving in 1959, two months after he arrived in America as an eager young chef with experience working in Paris’s most prestigious kitchens. He fell in love with the spirit of the holiday—“There is no political affiliation, no religious affiliation; it’s just people getting together, enjoying food, wine, and company,” he said—and with America itself.
“I only came to stay a year, maybe two years, to learn the language, and go back to France. I loved it and never went back—except for vacation.” Since then, the transplanted Frenchman has taught millions of Americans how to cook.
He’s the author of 32 cookbooks, the most recent being “Art of the Chicken,” published in September 2022, and a longtime host of PBS cooking shows—including one with his dear friend and fellow pioneering TV chef, Julia Child. Since the beginning of the pandemic, he’s continued to offer confidence and comfort to anxious, sheltering-at-home viewers with the award-winning “Jacques Pépin: Cooking at Home” web series, in 280-and-counting 2- to 6-minute videos posted to Instagram and Facebook with the help of his daughter, Claudine.
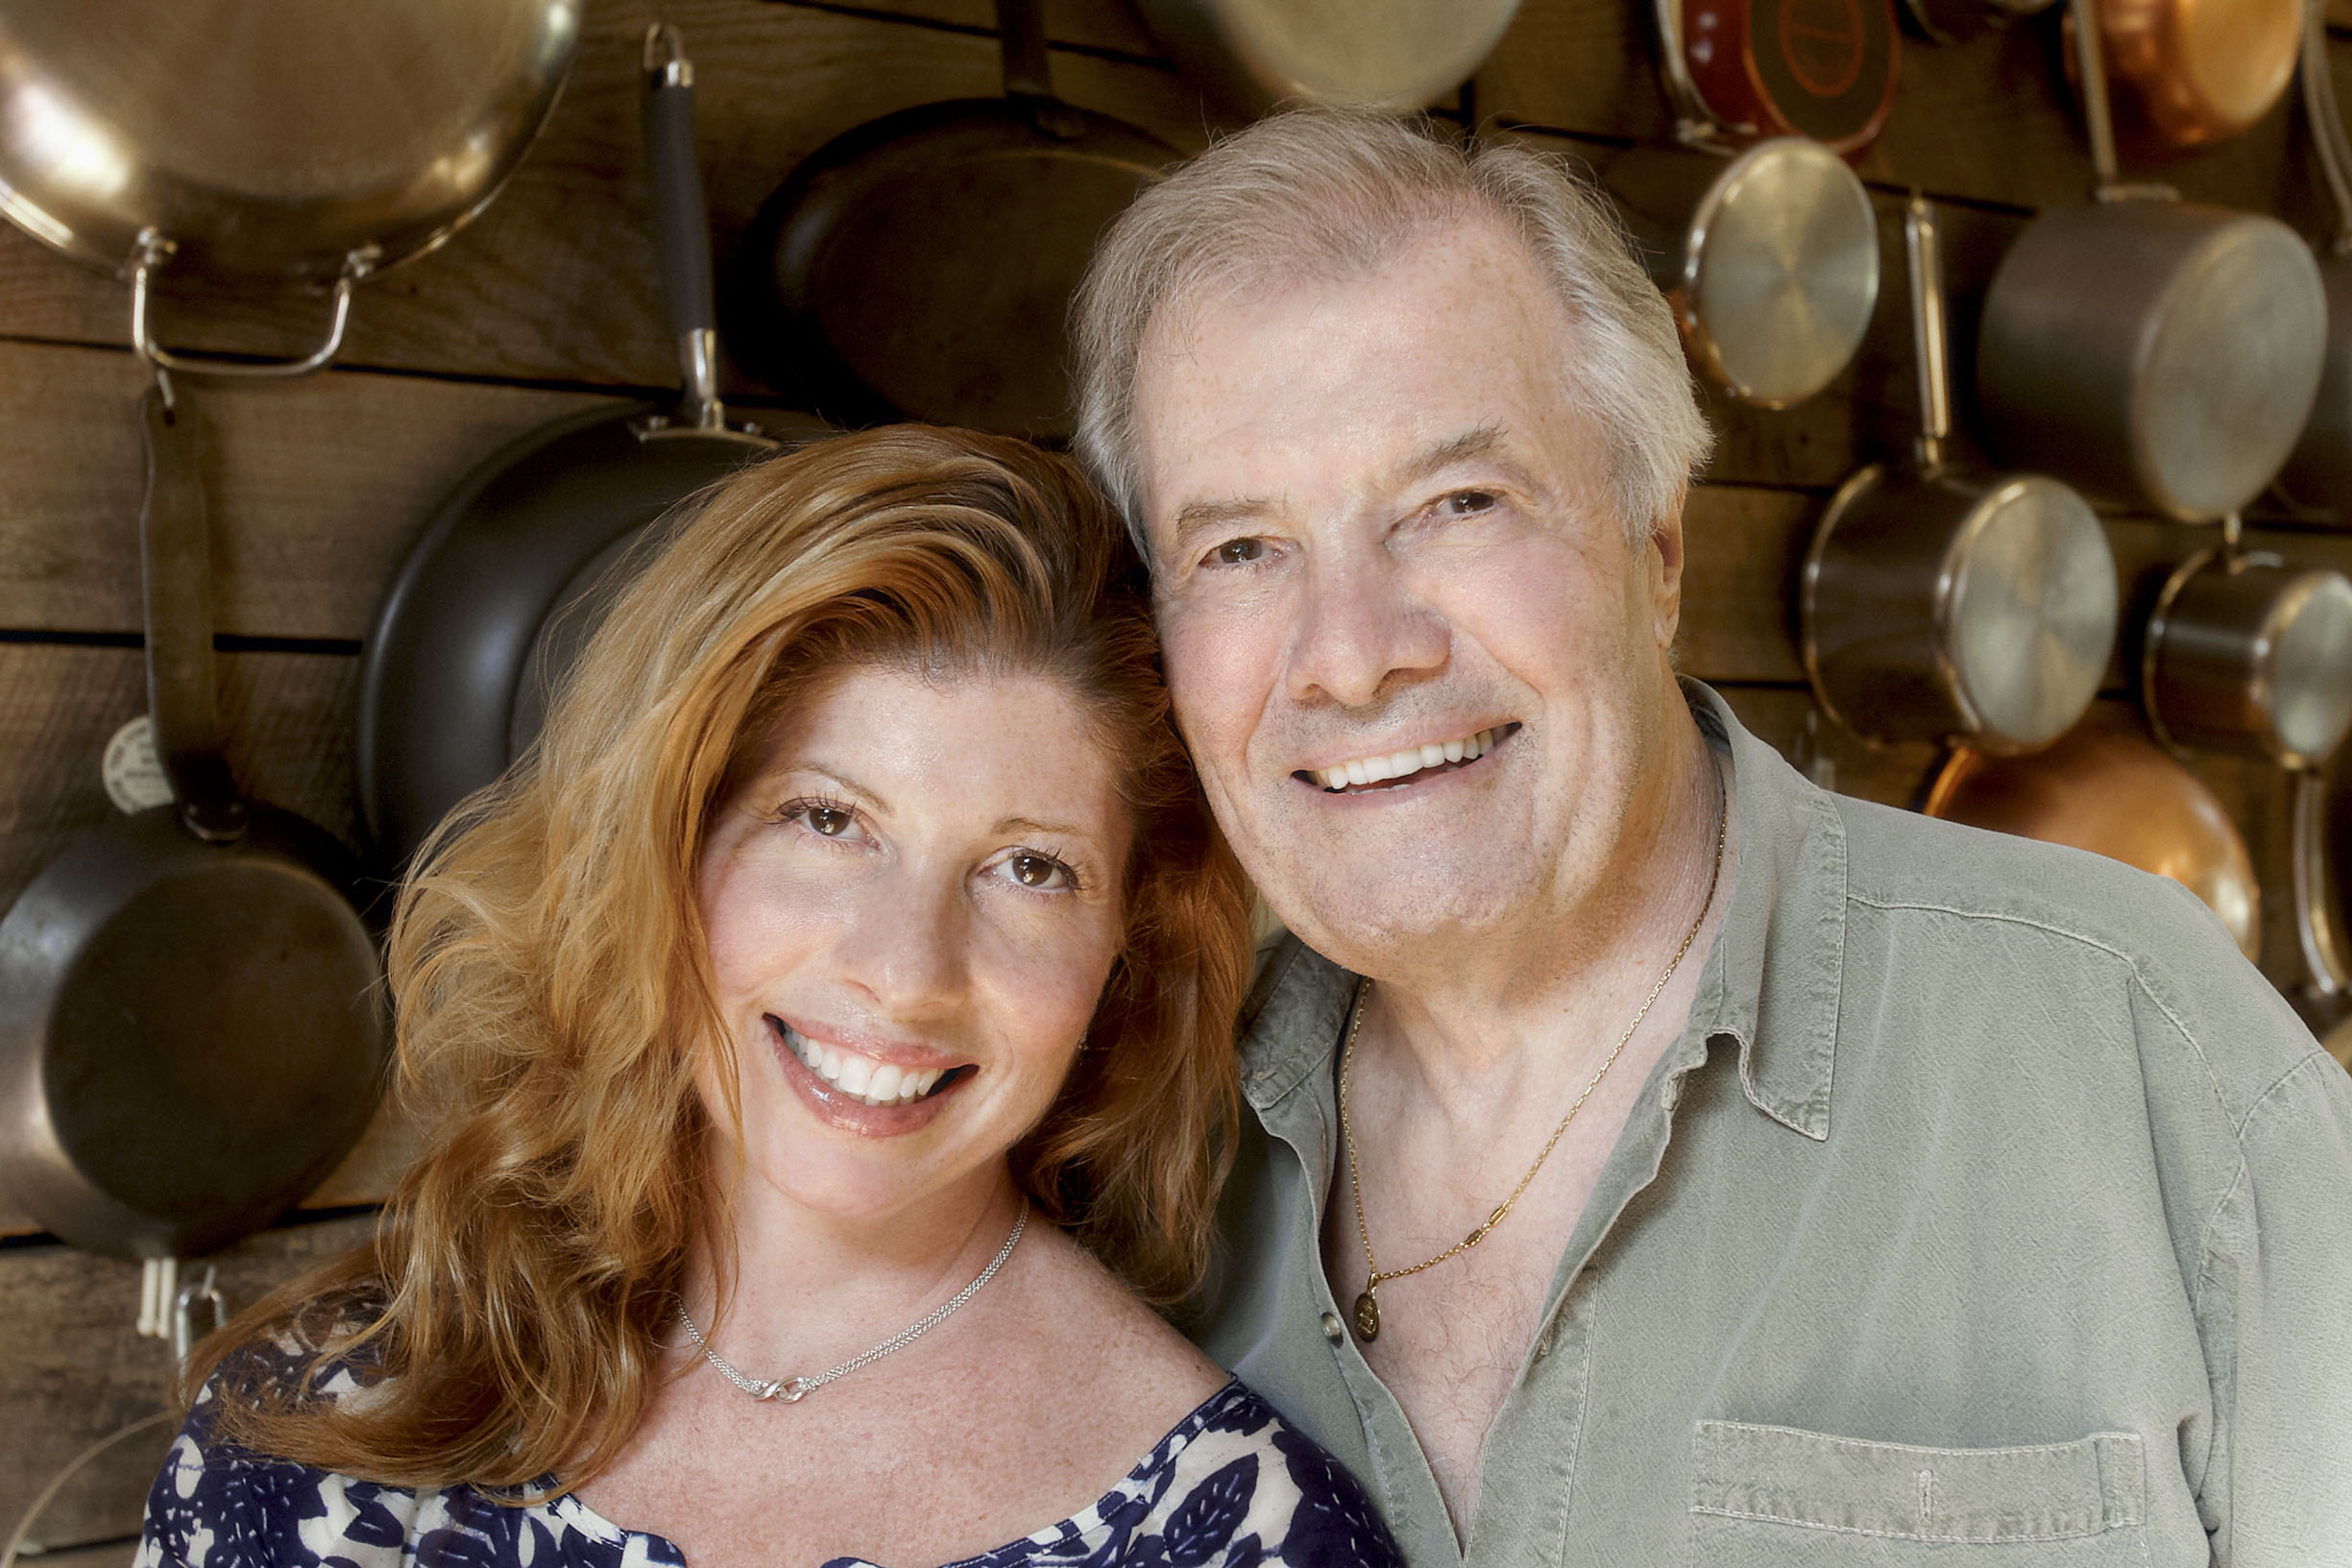
Pépin with his daughter, Claudine, who often appeared in his cooking shows and now works with him on various projects for the Jacques Pépin Foundation. (Courtesy of Jacques Pépin)
At nearly 87, Pépin still chops and sautés with an efficient, effortless fluency honed over decades of experience. His narration is just as easy and precise, deftly doling out instruction as he breaks down a whole chicken or shimmies a perfectly fluffed French omelet onto a plate.
And after all these years, he still cooks with an unmistakable French accent—though he’d argue that it doesn’t extend so much to the food. “Very often, people consider me the quintessential French chef,” Pépin said from his home in Madison, Connecticut, where he’s lived since 1975.
“And then you open one of my books, and there on page 32, you have a black bean soup with banana and cilantro on top.” Pépin’s late wife, Gloria, was half Puerto Rican and half Cuban. “Then you have a Kentucky fried chicken from Howard Johnson. Then you have a lobster roll from Connecticut. So I mean,” he said, smiling, “I’m probably the quintessential American chef now, after all these years.”
Dreaming of America
Born in Bourg-en-Bresse, France, a small town northwest of Lyon, Pépin grew up helping out in his parents’ restaurant, Le Pélican. At age 13, he left school to begin a culinary apprenticeship at the Grand Hôtel de L’Europe. By his early 20s, he’d worked his way up Paris’s culinary ladder, and, during his military service, he served as personal chef to three French heads of state, including Charles de Gaulle.
But he set his sights on farther shores.
“America was always kind of the Golden Fleece for me,” Pépin said. “Most people who come to America come here for economic reasons, to have a better life maybe, or political reasons, or religious reasons. I didn’t really have any of that. I had a very good job in Paris. My parents had a restaurant. I was fine. But I wanted to come to America.”
At the age of 23, he made good on his wish. He arrived in New York in September 1959. He didn’t mean to stay for long, but life changed his plans.
Within 48 hours of arrival, he landed a job cooking under Pierre Franey at Le Pavillon, the pinnacle of haute cuisine in America at the time, and he soon befriended the “who’s who” of the burgeoning food world—chef James Beard, New York Times food editor Craig Claiborne, and, of course, Julia Child.
“People were extremely welcoming,” Pépin recalled, and he saw “the possibility of doing basically anything” in his adopted country.
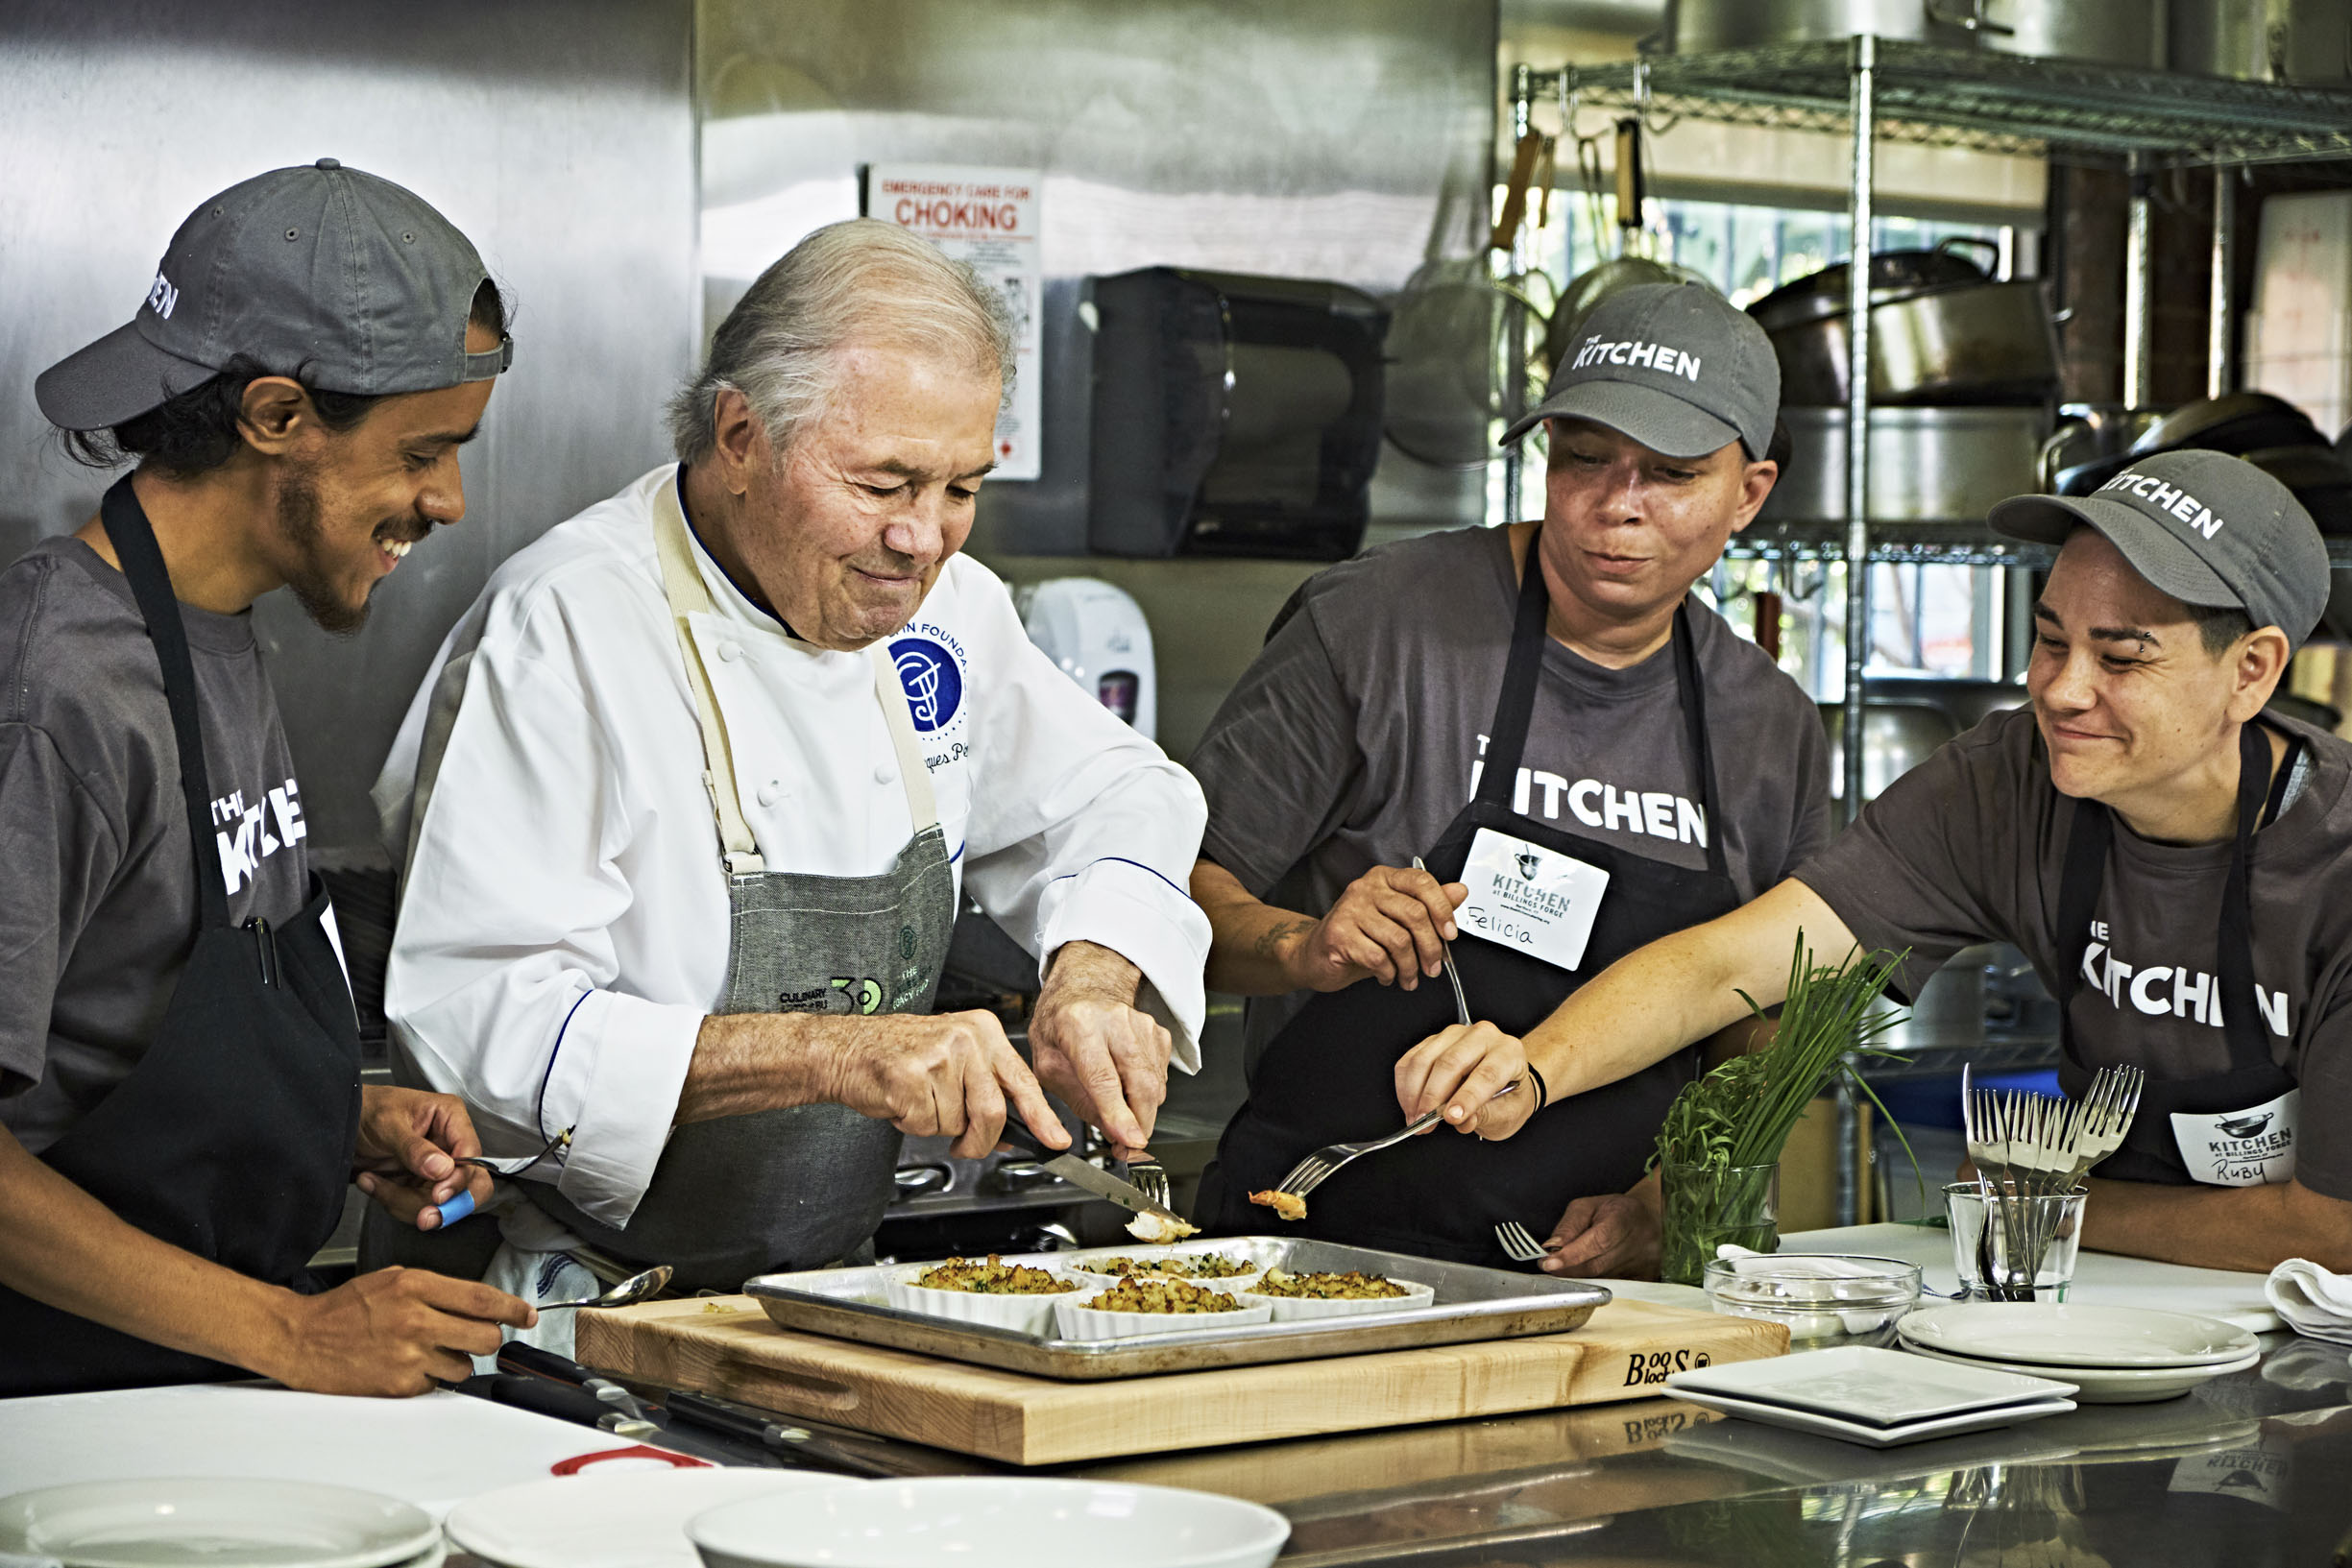
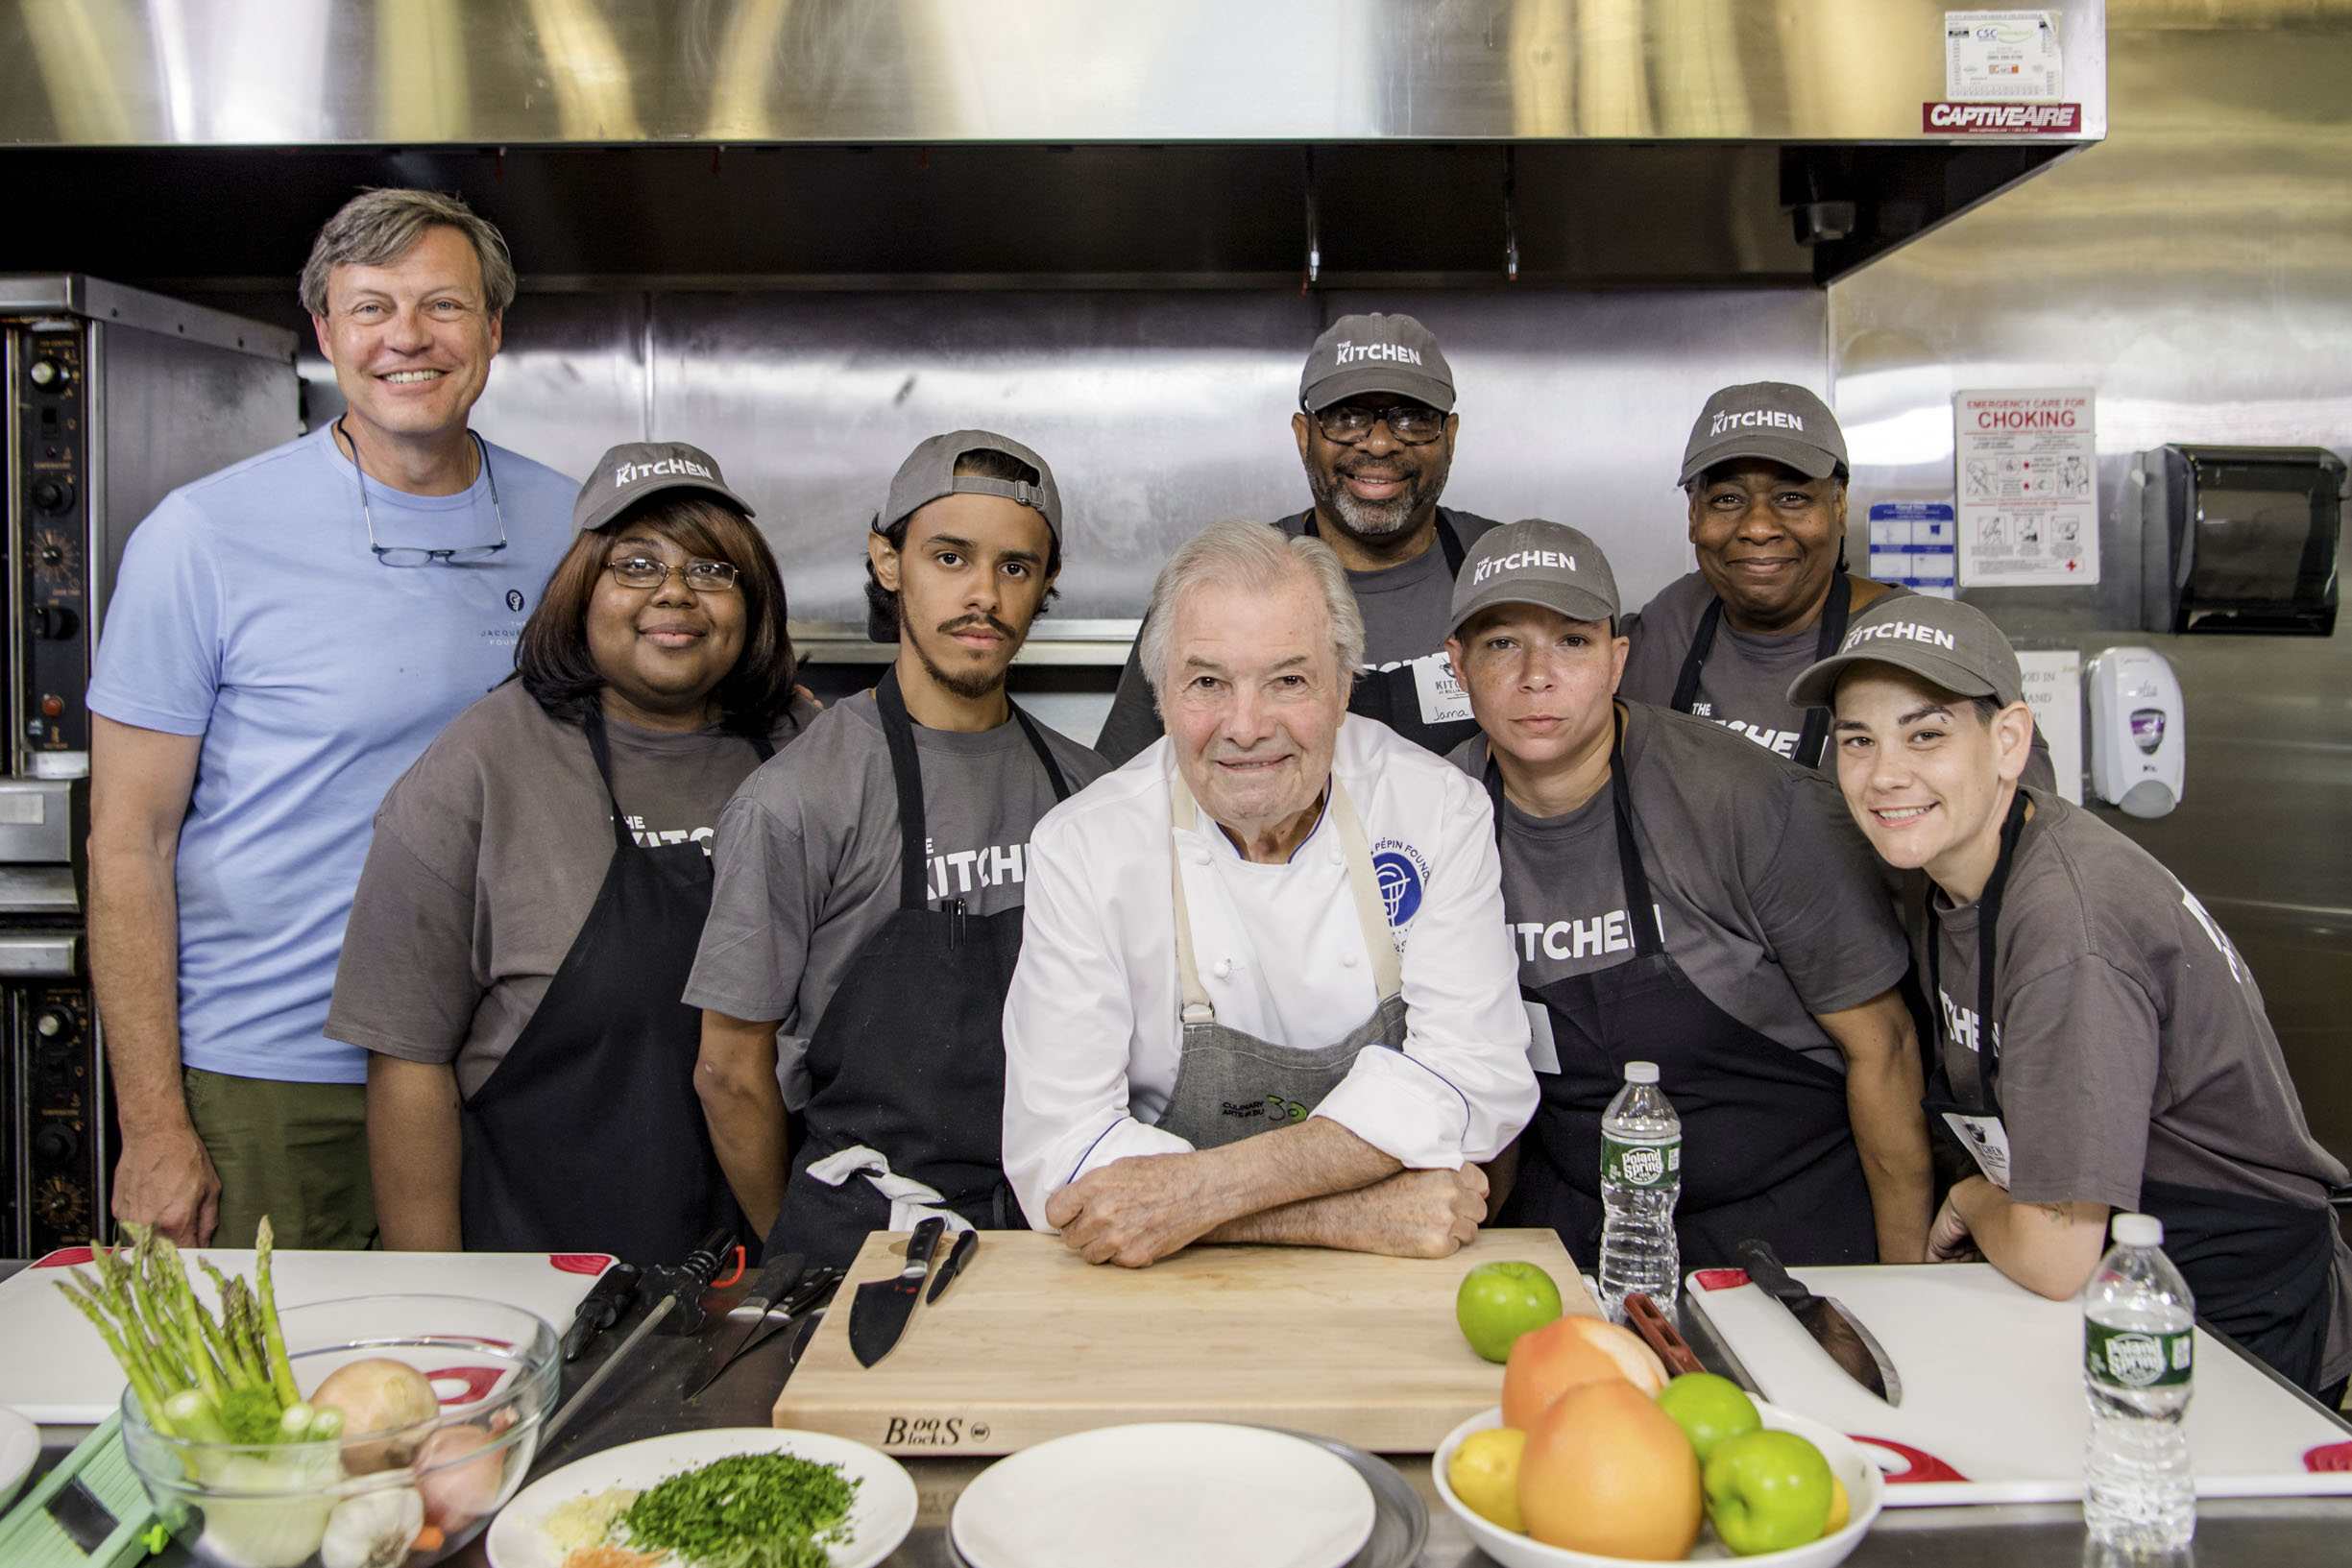
Pépin teaches a cooking class at the Billings Forge Community Works in Hartford, Conn., in 2019, as part of the Jacques Pépin Foundation’s work with culinary training programs across the country. (Courtesy of Jacques Pépin)
Spreading His Wings
Pépin took that possibility and ran with it. After less than a year of cooking at Le Pavillon, he was courted by the Kennedy family—regulars at the restaurant—to become the White House chef. He turned down the offer—he’d already cooked for presidents, after all—to instead take a job in a wholly new world: as director of research and development at Howard Johnson, then the country’s most successful restaurant chain, developing new recipes and pioneering high-quality frozen foods.
“That was a totally American environment, working only with American chefs and American eating habits,” he said. “I learned about marketing, mass production, the chemistry of food, all kinds of things I didn’t really know as a French chef.” When he wasn’t in the kitchen, ever the eager student, he continued his studies at Columbia University—eventually earning a master’s degree in French literature.
It was during his time at Howard Johnson that Pépin started writing down recipes, unwittingly setting a foundation for his future ventures. “At a regular restaurant, you learn by osmosis … and you duplicate what you do,” he said. “That was the way I worked in France for over 10 years; I never wrote a recipe, I didn’t have a cookbook. At Howard Johnson, of course, it had to be organized.”
Developing a chicken pot pie, for instance, started with a recipe using 3 chickens in the test kitchen, then scaled up to 20 chickens. “Eventually, we did 3,000 pounds of chicken in a thousand-gallon kettle pot. All of that has to be organized exactly in a recipe.” That experience with high-volume production proved crucial, he said, when he left Howard Johnson in 1970 and opened his own restaurant, La Potagerie, serving soups to the busy Manhattan working crowd, and later managed food operations for the newly opened World Trade Center.
Sharing His Knowledge
In 1974, Pépin suffered a serious car accident. After a long recovery, he left the restaurant kitchen world to turn his focus to writing and teaching. He taught at Boston University, where he and Child founded the culinary arts certificate program, and he later became Dean of Special Programs at the French Culinary Institute in New York (since renamed the International Culinary Center).
Pépin further extended his teaching legacy through the Jacques Pépin Foundation (JPF), the nonprofit he launched with his daughter, Claudine, and her husband, Rollie Wesen, in 2016.
As Wesen was assembling Pépin’s lifetime of books, videos, and other materials, Wesen asked, “‘Who do you think we should teach with these things now?’” Pépin recalled. “And I thought, maybe we should teach people who have been a bit disenfranchised by life—people who’ve come out of jail or former drug addicts or homeless people or veterans.”
(Courtesy of Jacques Pépin)
Now, the foundation supports culinary training programs for adults with high barriers to employment across the country, through offering books, videos, and grants. In 2021, its grant awards totaled $167,500.
These programs take students who might be 40, 50 years old, Pépin said, “and we want to teach them the basics of cooking.” With that foundation set, “you can join a kitchen, start doing basic work, start going up by yourself, and get to redo your life and be proud of what you do and make a living out of it.”
When JPF’s fundraising decreased during the pandemic, Wesen asked acclaimed chefs from across the country to film cooking videos in their own homes, as Pépin was doing. “He asked like 50 chefs, from Daniel Boulud, to Jose Andrés, to Martha Stewart—no one said no,” Pépin said. “Then he asked 50 more, and then he asked 50 more.” The resulting video recipe series, “Cook With Jacques Pépin and Friends,” is available to JPF donors. “Chefs are very generous,” Pépin said. “It’s part of who we are, to give away.”
Just the Essentials
Despite his age—“I am not a young man anymore,” he said with a laugh—the chef has hardly slowed down. “The secret is to keep busy and do things,” Pépin said. “If I don’t have anything to do, I kind of feel depressed.”
Of course, some things have changed with age. “I certainly don’t cook the way now as I did when I was 25 years old. When you’re younger, you tend to add to the dish, add more, make it fancier. At my age, you kind of take away, take away, take away from the plate, to be left with something more essential, something without too much embellishment.
“If I have a great tomato from the garden, have great olive oil and a bit of salt over the top, I don’t want more embellishment. This is it.”
What else has remained essential? The techniques, Pépin said, the foundational skills behind everything he cooks and teaches—and, certainly, the Thanksgiving turkey. He still insists on it every year, whether he cooks it himself or with his daughter at her Rhode Island home where he often goes for the holiday dinner. And then, more importantly, there are the people—the heart of every meal, the reason for cooking. “Being with your family and your friends together, you remember that more than the food itself,” Pépin said.
As a chef, he said, “What you do is, you feed people. You give pleasure to people by doing what you do. Even if you don’t become famous and all that, it’s a great way of spending your life.”
This article was originally published in American Essence magazine.
Visitors can explore the Bee Bluff via a canoe on Steel Creek. (Tim Ernst)
Winding down the mountain and through the rugged landscape of dense forest scattered with enormous rock formations, the road flattens out at the tiny, outdoor town of Ponca, Arkansas. With a population of fewer than 120 people, a post office, and a couple of wilderness outfitting stores, Ponca is the middle of nature-nowhere for the Midwest. With stunningly beautiful rustic surroundings and a full array of outdoor adventure opportunities, this northern Arkansas area is perhaps one of America’s best-kept secrets.
Ponca rests on the Buffalo River, the first river in America to be designated a National River. Commencing deep in the highest elevations of the Boston Mountains, the river’s over 150 miles of winding water carve a path eastward through the wilds and wonders of northern Arkansas. Its uppermost section boasts such steep terrain, sharp ridges, crags, and crevices that roughly the first 16 miles are further designated as wild, and the upstream gem is officially known as the Buffalo National Wild and Scenic River.
Show up at the Ponca Low-Water Bridge on any spring weekend morning, and you’re likely to see groups of people wearing orange life vests, paddles in hand, shoving off from shore in canoes bearing outfitters’ logos. Across the bridge lies a short trail to a historic cabin built in 1882, as well as a trailhead leading to a scenic, full-day, 12-mile hike upstream to Boxley—a small community in times past but now a river put-in and trailhead itself. Beneath this hiking stretch, the valley extending up to the ridgetops is a favorite location for Arkansas’s only herd of wild elk. Catching sight of them grazing before a backdrop of sloping terrain near the river’s emerald green waters resembles a scene from somewhere out West.
History
The Buffalo National River was established in 1972; its founding was the result of a long, contentious battle that began in 1960 when the U.S. Army Corps of Engineers proposed the construction of two hydroelectric dams that would have destroyed the river and buried its beauties. Under the leadership of Dr. Neil Compton, area residents and outdoor enthusiasts united to fight the proposal, forming a coalition known as the Ozark Society. Their decade of unwavering commitment to the river’s preservation ultimately saved the Buffalo and the treasured wilderness surrounding it.
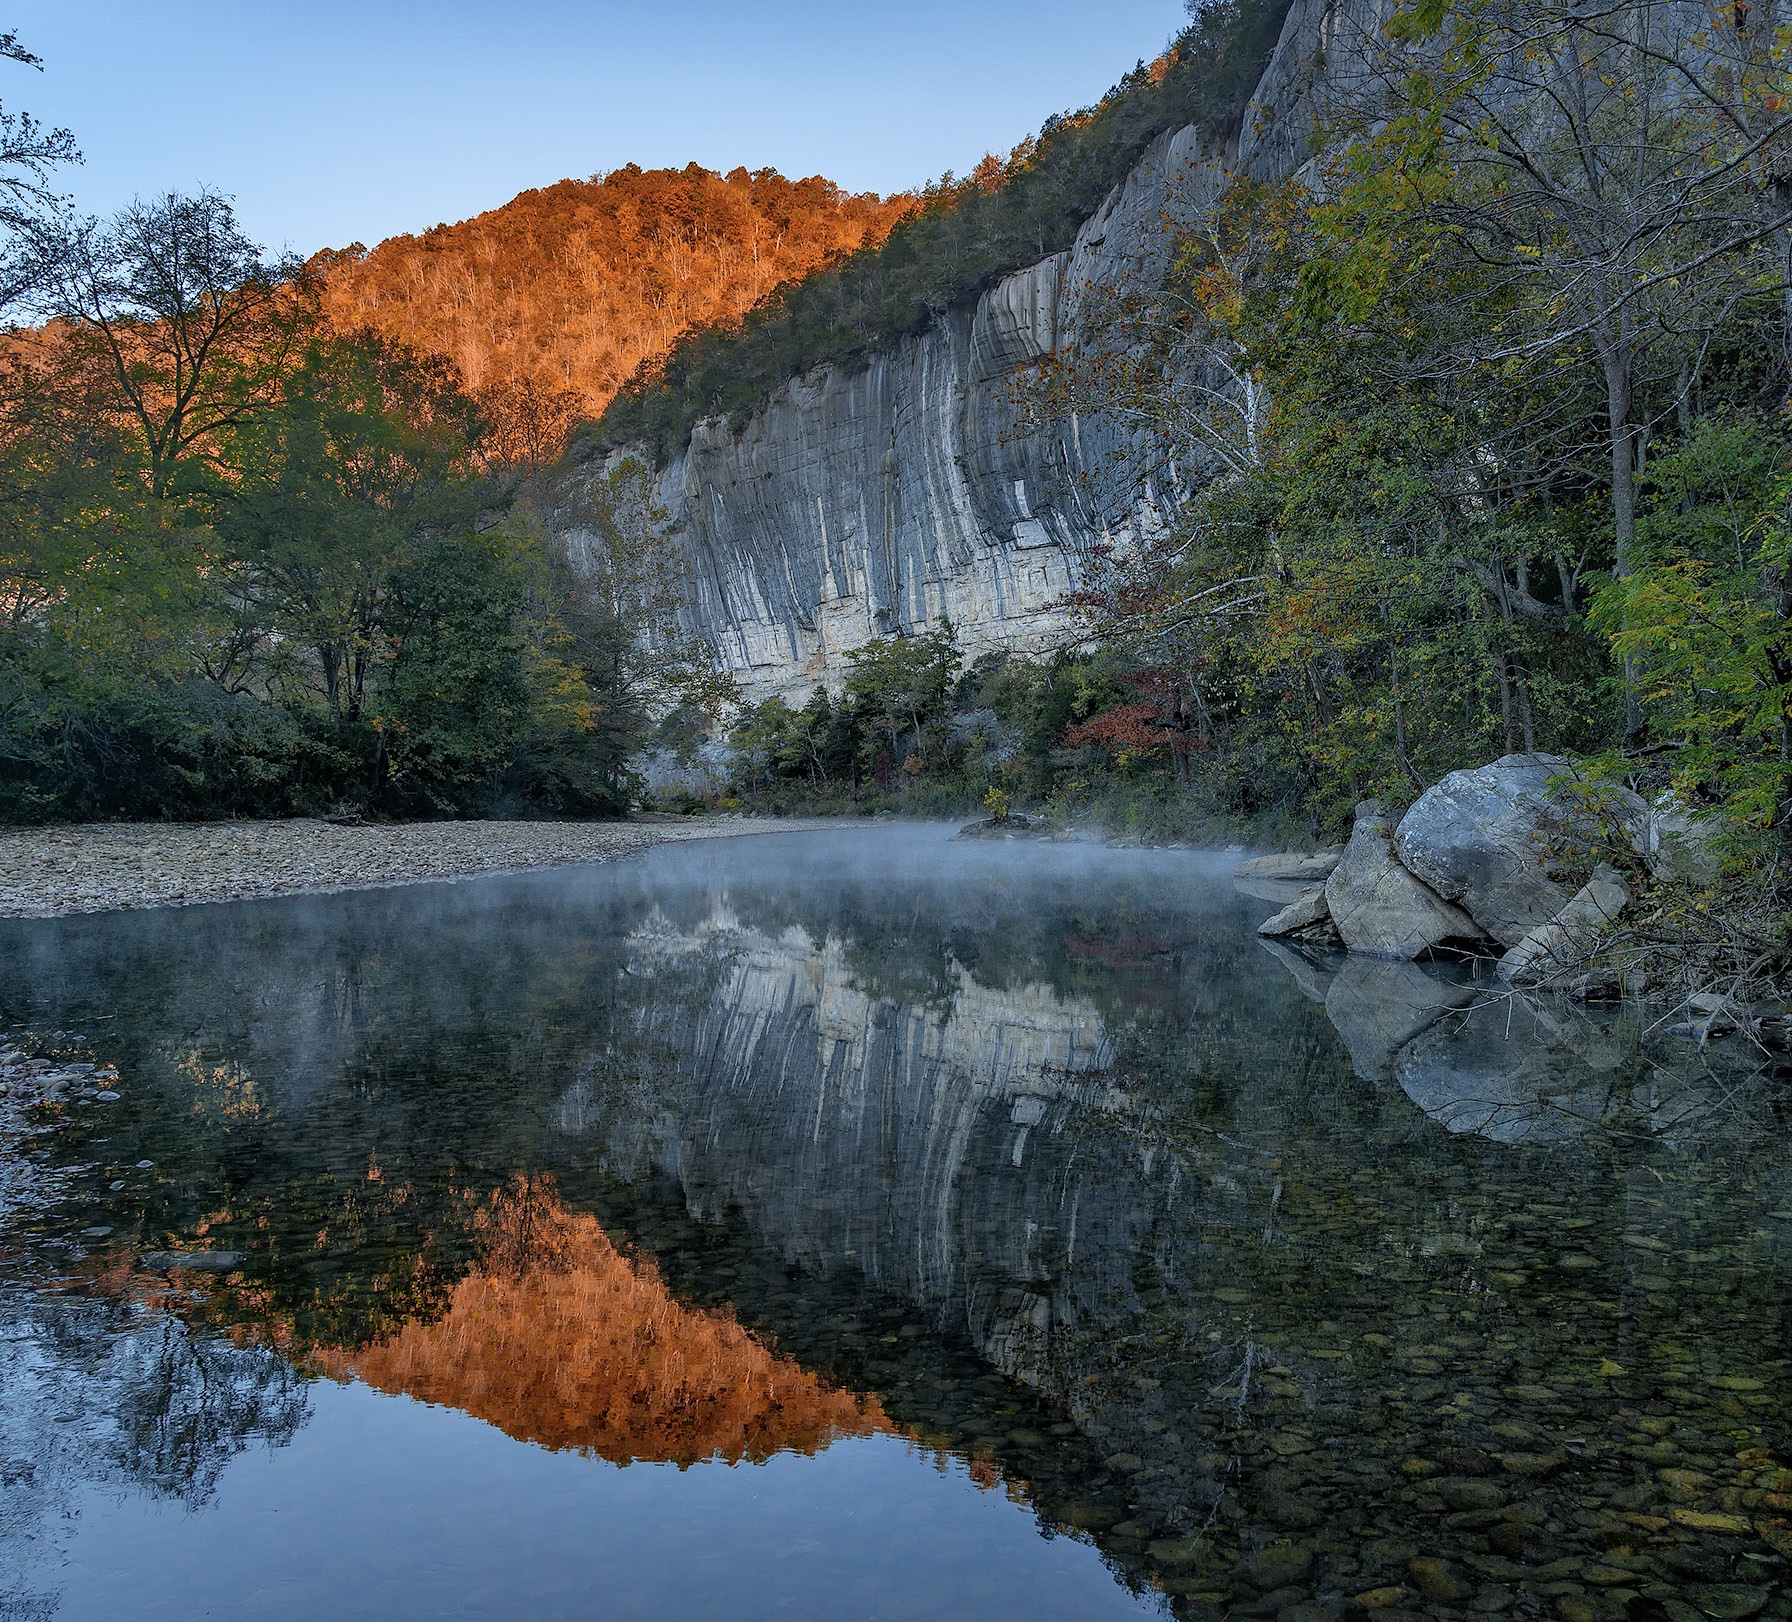
The Roark Bluff at dawn, one of the most stunning sites at Buffalo National River. (Tim Ernst)
The year 2022 marks the 50th anniversary of the Buffalo as a nationally protected area.
One of the few remaining free-flowing rivers left in the lower half of the country, the Buffalo River itself is a sculpted work of art, with water carving around rock and winding through untouched stretches of Arkansas wilderness. Its towering, seemingly painted bluffs are striking, and the clear emerald water that runs beneath them, vibrant and pristine. The waterway is a mecca for canoeists, kayakers, fly-fishers, and riverside campers. Perhaps an even greater set of wilderness wonders, however, exists within the surrounding crags, cliffs, and creeks beyond its banks—discoveries found after setting out with a pair of hiking boots, a map, and a backpack.
Area hiking expert Tim Ernst has spent almost a lifetime unveiling some of those discoveries, carving out trails, and documenting many of the Buffalo Wilderness Area’s wonders. His journaled publications are vital to hikers and backpackers alike, as they record miles of hiking trails ranging from the frequently traveled to the obscure, the relaxing stroll to the arduous climb, and the tiny trail to the week-long expedition.
Buffalo Wilderness Area
The nearly 95,000 acres encompassing the Buffalo National River hold a network of trails and treasures that extends even farther as it connects with the surrounding 1.2 million acres of rugged Ozark National Forest. With levels of exploration ranging from novice to hard-core hiking, and opportunities for mountain biking and equestrianism as well, the undeveloped remote areas are full of treasures waiting to be discovered by outdoor enthusiasts of all levels and ages.
Hiking the Buffalo Wilderness Area is also year-round. “You can’t hike in the Rockies, the Appalachians, or the Pacific Crest in the middle of winter,” said Ernst, “but you can hike in northern Arkansas—and the Buffalo’s emerald-colored water contrasted with scenic views of grays and browns is striking.”
Just this past January, Ernst completed an end-to-end winter bushwhacking journey starting at the river’s Cave Mountain headwaters and traveling 151 miles down to the mouth at the White River. A spinal issue prevents him from carrying a pack, so he completed the two-week excursion tentless and stoveless, sleeping under bluff overhangs and traveling ultra-light. “It was one of the most fun and spectacular trips I’ve ever taken,” he said.
Day Hiking Discoveries
You don’t need to sleep under a rock in winter to see some of the best of what the Buffalo River’s wilderness areas have to offer. Although there are plenty of single-track trails for backpackers and serious trekkers, easier trails with amazing sights and abundant waterfalls are not far from the pavement (or gravel, in this case).
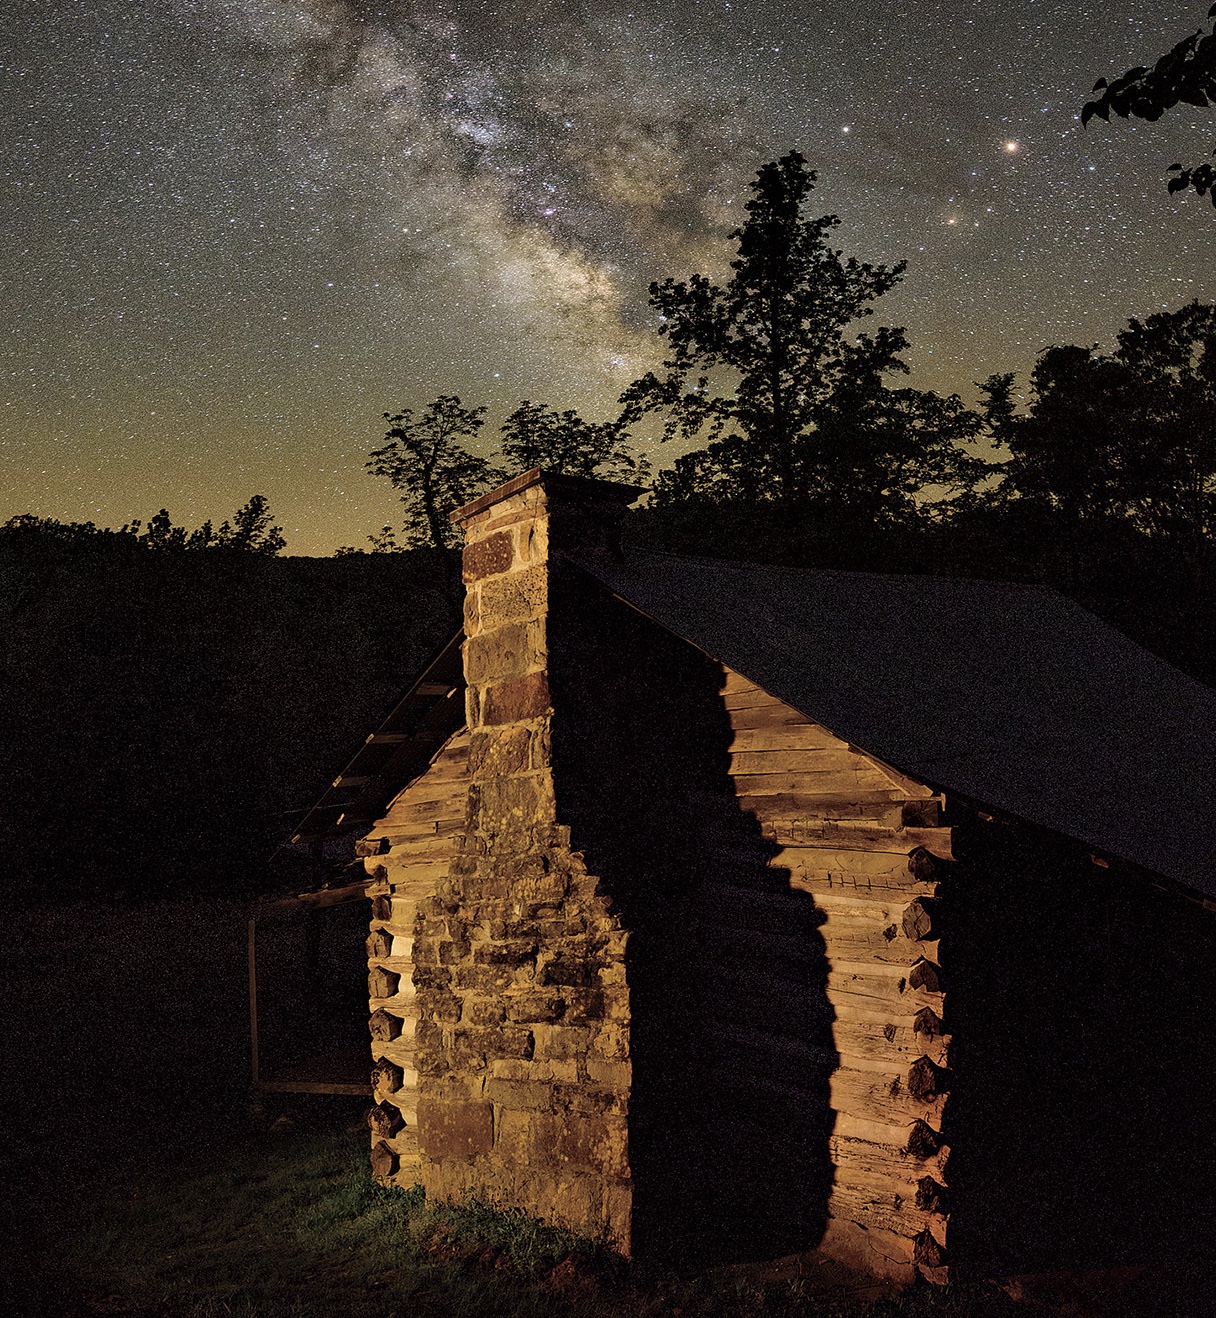
The Milky Way is visible over the historic Villines Homestead in Boxley Valley within the Buffalo National River area. (Tim Ernst)
Lost Valley is one of those signature trails, with everything from vertical walls of rock reaching upward from the valley floor, to Cob Cave—named after the many cobs of corn discovered there in 1931 when it was found to be rich in preserved native artifacts. Following Clark Creek, Lost Valley’s beauty is on display throughout the entire hike, winding through a lush forest full of waterfalls, cascades, and amazing rock formations. Packed with outdoor works of art and springtime wildflowers, the short, two-mile round trip is a scenic journey from start to finish and a small taste of the entire Buffalo River area.
Another offering among the renowned trails and signature sights is Hemmed-in Hollow, a towering waterfall and impressive rock formation that spills out varied amounts of water or displays icicles, depending on the season. A more arduous trail with a 1,400-foot elevation change, it isn’t for the faint of heart. Those up for the challenge will not be disappointed, though, as the famed, 209-foot vertical rock face is the tallest waterfall between the Rockies and the Appalachians, and hiking to its base is like discovering a secret hideaway at the end of a canyon.
Nearby lies another geological wonder that, when first encountered, might feel like a sacred discovery as well. Big Bluff, accessible via the appropriately named Goat Trail, is an impressive, oversized rock face, leaning out over the river with breathtaking views. Wrapping around the mountain and morphing into a mammoth wall of sandstone, the somewhat precarious trail narrows to curve around the bluff, revealing a 550-foot drop and an expansive view of the river and backcountry below.
Backcountry and Dark Skies
Lost Valley, Hemmed-in Hollow, and Big Bluff are just a few of the amazing trails and seemingly endless sights for day hikers to explore. On the other hand, hikers preferring to gear up with backpacks and tents for a weekend or two, venturing off the beaten path in the woods, can find what they’re after on the Buffalo River Trail. Winding back and forth across the river, as well as up and down in elevation, the “BRT,” as it’s known, totals almost 80 miles in length and can take you downstream via foot rather than canoe. Eventually connecting with the almost 200-mile network of the rugged and remote Ozark Highlands Trail, the Buffalo backcountry feels endless—ideal for trekking each day and sleeping under the stars each night.
Speaking of stars, the Buffalo National River was recognized in 2019 as an International Dark Sky Park. With the darkest nighttime skies in all of Arkansas, the park is a great place to go to escape suburbia and do some stargazing, learn the constellations, or see the Milky Way. With park regulations aimed at eliminating light pollution, the natural twinkling lights of nighttime skies are now as protected as the wilderness they blanket.
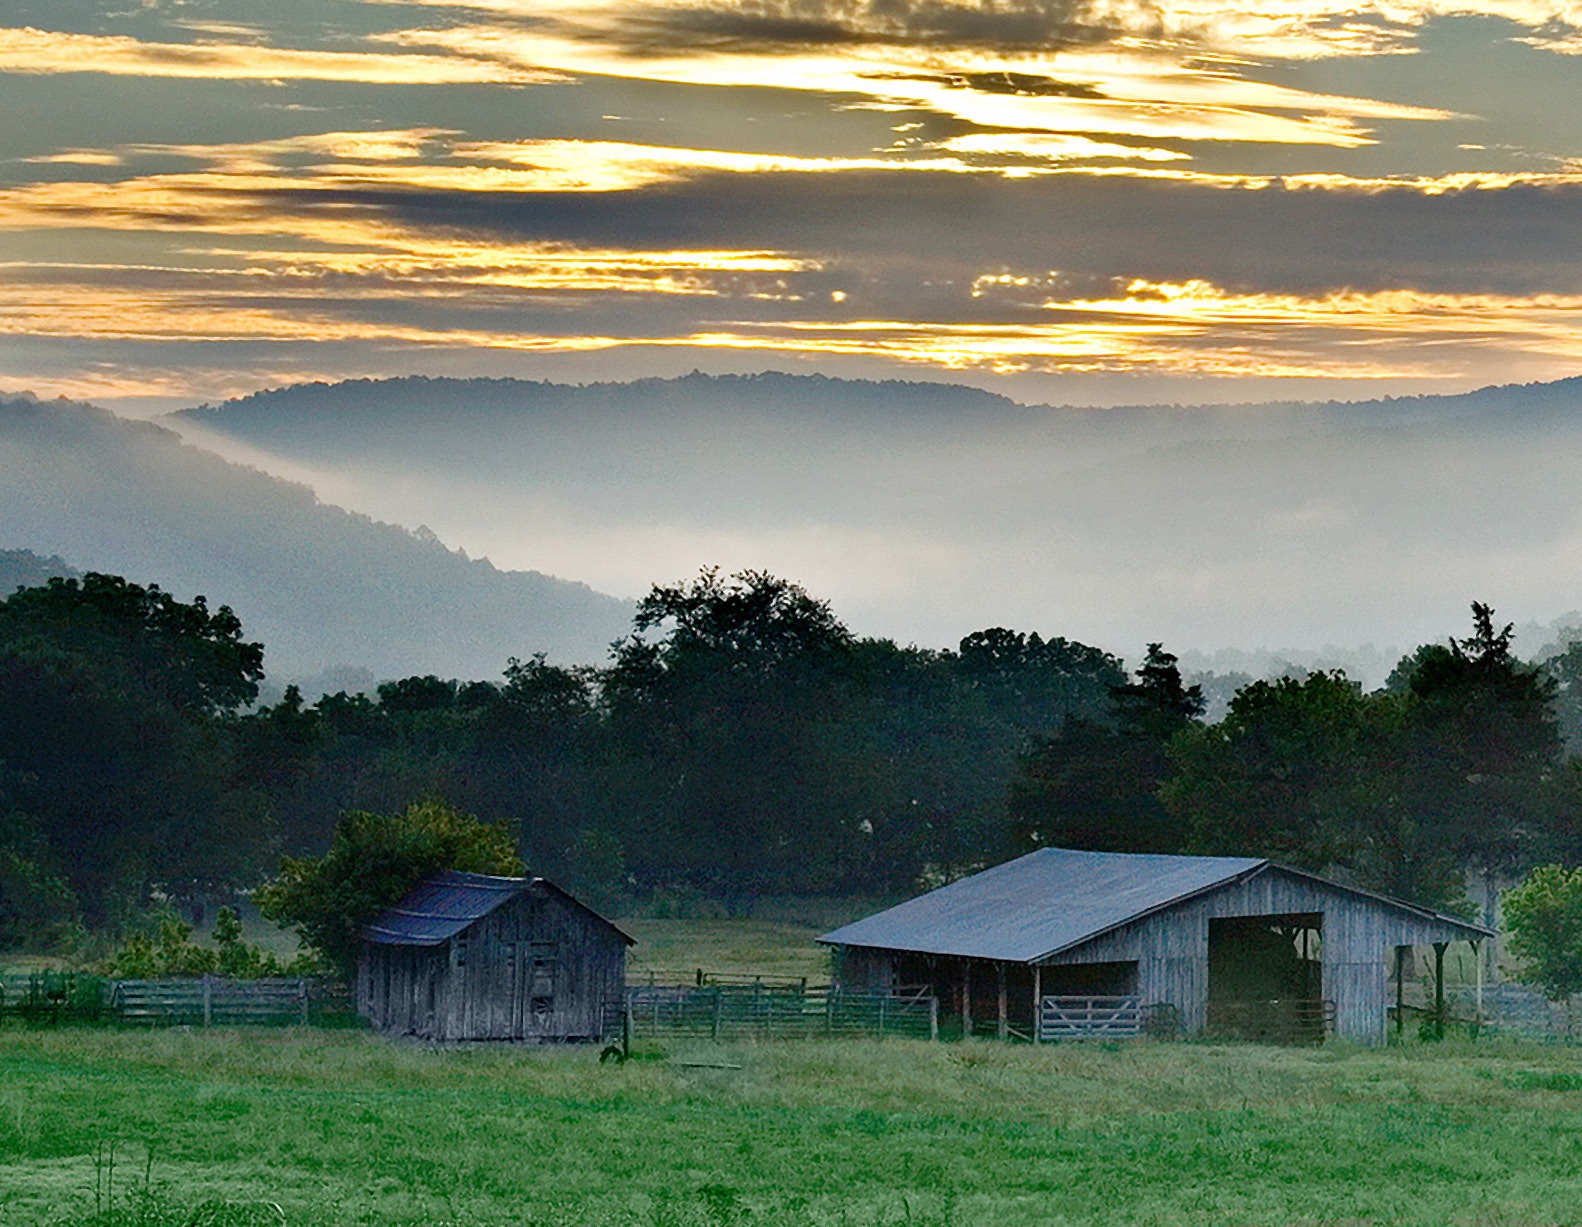
Sunrise over Boxley Valley within the Buffalo National River area. (Tim Ernst)
Preservation Through Growth
Many historical cabins and preserved homesteads are scattered throughout the Buffalo area as well. Granny Henderson’s cabin, the Parker-Hickman Farmstead in nearby Erbie, and the Villines family cabins in Ponca all commemorate a past era when pioneers worked tirelessly to survive in the wilds of a rugged landscape while carving out hard livings.
Although times have greatly changed since those days, the raw, rustic, and simplistic form of much of the area is still preserved. In the past 50 years in particular, since the national park and national river were established, the town of Ponca and the Boxley River Valley have remained virtually unchanged. Nestled in the valley between mountainside and river, the old-school mountain town atmosphere is difficult to miss.
The Buffalo Outdoor Center outfitters and Lost Valley Canoe and Lodging rentals still reside as the only two businesses of tiny Ponca, and most of the cabins viewed from the road are rentals. There are no motels. Although certainly adding to the area’s charm, the simplicity also poses some issues during crowded times, especially as the area grows in popularity.
“Elk, waterfalls, and hiking trails have increased traffic to the Buffalo River immensely,” said Ernst. “Particularly when the big bulls are out there bugling.”
The once-unknown, tiny area’s increased popularity hints at the need for new infrastructure to handle it—apparently, grants are in place to do just that. In the meantime, though, this area is still “in its infancy,” as Ernst said, citing that there aren’t too many places left in the United States where you can still chart new territory as a hiker or backpack a 47-mile section of backcountry without any established campsites.
Labeled the “Natural State” for a reason, Arkansas has plenty of raw, rare, hidden beauty, and although it’s rapidly growing, the Buffalo River remains a somewhat unrecognized outdoor mecca. “I doubt that the personal experience of discovery will ever be completed here,” Ernst challenged. So next time you’re in search of adventure, find Arkansas Highway 43 on a map, head south, and wind down into Newton County, stopping off in Ponca. A bit like venturing off the grid, the disconnection from your everyday world may end up connecting you with exactly what you’ve been looking for.
This article was originally published in American Essence magazine.
The Midwest, also known as America’s Heartland, is home to a myriad of cultures. Immigration, over hundreds of years, has played a key role in developing its diverse food traditions, evident in its variety of delicious dishes—like classic Swedish meatballs, Polish perogies, German bratwurst, and hearty macaroni and cheese casseroles.
Midwest food expert Capri Cafaro hosts the podcast “Eat Your Heartland Out” and regularly features guests from all over this area to discuss its many food traditions. Born and raised in Ohio, Cafaro is well-versed in Midwestern food and the different cultural influences on the region’s culinary scene.
In this interview, she discusses the importance of county and state fairs in building community and showcasing different local foods and agricultural practices. We also talk about unusual dishes in the Midwest, such as “dessert salads,” and the prevalence of farm-to-table schemes, such as Community Supported Agriculture (CSA) programs, which allow city dwellers to enjoy fresh produce from local farms.
This interview has been edited for clarity and brevity.
Q. How do you think immigration has influenced the Midwest culinary sphere?
Midwestern food and culture are incredibly diverse. I often think that Midwestern food is perceived as either bland, or industrial, or just typical fast food. Those things are somewhat true, and have some historical context based on companies like General Mills, Kellogg’s, and Kraft, which all originated in the Midwest. However, Midwestern food has a great deal more depth and variety, precisely because of both the immigration and migration patterns of individuals who have come to the Midwest over the last 200 years or more.
The purpose of my podcast, “Eat Your Heartland Out,” is to show how different immigrants have shaped the face of food in the Midwest—like Germans in Wisconsin, and Scandinavians in places like Minnesota.
Q. Can you give us an example of an interesting Midwestern food tradition that is still practiced today?
One of the things I personally associate with as a food tradition—and something I actually did a podcast episode about—are the Lenten traditions surrounding the Easter holiday, and the fish fries that churches and restaurants sponsor on Fridays throughout Lent.
They each take on the color of their particular communities and the churches they represent. For instance, some places serve macaroni and cheese as a side dish; some serve perogies because they have a larger Slavic community; some serve haluski, an Eastern European type of noodle dish.
They also serve as a way to bring the community together every Friday during the Lenten season.
(Photo credits: Emily Raw)
Q. Are there any distinctive dishes that you would only associate with the Midwest?
The Minnesota hot dish is a landmark recipe from the 1930s that calls for hamburger meat, onions, celery, canned peas, canned tomato soup, and Creamettes—a special Minnesotan macaroni—all to be stirred together and baked. It’s not a typical casserole because it is intended to be the main meal.
Then, there is the runza (a cross between a Hot Pocket and a burger), which is like a meat pie with Russian origins that became very popular in places like Nebraska. There is also Cincinnati chili, a stew-like meat sauce served with spaghetti, that I am not particularly a fan of, but which is very popular in that region of Ohio.
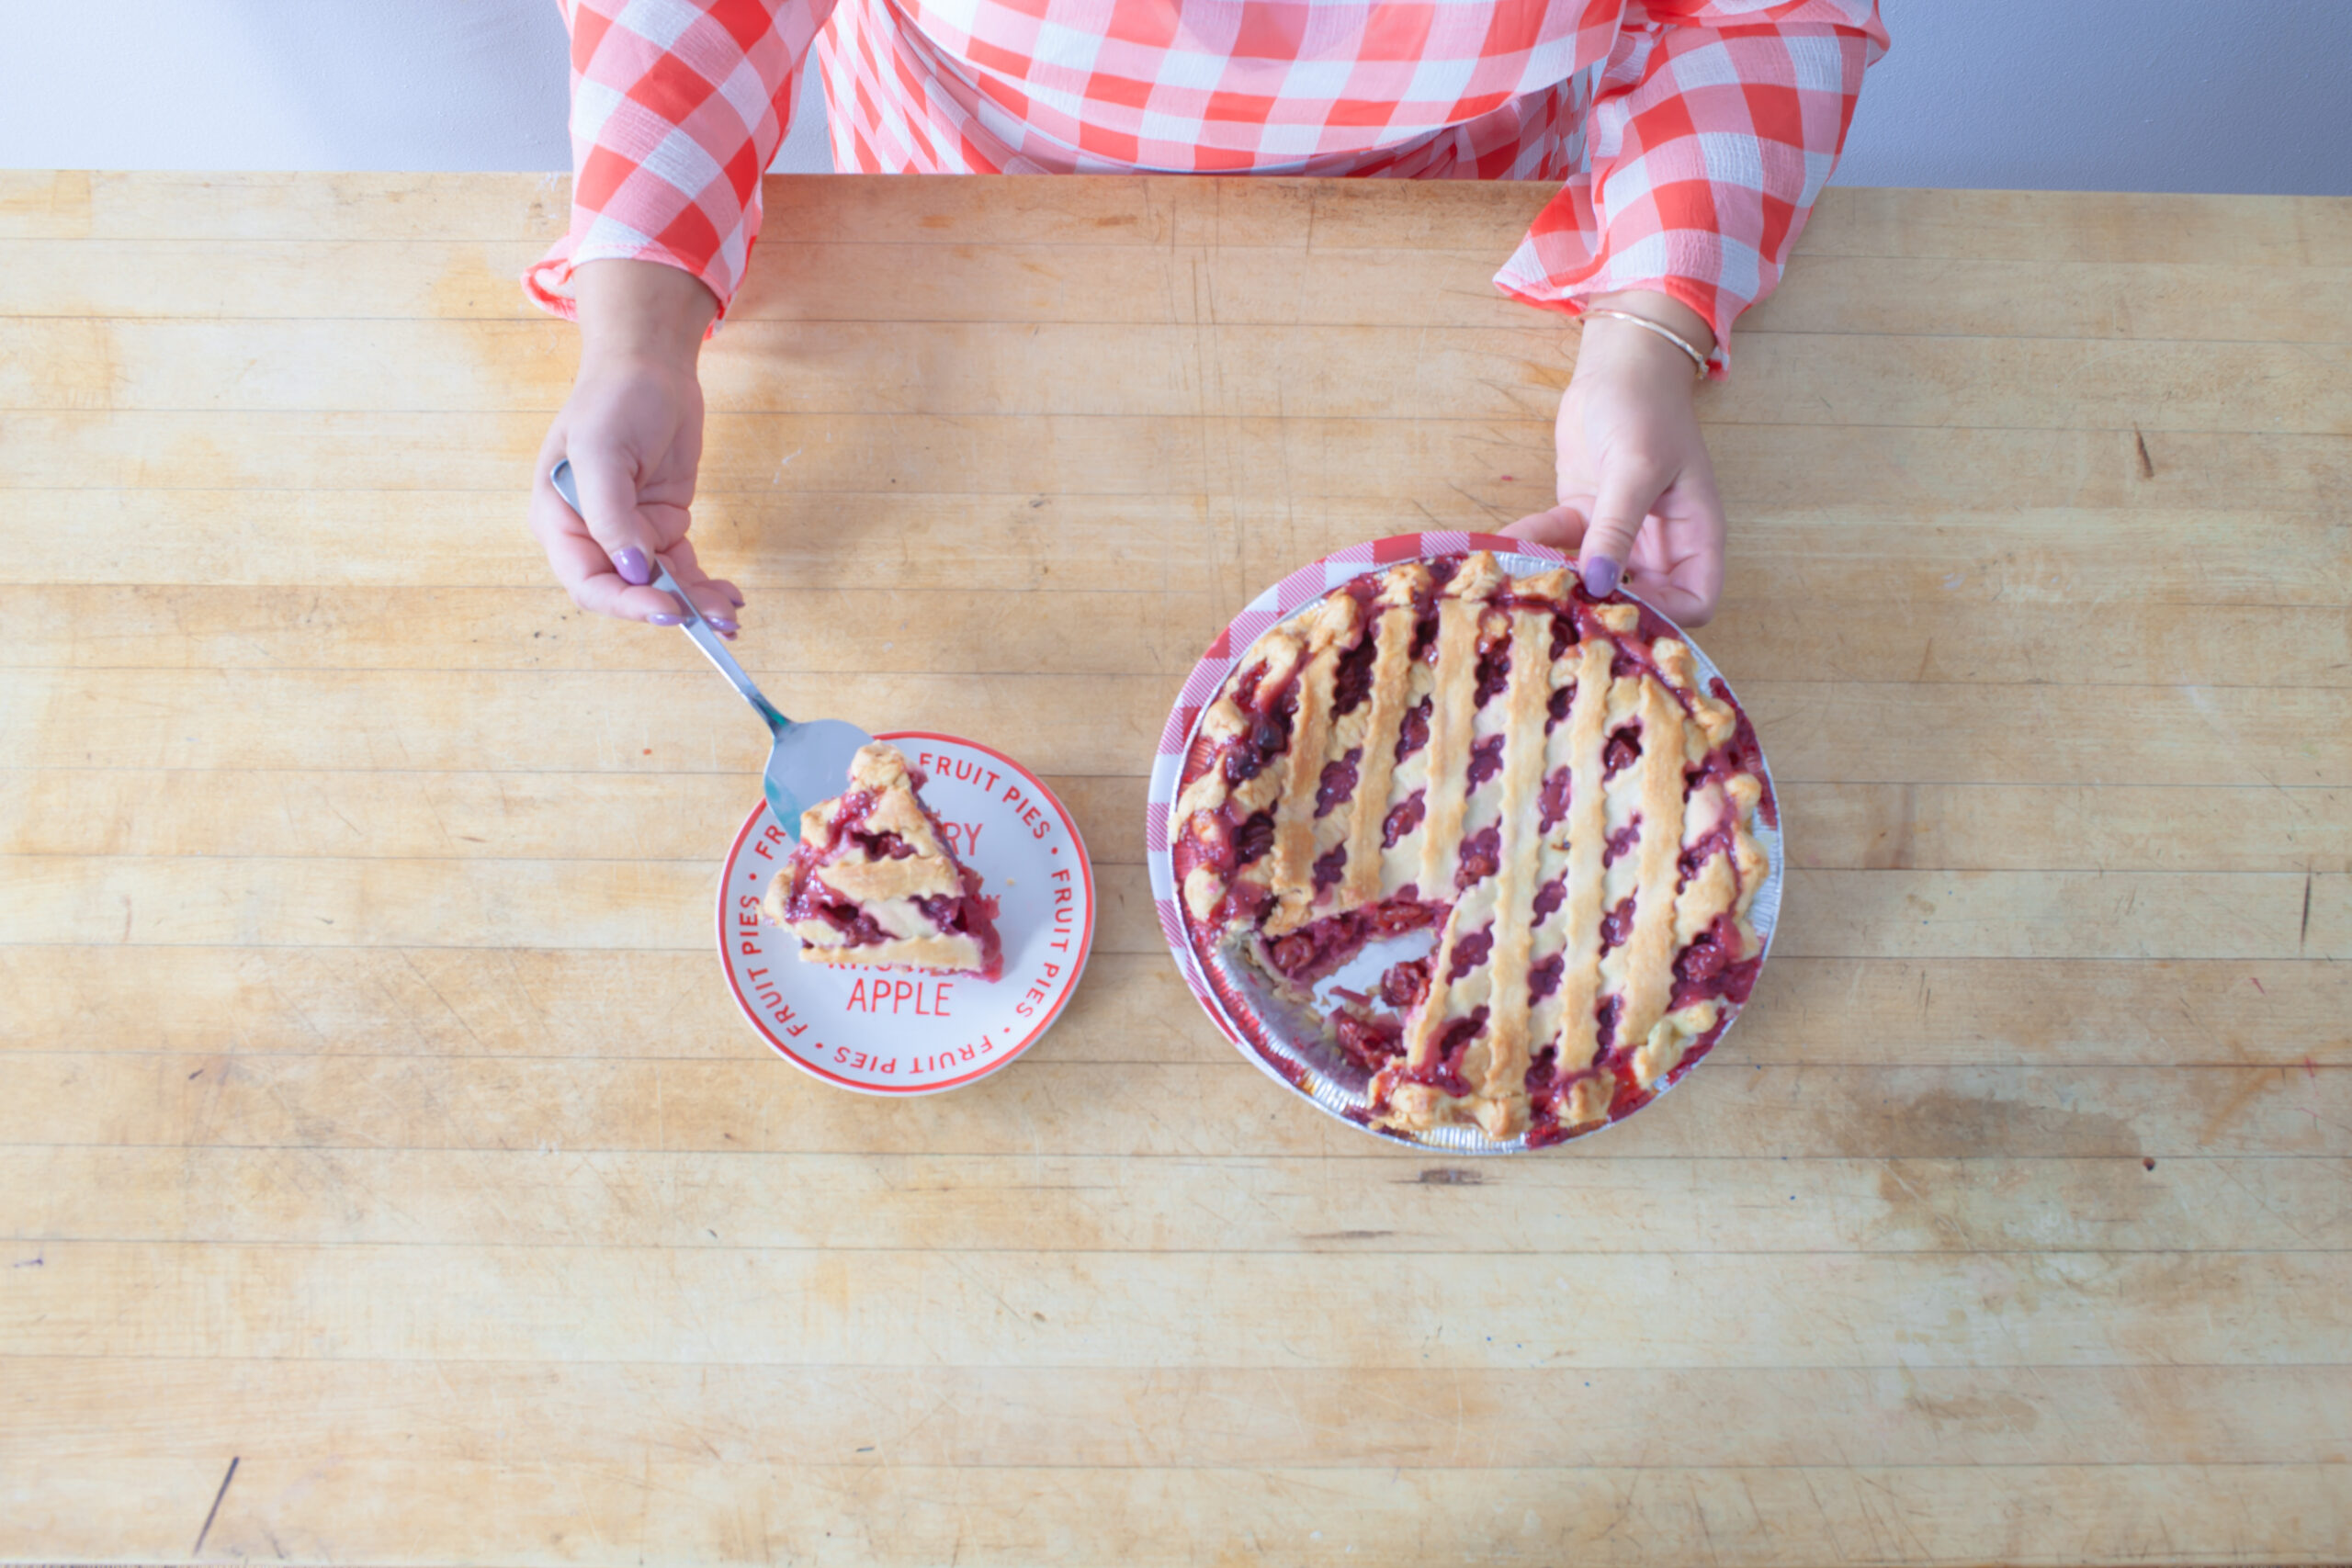
Q. Can you tell us more about the unique Midwest “salad dishes” and how they came about?
Jell-O salads, which can also be served as desserts, originated when it was discovered that bone marrow could be used to make gelatin. This discovery occurred just in time to be featured at the 1904 World’s Fair, held in St. Louis, Missouri, where gelatin was showcased as a brand-new food item.
As mechanization and industrialization came about, women were trying to spend less time in the kitchen and were looking for something that was easy and simple to make in a fast and affordable manner. Recipe books were published by companies in the Midwest, like General Mills, Kellogg’s, and Kraft, as a way to promote this new gelatin product. You can still find these well-used Jell-O cookbooks in many Midwest kitchens.
Jell-O salads remain very popular with hostesses, who find them convenient and easy to make and serve, either as a salad or for dessert. They are also easy to make and transport to church suppers or potlucks.
(Photo credits: Emily Raw)
Q. County and state fairs are a celebrated tradition in the Midwest. What are some typical foods served there?
That depends on where you go. In my neck of the woods—northeastern Ohio—you will always find pasta and meatballs due to the many Italians living here. Perogies are also a popular fair item where there are a lot of Eastern Europeans.
County and state fairs have their roots in agricultural production, in sharing agricultural techniques, and in bringing your bounty to market. You have dairy products that are often on display. For instance, in my area, people line up for the milkshake stands every year at the Ashtabula county fair because it’s the one place every year that you can get the freshest milkshakes in many different flavors.
The places where you really find the local foods at the fair are the ones that are affiliated with a local organization. So, sometimes the local 4-H club [a national youth organization] will run specialty food stands, but you also have fraternal organizations—like the Lions Club, Kiwanis, or Rotary—that will have their own stands to promote local food traditions, as well as to raise money for their various organizations.
Q. What do county/state fairs say about the American ideal of agricultural bounty and the desire to celebrate that?
Even though more and more people are moving out of rural communities and into suburban and urban areas, there is still a large part of our country that continues to rely on rural agriculture. The Midwest, in particular, has always been known as the breadbasket of the nation—even of the world. That’s because it is one of the major grain producers—including corn, soy, and wheat—as well as a major producer of livestock and dairy products.
Fairs have this sense of nostalgia and provide a magnet for urban dwellers to go back to their roots, at least annually—sometimes even if they have never lived in that particular state or county. There is also a sense that, while you may not necessarily be involved or affiliated directly with agriculture, you want to be engaged in supporting it, one way or another.
While farming may look very different today than it once did, the popularity of county and state fairs continues. Our nation’s politicians certainly appreciate that fact when they regularly visit these fairs to meet and greet voters, and to taste the most outrageous new food items, like fried ice cream or doughnut burgers.
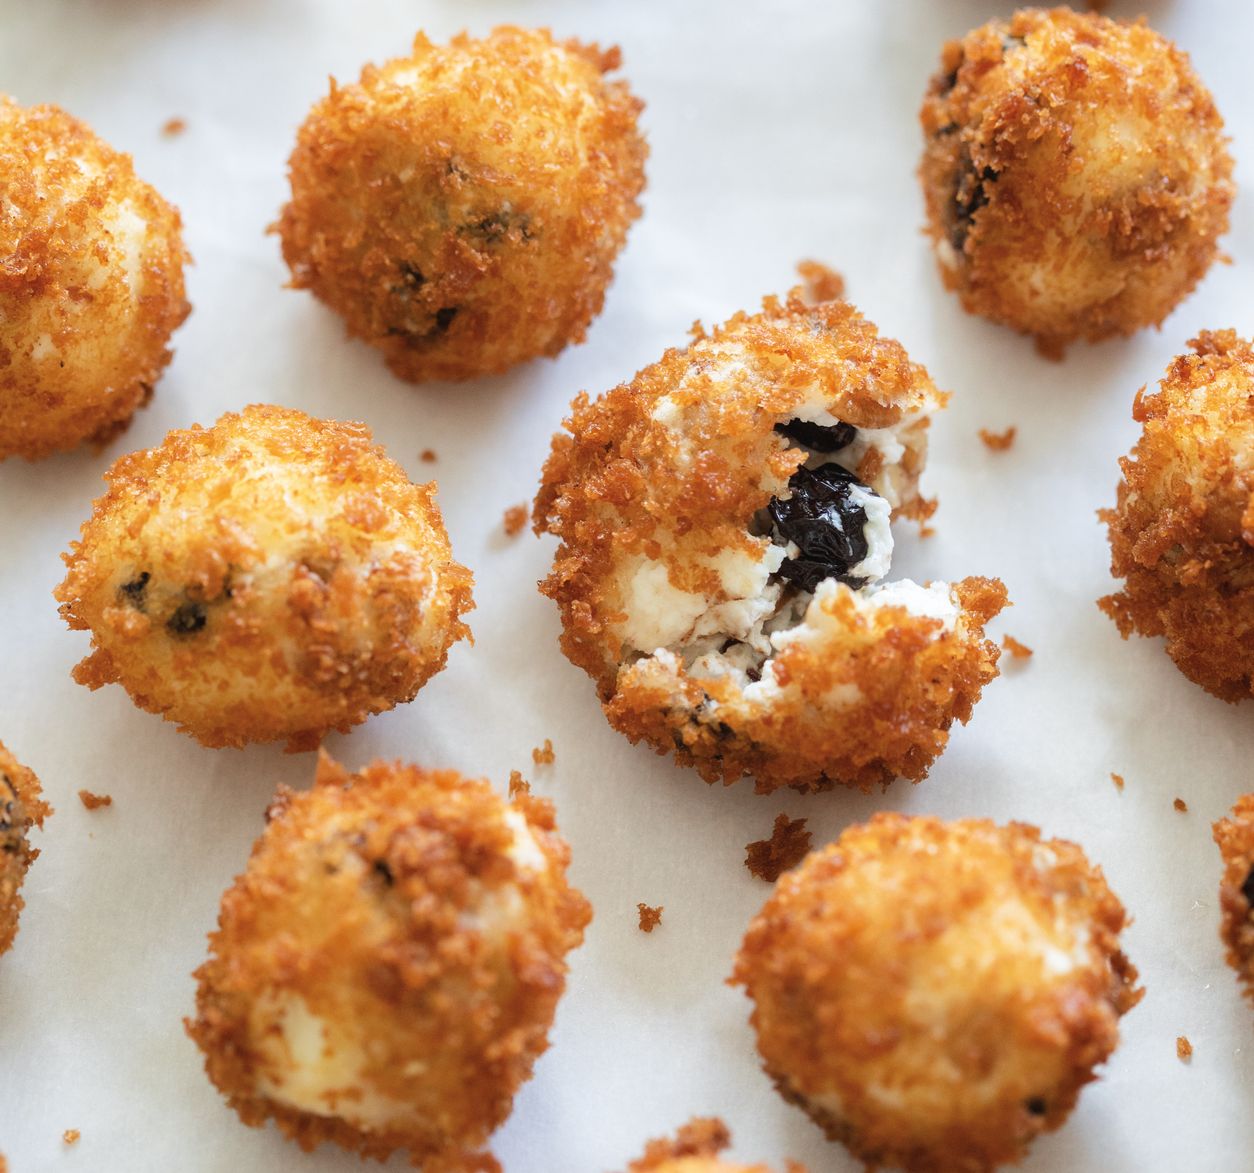
Fried Goat Cheese Cherry Balls. The dish originated in Michigan. (Photo credits: Emily Raw)
Q. What do you think about the trend in farm-to-table schemes like the Community Supported Agriculture (CSA) programs that allow urban and suburban communities to enjoy fresh, local produce?
CSAs have been a part of daily life in a lot of Midwestern cities and towns for decades. Nearby farmers and small-batch artisans promote CSAs as a kind of direct-to-household or farmers market activity, and as a way for even urban dwellers to have regular farm-fresh produce. You get your box of whatever produce is in-season every week, or every two weeks. That way you are supporting local agriculture, even if you may not live directly near it.
CSAs are becoming very popular in urban centers across America, not only in the Midwest. I think there is a misconception that the Midwest doesn’t necessarily set trends, but I would beg to differ. These programs are one longstanding Midwestern trend that is now catching on in other places.
Q. Do you have a specific Midwestern dish that you particularly enjoy?
I’m from the part of the Midwest that is highly Southern and Eastern European. So for me, my favorite comfort foods involve pasta. Also, anything that includes cheese, because some of the largest cheese producers are located in the Midwest.
A lot of planning and preparation goes into any backpacking trip, and plenty of thought should be put into your food beyond the gear and location logistics. Food is fuel on the trail, and you can only carry so much! That’s why a well-thought-out plan consisting of nutrient-dense, lightweight, and non-perishable foods is a must.
If you’re not used to planning out your meals for days at a time, like anything, you’ll get better with a bit of practice. Read on for field-tested tips to help guide the way.
Meal planning and preparation
Before you choose the foods you’re packing, ask yourself a few essential questions:
What is the intensity of my trip?
How many people are going?
How long will I be gone?
How much time do I have available to spend prepping food for my trip?
Identifying these specifics helps you start the meal planning process. Once you know the length of your trip, how many people are going, the intensity level, and how much time you have to spare, then you can start planning out the rest.
Although I often backpack alone, if I do go with a partner, we create a plan together. I find it easier to plan meals together to cut down on the number of things we need to carry and to save fuel when cooking.
Before the trip, we often schedule a phone call to discuss food options, likes and dislikes, and when we will do physical prep. Then, we add our ideas into a sharable document like Google Docs or a shared note.
Here is an actual meal planning document I’ve used for a trip as an example:
Meal
Day 1
Day 2
Day 3
Breakfast
Oatmeal + coffee
Oatmeal + coffee
Lunch
Pita with hummus, tomatoes, cucumbers, etc.
Tuna wrap
Tuna wrap
Snacks
Dried mangoes, peanut butter/banana wrap
Trail Mix, Date Balls, granola bar+peanut butter
Trail Mix, granola bar, dried mangoes
Dinner
Burrito Bowls/tacos
Tomato Basil Couscous
Other
Hot Chocolate/Tea
Hot Chocolate/Tea
On this trip, I went with another person, and we planned to eat many of the same things along the way. Underneath this chart on our shared document, we listed what we would need to buy for each meal or snack. That way, our shopping list is also made.
I always plan an extra day before and after the trek itself. The day before is vital to help you gather your gear and get all of your meals together and packed.
What type of food to bring
When planning a trip, no matter the length or number of people involved, simplicity is key. It can be tempting to want to plan for variety, but this can mean you’re buying more and carrying more. For most hikers, the easiest areas to repeat are breakfast, lunch, and snacks. Since supper is often the most calorie-dense and largest meal of the day, it’s the easiest place to add variety.
The type of food you choose to bring should first and foremost be foods you’ll eat! Don’t choose a snack or a meal option because you think you should eat it while backpacking. For instance, if you don’t like Clif bars, don’t pack Clif bars! Choose foods you enjoy to ensure you will reach your nutritional needs.
After that, consider these other factors:
Portability: Opt for dehydrated, freeze-dried, or powdered foods. Backpacking food can consist of perishables (like in my example above). However, those are eaten on the first day. The rest of the food should have a long shelf life to ensure it will not spoil as you hike.
Weight: keep in mind you are carrying everything you need! Avoid foods that have heavy packaging (i.e., cans) or contain a high water level. Gathering food from bulk bins, using pre-made meals, and repackaging some items can help you have more control over the weight.
Nutritional value: the main things you’re looking for in backpacking meals are calories (unsaturated fats), carbohydrates/sugars, protein, and antioxidants. Among those focus areas, unsaturated fats and carbohydrates tend to be what your body craves most. Protein is important for recovery, but complex carbs and good fats are needed for sustained energy. Then, sugars help with bursts of energy, while antioxidants boost your immune system function.
Cook time/method: many pre-packaged meals are designed so that all you have to do is add hot water, let it sit, and eat. If you are gathering and prepping meals on your own, then the cooking time may differ and include simmering food on the stove. Try to find foods that only use boiling water, and if it has to be cooked longer, keep it under 20 minutes. Longer than that, and you’ll find yourself carrying a lot of extra fuel.
Where to get backpacking food:
Prepacked meals from online shops or outdoor retailers
Bulk food sections in grocery stores
Small packaged foods in grocery stores (i.e., power bars, tuna packets, etc.)
Bulk food sections are my favorite place to make backpacking meals. You can often get the exact amount of certain foods like dehydrated refried beans, dehydrated hummus, and they have tons of seeds, nuts, and dried fruits to create your trail mix.
How much food to bring
Before getting into the number of calories to bring and how much to eat, breaking it down into sections will help you determine the exact amount of each to carry.
Knowing your body and your needs will also help beyond simple calorie calculations. As you go on more trips, you’ll know your eating habits and how much you need to be eating to fuel the adventure.
The amount of food you should be eating will also be influenced by your body size, weight, level of intensity of daily activity, your metabolism, and the weather. Since most folks like to have numbers to reference, a good rule of thumb is 1.5-2.5 lbs. of food or 2500-4500 calories per person per day.
Now, those ranges are broad because so many factors impact your individual dietary needs. For instance, someone hiking four miles on flat terrain may not need to eat as much as someone hiking 12 miles through mountain passes.
How to pack it
Pre-made meals, power bars, and other items will come in an easy-to-carry package. Other foods will need to be repackaged, especially when buying from grocery stores or bulk food sections.
To cut back on packaging, try to utilize the packaging the food comes in, but if that is not an option, repackage items in reusable bags or reusable food wrap. When that is not an option, or it is adding too much weight, you can also use resealable plastic bags.
For organizational purposes, I prefer to have one large food bag in my pack and one snack bag that is easily accessible. I use individual cloth or mesh bags to organize meals within my larger food bag. In some areas, a bear bag or canister is needed, so store all food in that.
Keep in mind, what you pack in, you must pack out. So, pack a garbage bag to carry for the duration of your trip and follow Leave No Trace guidelines.
Camp kitchen checklist
Need a backpacking camp kitchen or are not sure what to pack?
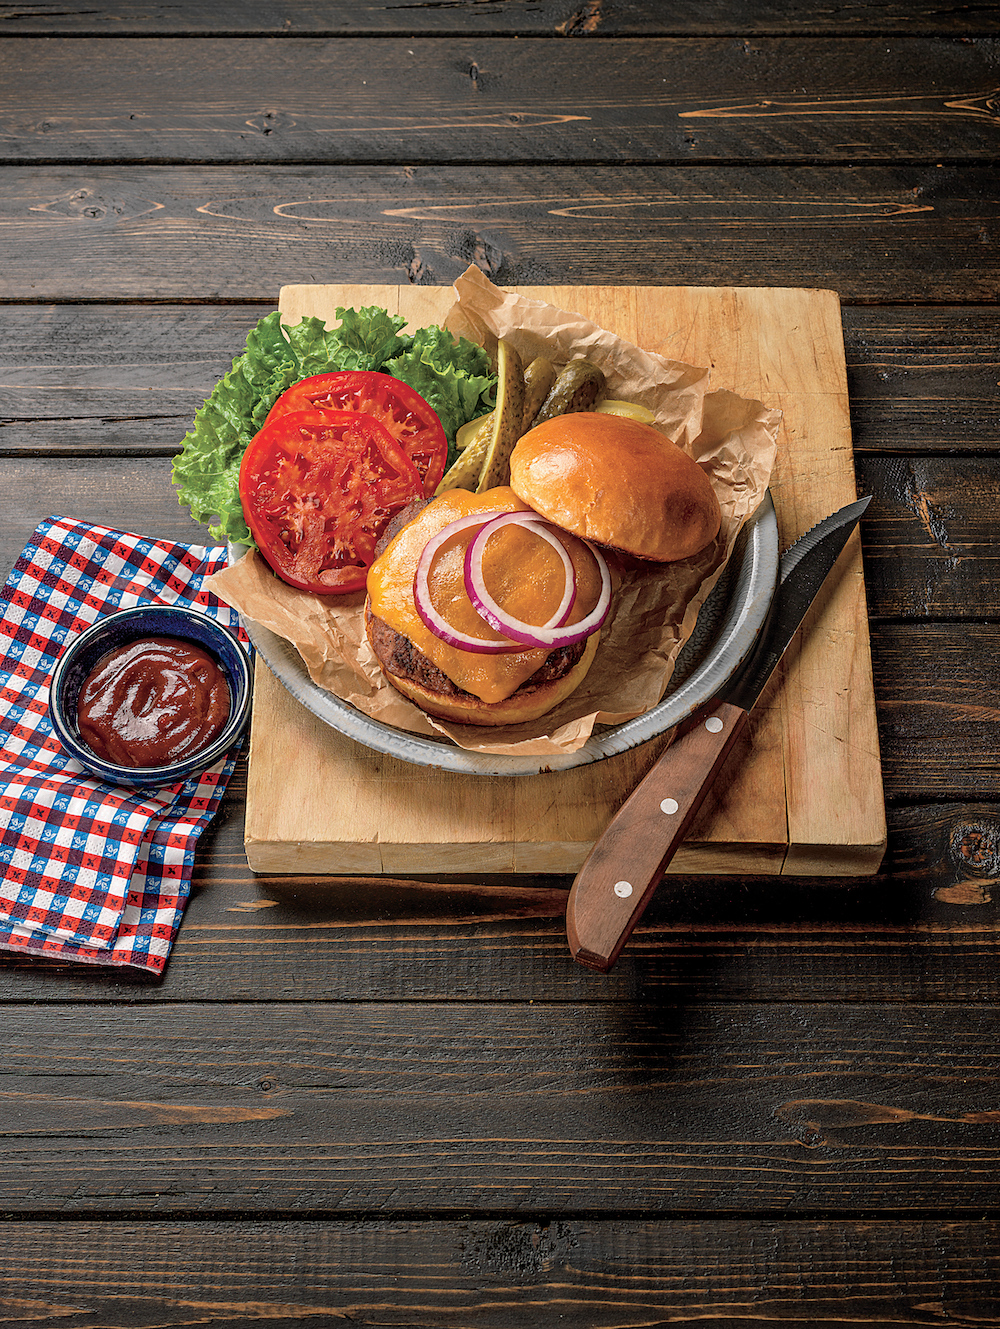
This sweet and smokey cheeseburger prepared by chef Matthew Wendel was taken by Bruce White. First Lady Laura Bush liked the burgers to be prepared with toasted wheat bun, burger patties blended with barbecue sauce, and topped with extra sharp cheddar cheese. (Courtesy of The White House Historical Association)
People often say that we are what we eat. As a country built by immigrants, America’s food culture is as rich as the various cultures represented by the people who make up this diverse nation. Our ancestors brought the traditional dishes of their native countries with them and passed these delicacies down from one generation to the next. So, what really is “American” food?
Some may say the quintessential American food is a burger, or a hot dog. And in fact, these delicious items are the mainstay of the traditional barbecue parties that are essential to many American celebrations. The key to serving up good barbecue is having love and patience. This tradition may be simple, but it can change the world—as hot dogs and burgers have sometimes played a critical role in U.S. diplomacy.
The first, and perhaps most important, “barbecue diplomacy” event was arguably held in June 1939, when King George VI of England and his wife, Queen Elizabeth (mother of Elizabeth II), visited the United States. Following their royal state visit to Canada, President Franklin D. Roosevelt invited the British sovereigns to visit his home in Hyde Park, New York, for an American-style picnic.
Prior to this visit, no reigning British monarch had ever set foot on American soil. In 1939, England was on the brink of war with Germany, while the United States was pursuing a foreign policy of isolationism. Many Americans were worried that Britain might drag their country into a foreign conflict. While FDR wanted to lend help to the British, he had to convince the American public that such support was warranted.
On June 11, 1939, perhaps the most famous hot dogs in world history were served to King George VI and Queen Elizabeth at the Hyde Park picnic. Apparently, the royal couple had never been served frankfurters before, and the Queen quietly asked her host just how one should go about eating a hot dog. This humorous inquiry made headlines in the American press at the time. It was also included in the popular TV drama series, “The Crown” (Season 1).
We will never know what kind of meat or other ingredients were used to make those royal hot dogs, but they apparently made a significant impression on the royal couple. While the Queen purportedly used a knife and fork, the King ate his U.S. treat, American-style.
No doubt, this “hot dog diplomacy” was a great success. Just three months later, Britain declared war on Germany; and while the U.S. did not enter the war in Europe until December 1941, following the Japanese attack on Pearl Harbor, the Hyde Park picnic had helped FDR introduce the King and Queen of England to American isolationists in a relatable manner. The hot dog picnic changed the relationship with Great Britain forever: no longer as a former imperial power and its runaway colony, but now as friends and important allies.
“Barbecue diplomacy” has since been utilized by other U.S. presidents as well. George W. Bush hosted a barbecue party for German Chancellor Angela Merkel in 2006, and another for British Prime Minister Gordon Brown in 2007, treating them both to delicious Bush-style cheeseburgers.
Chef Matthew Wendel, who worked for GW Bush and his family at Camp David, and at their Texas home, revealed the recipe in the book, “Recipes From the President’s Ranch: Food People Like to Eat,” with First Lady Laura Bush providing helpful tips on assembling the burgers, such as using extra sharp cheddar cheese and toasted whole-wheat buns.
Sweet and Smoky Cheeseburgers Recipe
Serves 4
Ingredients:
1 ⅓ pounds lean ground beef
3 tablespoons favorite barbecue sauce
Salt and freshly ground pepper
Oil, for brushing the grill
4 slices extra sharp cheddar
4 whole-wheat buns, toasted
Directions:
In a bowl, mix the ground beef with barbecue sauce and salt and pepper just until combined; do not over-mix. Divide the meat into 4 equal patties about 1/2-inch thick.
Lightly brush a charcoal or gas grill with oil and heat to medium. Grill burgers for about 5 minutes, until charred on the bottom. Flip burgers and cook for 1 minute more. Top each burger with cheese and cook just until melted, 1 to 2 minutes more, or until cooked to desired temperature.
Serve on toasted buns with your favorite burger condiments.
Recipe from “Recipes From the President’s Ranch: Food People Like to Eat,” by Matthew Wendel (The White House Historical Association, 2020)