Categories
Camping Lifestyle The Great Outdoors

Beginner’s Guide to Cold Weather Camping

Growing up in Minnesota, outdoor activities never ended despite the cold winters. We just had to adapt to the weather and changing seasons. With the right equipment and know-how, you can camp all year, even during the coldest months!

Entering any new type of outdoor recreation, even as a seasoned camper or backpacker, can be intimidating. Throw in a few life-threatening conditions like extreme cold and snow, and it’s even harder to make that leap.

Cold weather camping doesn’t have to be scary or even really that dangerous! This guide will help you break into cold weather camping with confidence and prepare you to invest in the right equipment before you go.

What is cold weather camping?

If you research cold weather camping, you’ll find varying definitions. As a general range, anything below 50°F (10°C) can be considered cold weather camping. Other experts and winter enthusiasts may express that temperatures should be closer to freezing (32°F/0°C) to fit in that category.

To me, the best distinction between those discrepancies is to classify cold weather camping and winter camping differently. When cold weather camping, temperatures may be low, there may be some moisture, but it’s likely not cold enough for snow.

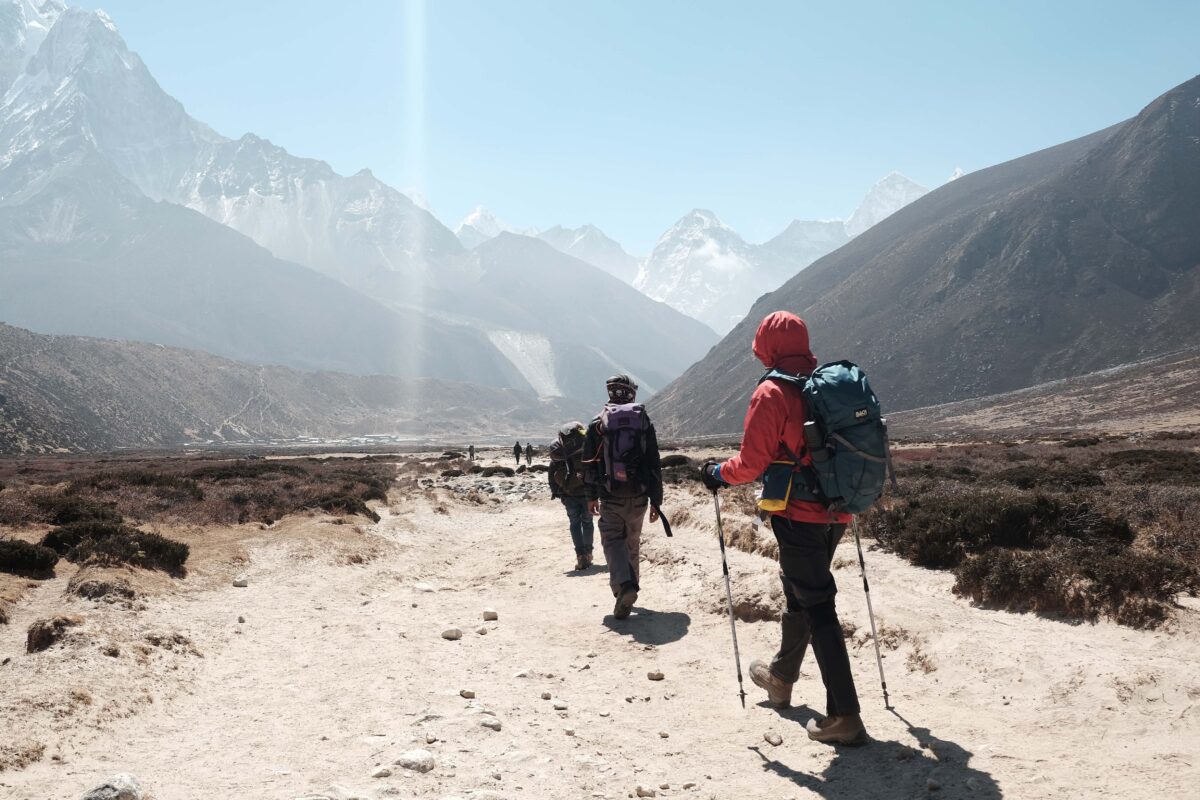
Freezing temperatures are expected when winter camping, and may include some snow and ice. A lot of this boils down to the climate and area you are camping in. For instance, winter in the Sonoran desert may have cold temperatures but will likely have less snow than winter in the Cascades.

Get to know the area, climate, and weather patterns. Then, you can begin to prepare for the journey ahead.

Considerations for winter camping

Since temperatures and weather patterns are the main differentiating factors from warm weather camping and winter camping, there are varying considerations when prepping for a trip or buying gear.

Things to think about before you go winter camping:

  • Weather conditions: keep an eye on the weather and consider bringing a GPS device with satellite weather information.
  • Terrain: if there is lots of snow, know how you will cover ground and pitch a tent in the snow, as well as if there is ice, rocks, or glaciers in your path.
  • Getting enough calories and food: eating and drinking enough is vital in winter conditions, and eating nutritious meals can help you stay warm. Plan warm meals for morning and night and pack additional nutritious foods to eat throughout the day.
  • Water sources: remembering to hydrate can be hard when it is cold outside, so schedule breaks that include drinking water. Plan water sources accordingly, knowing they may be frozen and what to do in those situations. Pack a few warm drinks like tea to up your water consumption as well.
  • Cold injury prevention: a first aid kit is a must in the back-country. Familiarize yourself with cold-weather injuries like frostbite, wind-burn, and the signs of hypothermia.
  • Cold weather gear: pack the appropriate sleeping gear, boots, shelters, stoves, etc., for the conditions at hand. For example, not all fuels work at high altitudes or low temperatures. Not all shelters are built for winter conditions. Get to know your gear and invest in equipment that will keep you warm and safe.
  • Dress appropriately: your wardrobe needs to reflect the weather. Invest in proper boots, gaiters, traction devices, and learn to layer your clothing to cut down on the volume and optimize heat retention and warmth when hiking and when you’re in camp.

Many of these considerations overlap with standard backpacking preparation but are applied to a cold-weather setting.

Leave No Trace

Always follow Leave No Trace principles when camping or backpacking. Cold weather camping includes the same general rules, with some modifications.

A few of those modifications include:

  • Only travel on trails when the ground is exposed, otherwise, travel on deep snow as much as possible.
  • Camp on deep snow if possible and only in designated areas.
  • Pack out all waste, especially human waste. When camping on snow, wag bags make this easy to do.
  • When having a fire, use dead and down wood. Never cut or break tree limbs.
  • See all Leave No Trace Winter Recreation ethics and best practices on their website.

What do you need for cold weather camping?

Among the planning considerations for winter camping and backpacking, gear will significantly impact your experience. A part of getting the right equipment for your trip is knowing what to expect in terms of weather and terrain.

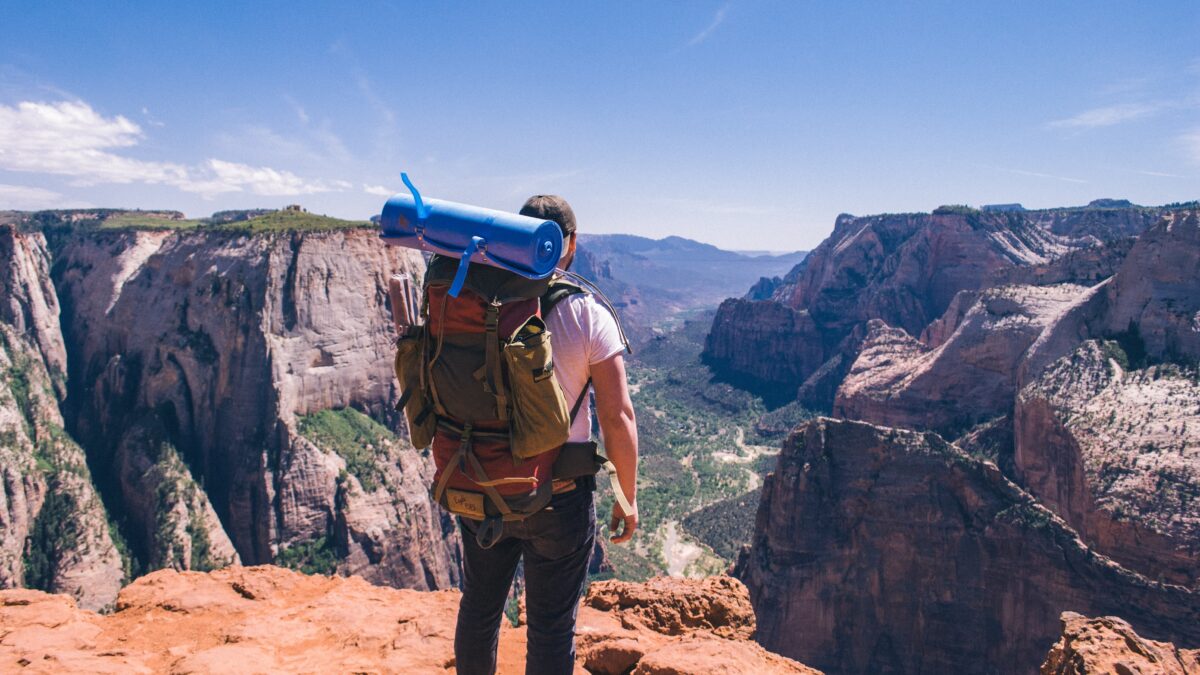
One aspect of winter backpacking specifically is that you will be carrying more bulky gear. You need more layers of clothing, more options for traction devices, a thicker and more durable tent made of less meshing, and likely a thicker, warmer sleeping bag. All of this will add weight and bulk to your pack.

So, if that is too daunting as a beginner, I recommend starting with a few car camping expeditions until you can hone in your gear and practice packing and carrying the additional weight.

The main focus areas for cold-weather outdoor gear includes two things:

  • It keeps you warm.
  • It keeps you dry.

That means certain materials, like cotton, that absorb moisture or take a long time to dry must be omitted. Your tent needs to keep you dry and warm, even during storms, and your sleeping bag should ensure warmth and continue to insulate when wet. There are even cold-weather sleeping pads that help you retain more heat.

Cold weather camping gear list

New gear is expensive and can be hard to justify buying if you’re unsure whether you like an activity or not. Consider renting gear from an outfitter that can provide expert knowledge not only of the equipment but of best practices in the back-country and current trail conditions.

Much more can be said about the types of gear you need, but here is an essential list to get you started.

  • Snow Travel (if needed): backpack (65-80L), traction aids, trekking poles (with snow baskets)
  • Optional: skis and skins, snowboard, snowshoes, ice axe, avalanche gear, two-way radio, hand/foot warmers, sled
  • Sleep Gear: 4-season tent, guylines, snow/tent stakes, sleeping bag, sleeping pad
  • Optional: camp pillow, sit pad, sleeping bag liner, foot warmers
  • Camp Kitchen: stove, fuel (liquid or canister with pressure regulator), lighter, cook set, bowl/mug, cutlery, insulated water bottle, biodegradable camp soap, towel/cloth, reusable wet bag
  • Water/Food: water canister (bottles, reservoir, etc.), insulated water canister sleeves, water treatment, extra fuel, meals and snacks, an extra day’s supply of food, bear canister/bag (if needed)
  • Optional: hot beverage mixes
  • Toiletries: toothbrush, toothpaste, hand sanitizer, towel, toilet paper/wipes, wet bag, menstrual/urination products, prescription medicines, extra pair of glasses, sunglasses, sunscreen
  • If needed: wag bag (or portable toilet in a bag)
  • Clothing: long underwear, long-sleeved base layer, insulated mid-layer, puffy jacket (with hood), insulated pants, waterproof jacket, pants, wool socks, winter boots, gaiters, hat, polar buff, gloves/mittens, underwear, extra clothes
  • Navigation: map, compass, GPS, satellite messenger, route information, and watch
  • Emergency Kit: whistle, first-aid kit, emergency shelter, two itineraries (one in car, one with a friend)
  • Repair Kit: tent repair (cord, pole sleeve, etc.), duct tape, tenacious tape, knife/multi-tool, other specialized repair kit items
  • Other: ID, cellphone, credit card/cash, permits (if needed)

What you bring will vary according to the type of camping you’re doing and current conditions.


Categories
Camping Food Lifestyle The Great Outdoors

How to Meal Plan for Backpacking 

A lot of planning and preparation goes into any backpacking trip, and plenty of thought should be put into your food beyond the gear and location logistics. Food is fuel on the trail, and you can only carry so much! That’s why a well-thought-out plan consisting of nutrient-dense, lightweight, and non-perishable foods is a must.  

If you’re not used to planning out your meals for days at a time, like anything, you’ll get better with a bit of practice. Read on for field-tested tips to help guide the way. 

Meal planning and preparation

Before you choose the foods you’re packing, ask yourself a few essential questions:

  • What is the intensity of my trip?
  • How many people are going?
  • How long will I be gone?

How much time do I have available to spend prepping food for my trip?

Identifying these specifics helps you start the meal planning process. Once you know the length of your trip, how many people are going, the intensity level, and how much time you have to spare, then you can start planning out the rest.  

Although I often backpack alone, if I do go with a partner, we create a plan together. I find it easier to plan meals together to cut down on the number of things we need to carry and to save fuel when cooking.  

Before the trip, we often schedule a phone call to discuss food options, likes and dislikes, and when we will do physical prep. Then, we add our ideas into a sharable document like Google Docs or a shared note.   

Here is an actual meal planning document I’ve used for a trip as an example: 


Meal Day 1 Day 2 Day 3
Breakfast Oatmeal + coffee Oatmeal + coffee
Lunch Pita with hummus, tomatoes, cucumbers, etc. Tuna wrap Tuna wrap
Snacks Dried mangoes, peanut butter/banana wrap Trail Mix, Date Balls, granola bar+peanut butter Trail Mix, granola bar, dried mangoes
Dinner Burrito Bowls/tacos Tomato Basil Couscous
Other Hot Chocolate/Tea Hot Chocolate/Tea

On this trip, I went with another person, and we planned to eat many of the same things along the way. Underneath this chart on our shared document, we listed what we would need to buy for each meal or snack. That way, our shopping list is also made.  

I always plan an extra day before and after the trek itself. The day before is vital to help you gather your gear and get all of your meals together and packed. 

What type of food to bring 

When planning a trip, no matter the length or number of people involved, simplicity is key. It can be tempting to want to plan for variety, but this can mean you’re buying more and carrying more. For most hikers, the easiest areas to repeat are breakfast, lunch, and snacks. Since supper is often the most calorie-dense and largest meal of the day, it’s the easiest place to add variety.  

The type of food you choose to bring should first and foremost be foods you’ll eat! Don’t choose a snack or a meal option because you think you should eat it while backpacking. For instance, if you don’t like Clif bars, don’t pack Clif bars! Choose foods you enjoy to ensure you will reach your nutritional needs.  

After that, consider these other factors: 

  • Portability: Opt for dehydrated, freeze-dried, or powdered foods. Backpacking food can consist of perishables (like in my example above). However, those are eaten on the first day. The rest of the food should have a long shelf life to ensure it will not spoil as you hike.  
  • Weight: keep in mind you are carrying everything you need! Avoid foods that have heavy packaging (i.e., cans) or contain a high water level. Gathering food from bulk bins, using pre-made meals, and repackaging some items can help you have more control over the weight.  
  • Nutritional value: the main things you’re looking for in backpacking meals are calories (unsaturated fats), carbohydrates/sugars, protein, and antioxidants. Among those focus areas, unsaturated fats and carbohydrates tend to be what your body craves most. Protein is important for recovery, but complex carbs and good fats are needed for sustained energy. Then, sugars help with bursts of energy, while antioxidants boost your immune system function.  
  • Cook time/method: many pre-packaged meals are designed so that all you have to do is add hot water, let it sit, and eat. If you are gathering and prepping meals on your own, then the cooking time may differ and include simmering food on the stove. Try to find foods that only use boiling water, and if it has to be cooked longer, keep it under 20 minutes. Longer than that, and you’ll find yourself carrying a lot of extra fuel.  

Where to get backpacking food:

  • Prepacked meals from online shops or outdoor retailers
  • Bulk food sections in grocery stores
  • Small packaged foods in grocery stores (i.e., power bars, tuna packets, etc.)

Bulk food sections are my favorite place to make backpacking meals. You can often get the exact amount of certain foods like dehydrated refried beans, dehydrated hummus, and they have tons of seeds, nuts, and dried fruits to create your trail mix.  

How much food to bring 

Before getting into the number of calories to bring and how much to eat, breaking it down into sections will help you determine the exact amount of each to carry.  

Knowing your body and your needs will also help beyond simple calorie calculations. As you go on more trips, you’ll know your eating habits and how much you need to be eating to fuel the adventure.  

The amount of food you should be eating will also be influenced by your body size, weight, level of intensity of daily activity, your metabolism, and the weather. Since most folks like to have numbers to reference, a good rule of thumb is 1.5-2.5 lbs. of food or 2500-4500 calories per person per day.  

Now, those ranges are broad because so many factors impact your individual dietary needs. For instance, someone hiking four miles on flat terrain may not need to eat as much as someone hiking 12 miles through mountain passes.  

How to pack it  

Pre-made meals, power bars, and other items will come in an easy-to-carry package. Other foods will need to be repackaged, especially when buying from grocery stores or bulk food sections.  

To cut back on packaging, try to utilize the packaging the food comes in, but if that is not an option, repackage items in reusable bags or reusable food wrap. When that is not an option, or it is adding too much weight, you can also use resealable plastic bags.  

For organizational purposes, I prefer to have one large food bag in my pack and one snack bag that is easily accessible. I use individual cloth or mesh bags to organize meals within my larger food bag. In some areas, a bear bag or canister is needed, so store all food in that.  

Keep in mind, what you pack in, you must pack out. So, pack a garbage bag to carry for the duration of your trip and follow Leave No Trace guidelines.  

Camp kitchen checklist 

Need a backpacking camp kitchen or are not sure what to pack?  

Here are our recommended essentials:

  • Stove with Fuel
  • Lighter
  • Camp Cookware
  • Utensils
  • Biodegradable Soap
  • Dish Cloth
  • Water Purification or Filter
  • Water Bladder + Bottles
  • Organizational Bags or Stuff Sacks
  • Location Dependent: Bear Bag or Canister
Categories
Camping Lifestyle The Great Outdoors

Layering for Cold Weather Hiking


One big issue that beginner all-season hikers struggle with during the fall and winter hiking seasons is how to dress appropriately. Part of the problem with not wearing proper clothing while hiking is that it can ruin your experience. After all, if you’re uncomfortable the entire time, why would you want to keep going and make that discomfort a regular part of your life?

Knowing what to wear and how to wear it during each season and for all climates is essential. Especially in the shoulder seasons (spring and fall), when you will experience a wide range of temperatures throughout the day. To avoid carrying unnecessary weight, layering is the best way to stay comfortable and safe during the hike.

Winter hiking will likely require more layers or different types of layers than hiking earlier in the fall. Still, many of the basics will overlap as far as types of materials to wear and how to layer for the best protection. For instance, hiking during the first week of October in the Cascades may require layers that can keep you comfortable in 30-60° F weather, both when you’re moving and stationary. Then, factor in any precipitation, and you could end up carrying a lot of extra clothing if your layering system isn’t quite honed in.

Anytime you are layering, you’re going to balance the right combination of base layers, middle layers, and outer layers. It can take some time to find the right combination for you, and everyone’s comfort level will differ.

Before we jump into the best practices for layering clothing for cold weather hiking, you need to know what types of materials to wear. When choosing hiking clothing for any season, gravitate towards moisture-channeling and quick-drying materials like wool, alpaca fleece, Tencel, and synthetic blends (polyester, spandex, and nylon). Avoid cotton, including denim and cotton blends, due to their inability to dry quickly and how easily they absorb water. The adage “cotton kills” is especially applicable to cold environments where hypothermia is a threat.

In the fall, you’ll want clothing that allows for enough air flow to be comfortable mid-day when it is 50-60° F but will keep you warm in the morning and night at camp. You can still wear breathable layers in the winter, but your main focus is water resistance and heat retention.

To break down the basics of layering, you need to know the purpose of each layer and how to differentiate between them:

Base Layer: to wick sweat and moisture off and away from your skin (also known as the underwear layer)
Middle Layer: to help you retain body heat and insulate or protect from the cold
Outer Layer: to shield you and your other layers from wind, rain, and other elements (also known as the shell layer)

The primary purpose of a base layer is to keep moisture away from your skin and to dry quickly. In colder weather conditions, the base layer will usually be a long underwear style and is intended to keep your skin dry to avoid a drop in body temperature that could lead to you feeling chilly or suffering hypothermia.

Materials like merino wool and silk are natural fibers that have this ability along with natural anti-microbial properties. Polyester and nylon can also be good options, but all fabrics and blends will vary in drying and wicking ability, odor retention, durability, and comfort. For cold weather hiking, wear a base layer on both the top and the bottom.

The mid-layer or insulating layer is what will help you trap body heat. This is especially important when you are not in motion and aren’t producing as much body heat. Both synthetic and natural insulating materials exist, and it is often up to personal preference on which one you choose. In general, the puffier the jacket, the warmer it will be. However, other types of mid-layers like wool sweaters can help as well.

You may need more than one mid-layer, depending on the weather. For instance, say you have a base layer that you plan to wear consistently on your hike. You may also pack a Smartwool sweater to wear on top of that, but you’ll likely still need a puffy jacket for the morning and evenings in camp. The wool sweater and the puffy jacket are both still considered mid-layers, so don’t be afraid to bring more than one insulating layer depending on the forecast.

Since you won’t only be wearing long underwear on the bottom for hiking, having a durable pair of hiking pants to wear over your base layer is important. You can often get away with three-season pants made from a synthetic blend of materials that is quick drying and still breathes for fall hiking. For winter hiking, opting for less breathable thermal moisture-resistant pants will be ideal for  regulating body temperature and keeping moisture out.

Finally, your outer or shell layer is the protection piece to keep the wind, rain, and snow away. Most outer layers will be a rain jacket of some kind that is treated with DWR (durable water repellent). This type of treatment on the jackets or rain pants helps the water bead up and roll off the fabric. Over time and with use, DWR wears off. So, be mindful of when and how to reapply if necessary.

Outer layers can still offer air flow (i.e., rain jackets with vents), and the types of outer layers will vary from softshells, waterproof, water-resistant, and more, depending on climate and intended use.

The shell layer is vital in cold weather hiking, especially if you get caught in a storm of any kind. The outer shell, whether it is a rain/snow jacket or pants, is designed to protect you and your other clothing layers from getting too wet and cold. If too much moisture is allowed to penetrate your inner clothing layers, you will struggle with regulating your body temperature.

Other clothing to consider for cold-weather hikes include:

Gloves
Gaiters
Hat
Buff/Scarf/Dickie
Winter specific socks
Winter/waterproof boots
Micro-spikes


Categories
Camping The Great Outdoors

How and Where to Set Up a Tent When Camping

There is a lot to learn when you start to get into outdoor recreation like camping and backpacking. No matter the type of camping, there are some things you should know when it comes to setting up your tent.

First things first, you’ll need a tent! So, how do you choose the right tent for your camping needs? If you’re new to camping and have no idea where to start, talk to a friend with camping experience. Better yet, have them take you camping and teach you a thing or two. If you don’t have any connections that can mentor your camping purchases and experiences, look into outfitters. Gear outfitters often have gear to rent and can take you on guided trips. This helps ease anxieties surrounding the new activity and ensures that someone more knowledgeable can help guide you.

If you decide you are ready to buy your own tent, there are a few things to consider before purchasing:

Sleeping capacity
Season of use
Tent style and height
Tent features
Intended use
Durability needs

While all of these things are important to think about when shopping for a tent, identifying the intended use will be a priority. Are you camping with a family? Do you need a three-season tent? Do you bring your dog camping? Are you car camping or backpacking? Start asking and answering these questions to help guide your purchasing decisions.

A three-season tent is sufficient for most beginner campers as you’re more than likely planning to camp during the spring, summer, and fall. These tents will keep you dry in the rain and light snow, provide privacy, shield you from bugs, and have enough ventilation.

The size of the tent will depend on how many people and pets are going camping and whether you have to carry the tent or not. For instance, if you are car camping with you and your dog, a 1-2 person tent should work just fine. However, if you plan to go with you, a partner, and a dog, you may want a 2-3 person tent. If you are backpacking, the tent’s weight comes into account because you have to carry it from campsite to campsite.

Once you’ve chosen a tent you feel fits your needs, practice setting it up. If you bought the tent new, the manufacturer will include instructions on how to set up the tent properly. Follow these instructions. It can be tempting to try and figure it out on your own, but some tents are more complicated than others, and it is easy to miss a step, forget a piece or two, and even damage the tent if you set it up improperly.

If you bought a used tent, are renting, or are borrowing a tent from someone else, you should still practice setting up the tent at home before you go. These tents may not have instructions included, or they’ve been lost over time, so to find out how to properly set up that tent, look on the manufacturer’s website for resources. More often than not, there will be digital instructions to guide you. With used tents especially, the pre-trip practice setup ensures that you have all the correct pieces and that no part of the tent is damaged.

At the campsite, no matter the type of camping, follow Leave No Trace guidelines regarding the best practices for minimizing your impact in that natural area. Best practices for setting up your tent according to LNT include:

Always camp at least 200 feet away from lakes and streams.
Seek out existing campsites, especially in well-traveled areas
Pitch your tent in an area where vegetation is absent and keep campsites small.
In undisturbed or remote areas, minimize the impact by spreading out tents, finding durable surfaces, and changing sites each night.

Other considerations for choosing a tent location include minimizing stressors like wind and rain. Your tent is built to withstand these elements, but that doesn’t mean that it cannot be damaged, especially in serious storms. Look for natural windbreaks like trees, hills, or rocks to protect the tent and avoid camping under trees with dead or broken limbs. The time of year will guide how you orient your tent in accordance with the wind. For instance, during hot summer months, you may orient the door towards the wind for more of a cooling effect. Then in high wind conditions, you should have the side with the strongest pole structure facing the direction the wind is coming from.

When it is raining or rain is forecast, try to find higher, dry ground under tree cover. Higher ground generally means less moisture and less condensation in the tent, and tree cover creates a micro-climate that tends to be warmer and drier. Always avoid camping in low areas where water can channel or collect during a storm, and orient the door away from the wind during rainstorms.

Now that you’ve found the perfect spot to pitch your tent, it’s time to set it up! First, clear the area of any debris that can damage the tent’s floor or make for uncomfortable sleep. These items include things like sticks and rocks. Once this is established, place the footprint down and then roll the tent out on top. If it is exceptionally windy as you set up the tent, have another person help you or stake down the corners to hold it in place and readjust later.

Once you have followed the manufacturer’s instructions for getting the poles into the tent and up, stake the tent. Most stakes will have the best holding power in soils if vertical when pushed into the ground. On surfaces that are hard to push a stake in, use a rock or a mallet to hammer it down. Push the stake in just far enough that it is close to the ground, but enough of the top is exposed to attach a cord over it.

After you’ve staked the tent, decide if you need the rainfly or not. A rainfly may not be necessary for the middle of summer, and having it off will give you a great view of the sky and a much cooler sleeping situation. However, knowing how to attach the rainfly in a pinch is necessary if you go this route. If you need the rainfly, then secure the rainfly wraps first. These typical velcro strips attach the fly to the tent poles to make it a sturdy cohesive piece. Attach the rainfly to the tent corners and then tension the fly evenly.

If bad weather is forecast, it can also help to add guylines to your tent setup. Guylines are generally optional, but they can help keep your tent more secure and protected. If you’re unsure about the severity of the wind, at least add one guyline on the side of the tent the wind is coming from. For a more stable shelter, attach guylines evenly on all sides of the tent.

Check the setup each night before bed to ensure everything is stable and in place, and enjoy the camping experience.

Categories
Camping Entrepreneurs The Great Outdoors

How to Pack Your Backpack for an Overnight Trip

Backpacking can seem like a daunting undertaking if you’ve never done it before. So, I almost always recommend a short overnight trek or a weekend outing for people wanting to try it out for the first time. That’s just enough time to experience backpacking without the intensity of an extended adventure.

If you’ve never gone backpacking before, then it is likely you also need to get some of the gear. Before you jump to buying everything you might need for an overnight backpacking trip, borrow or rent first. These options are more affordable since they give you the chance to try out the activity without the pressure of financially investing fully. Renting or borrowing gear from a friend also gives you a chance to try out different gear options before investing in your equipment as well.

Eventually, you’re going to want a few of your own things. And a great starting point for beginner backpackers is first to get your backpack.

Choosing a Suitable Pack

While the best option when starting any new activity is to start with what you have, even if you have a backpack for school or commuting on your bike around town, the chances are that it isn’t suitable for a backpacking trip.

Standard backpacks for day-to-day travel can work when you first start day hiking, but as you graduate to backpacking, you need more room and better support. Most backpacks we use for daily activities only have shoulder straps, have limited organization, and have no back support. On the other hand, backpacking packs are designed to help you comfortably carry heavy loads over long distances.

There are three main areas to look at when choosing the right backpack for your trip needs:

  • Size
  • Features
  • Fit

The size of the backpack you need will depend on the length of your trip and what you need to carry. For instance, if you are backpacking in the summer, a smaller pack could work, but in the winter you need to carry more layers, bulkier sleep gear, and maybe more fuel for cooking.

When looking at backpacking packs, the size is labeled in liters. For an overnight or weekend trip, a 30-50L pack should work just fine. For overnights specifically, a pack less than 35L can work. Liters are the standard measurement for backpacks because it discloses the volume of the bag. An easy way to think about the size of a backpack then is to imagine a standard Nalgene water bottle. One water bottle is one liter. So, a 35L backpack hypothetically should be able to hold 35 Nalgene’s worth of water. I don’t recommend pouring water into your pack though, that’s for visualization purposes only.

The features of your pack will vary depending on the style of the bag and the intended use. That’s why backpacking specific bags work best. They’ll have more features like exterior attachment points for gear, a frame to support the weight, various pockets for organization and easy access, a hydration reservoir, padding on the back and straps for comfort, and a hip belt to take most of the weight off of your shoulders. There are other possible features and additional accessories, so when shopping for a bag, look at all options to see what works best for your needs.

Finally, the fit of the bag needs to be specific to your body. They make male and female-specific backpack designs to better fit differing anatomy like broader shoulders or wider hips. There are also unisex options. Going to a gear shop to try on backpacks is recommended, even if you don’t buy them there. Most sales associates in those stores are trained to help customers find and fit backpacks to their body types and size. Although backpacks may be labeled as gender-specific, don’t let that stop you from trying them. For example, I am a female but use either male or unisex backpacking packs because I have broader shoulders, and female-specific bags don’t fit my body as well.

Renting backpacking equipment can also help you find the right bag for you as the outfitters will help find and fit a backpack to your body. Not all outfitters will have the same options, but if there is one with several brands and styles, try on a few and see which ones feel best. That way, you essentially get a test run of a bag before you buy it.

What You Need to Bring

This is an overnight or weekend trip, but the basics of any backpacking trip will require similar gear. How much of each thing and the type of gear will depend on the length of your trip, the climate/weather, and your personal needs. I’m not going to break down each type of gear in detail, but instead, provide a brief list so you have an idea of what you’ll need to fit into your backpack while you’re packing.

Items to include on a backpacking checklist:

  • Hiking shoes
  • Season-appropriate clothing
  • Tent (or other shelter)
  • Sleeping bag
  • Sleeping pad
  • Stove + Fuel
  • Other camp kitchen supplies
  • Enough food for the length of trip
  • Water bottles + reservoir
  • Water treatment supplies
  • Personal hygiene products
  • First-aid and emergency kit
  • Repair kit
  • Headlamp

Other items can be included or even necessary to bring pending the type of terrain you encounter, the time of year you’re hiking, and to fulfill other personal needs.

How to Pack Your Backpack

Even though the list above isn’t exhaustive, it can still seem like a lot to fit into a 35L backpack! You’ll be surprised how much you can carry comfortably as you start to pack and hit the trail.

When packing your backpack for any trip, the first thing to do is gather all of your supplies and lay them out on the floor. This gives you a great visual to ensure you have everything you need. You can go down your checklist and double-check that it is all there. Then, you can begin packing your bag.

The Zones

Bottom zone: usually a sleeping bag compartment, this zone is designed to fit bulkier gear items that you won’t need until you get to camp.
Core zone: this is the middle of your pack, above the bottom compartment. Pack heavier items here like your food, bear canister, and camp kitchen.
Top zone: near the top of your pack is where you can store items that may be somewhat bulky, but may still need while hiking. These items include extra layers, a water filter, a toilet bag, and your first aid kit.

There are other usable areas on the backpack, like the accessory pocks and any exterior attachment points. Some packs have straps designed to attach a foam sleeping pad to the base of your pack, and others will have a brain with pockets that sit on the top of the pack.

These accessory pockets and lash-on points are ideal for items you need often or in an emergancy. They could be front pockets, hip belt pockets, water bottle holders, side pockets, or brain pockets. Each backpack will have varying designs. Examples of things often kept in accessory pockets include a map, snacks, pack rain cover, compass, headlamp, or your ID.

Don’t be afraid to pack, unpack, and repack your bag multiple times or change things around when you are on the trail. You want the pack to feel comfortable and be easy to carry.

The last thing to do before you put the pack on after it’s packed is to compress things as much as possible. Most backpacks will have compression straps to help press things together and make the bag more compact and easier to carry.

Categories
Camping The Great Outdoors

Enjoy the Great Outdoors With These Made-in-America Products

Finex Skillet, $120–$240

(Courtesy of Finex)

FinexUSA.com
Based in Portland, Oregon, Finex crafts cast-iron cookware by hand. Their pans have a unique octagonal shape that allows for easy pouring of liquids and releasing of whole-pan dishes such as cornbread, while each handle has a stainless steel spring that helps keep it cool enough to touch. The Finex skillet is perfect to bring on a camping trip to do all the cooking.

Gokey Boots, $299–$599

(Courtesy of Gokey)

GokeyUSA.com
These are your classic outdoorsmen’s boots, primarily made from handsome Brazil pebble grain leather that’s tanned in the United States. Gokey is a 171-year-old company that continues to handcraft its shoes to this day, out of a factory in Columbia, Mississippi. The leather retains 18 percent of its original oil content, making it soft, flexible, and more water-repellent.

Flint and Tinder Waxed Trucker Jacket, $240

(Courtesy of Huckberry)

Huckberry.com
A sturdy jacket can be a necessity as you brave the elements outdoors. This one is made of water-resistant sailcloth that will reveal natural wear patterns as the fabric creases and bends. The sailcloth is sourced in New Jersey, while the jacket is made in Los Angeles.

Middleton Made Knives’ ONA Knife, $360

(Courtesy of Middleton Made Knives)

MiddletonMadeKnives.com
Artisan knife-maker and South Carolinian Quintin Middleton has created a new culinary folding knife, dubbed ONA (a Yoruba term for fire), designed to be tough yet lightweight and suitable for a variety of uses, from working in the kitchen to hunting and fishing outdoors. The blade is made of stainless steel and the handle is made of anodized titanium.

Middleton became curious about knife-making after watching “Conan the Barbarian”; he took down his mother’s shower rod and beat it into a knife handle. As a teenager, he met bladesmith Jason Knight and began training under him. Today, Middleton is known for making knives for Charleston’s top chefs.

ULA Equipment Backpacks, $160–$299

(Courtesy of ULA Equipment)

ULA-Equipment.com
ULA Equipment makes backpacks that are lightweight, yet durable enough to get the job done. The company’s popular Catalyst model can hold up to 40 pounds and has comfortable features including an internal frame, a padded hip belt, and contoured shoulder straps—it’s even bear-canister capable. Their bags are all sewn and made in Logan, Utah.

Categories
Camping National Parks The Great Outdoors

Tips for Camping at or Near National Parks

When Mark Koep first started camping with his family 12 years ago, one of his fears was being attacked by a bear. “We’ve seen black bears invading trash cans, but that’s about it,” Koep said in an interview. “There’s not a lot of danger when you’re out camping, especially when there’s a lot of people in the campground, just because animals shy away from that.”

Although bears are rare, Koep said he has seen other wildlife emerge from the surrounding forest at campsites. “We have seen moose, mountain lions, and wolves in and around campgrounds, but never in a threatening way,” he said. “There was always a sense of awe and amazement to see them.”

Koep and his family are among the 10.1 million households who camped in 2020, according to a Kampgrounds of America study. “We already had growth in camping, but then COVID just accelerated it,” Koep said in an interview. “With the loss of other types of travel, camping became a fallback, plus it has the benefits of you’re relatively isolated, so you’re able to stay distant from people, and you’re able to go out into remote areas.”

Koep, who founded resource site Campground Views based on his camping experience, expects campsites to be packed this year now that COVID-19 restrictions are being lifted state by state and vaccinations are on the rise nationwide. “A lot of the Forest Service and Bureau of Land Management lands where you can camp for free by just parking off the side of a road are going to see record numbers of people,” he said. For newcomers to the campsite scene, Koep offers the following tips.

When campgrounds tell you they’re booked 2 to 6 months out, call back.

“They may have just had a few cancellations for the weekend,” Koep said. “Generally, people are booking up campgrounds, but then the trend we’re seeing is cancellations at the last second. There are about a billion campsites nationwide, and there’s never going to be a million people camping. So there’s always availability.”

(Courtesy of Mark Koep)

Broaden your search for campsites outside of major national parks such as Rocky Mountain, Yellowstone, Yosemite, and Grand Teton.

“There’s a handful of campgrounds inside Yellowstone National Park and other national parks, but if you do a 50-mile radius search around Yellowstone, there’s literally hundreds of campgrounds,” he said. “It may require a bit more research, but you can always find a campsite in the surrounding area.”

Bring a propane stove when camping in a tent.

“If you’re in an RV, you’ll have a stove or microwave in the RV and maybe even a power-appropriate barbecue. And in a tent, generally, you’ll have a Coleman camping stove that’s propane powered,” Koep said. “Sometimes you can cook on a fire at a campsite, but there’s usually a lot of fire restrictions in the summertime, especially out west.”

(Courtesy of Mark Koep)

Ask before transporting firewood across state lines.

“Some states don’t allow it,” he said. “Research and understand the rules of where you’re going before you get there so that you don’t inadvertently do something that causes damage to the area.”

Juliette Fairley is a graduate of Columbia University’s Graduate School of Journalism. Born in Chateauroux, France, and raised outside of Lackland Air Force Base in Texas, Juliette is a well-adjusted military brat who now lives in Manhattan. She has written for The New York Times, The Wall Street Journal, TheStreet, Time magazine, the Chicago City Wire, the Austin-American Statesman, and many other publications across the country.

(Courtesy of Mark Koep)