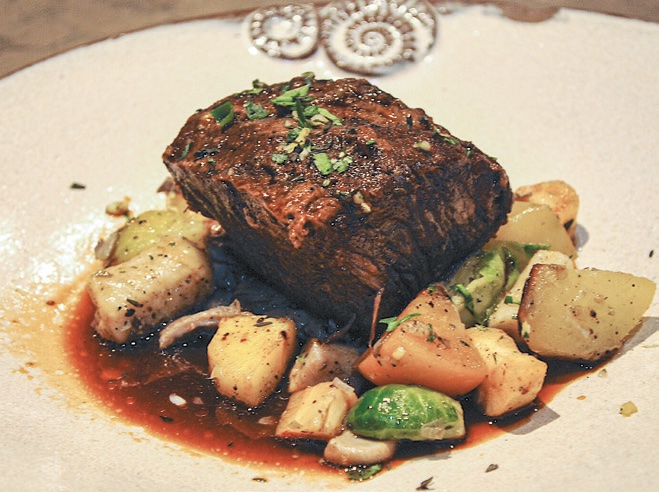
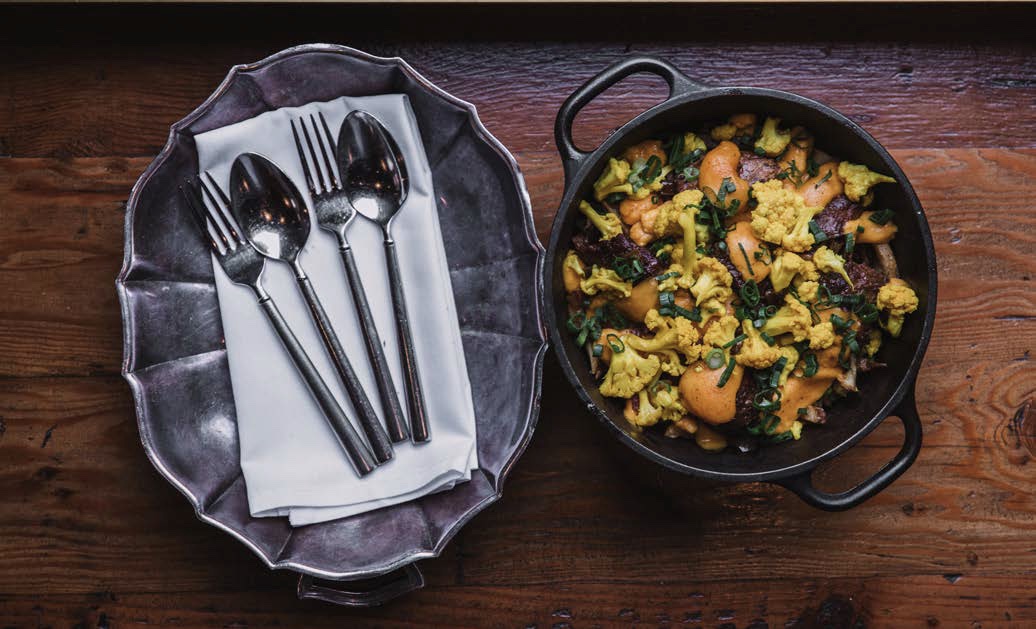
Braised short rib with root vegetables, brussels sprouts, and jus. (Karim Shamsi-Basha for American Essence)
Chris Hastings is comfortable in his own skin. Trim with short hair and glasses, he tucks his shirt in and speaks with the authority of someone on a mission—one of providing mouth-watering cuisine to his customers and fans.
Hastings has been around the culinary block a few times. In 2012, he beat Food Network star-chef Bobby Flay on Iron Chef, and in 2013, Hastings received the top culinary prize in America: a James Beard Award. His Hot & Hot Fish Club has dazzled Birmingham’s sophisticated clientele using a modern approach to blend Southern food with French and Californian styles and techniques.
Hastings works with his family. His wife Idie runs the business side of the restaurant, and his son Zeb is a sous-chef. Their daughter-in-law Molly helps Idie with marketing and public relations.
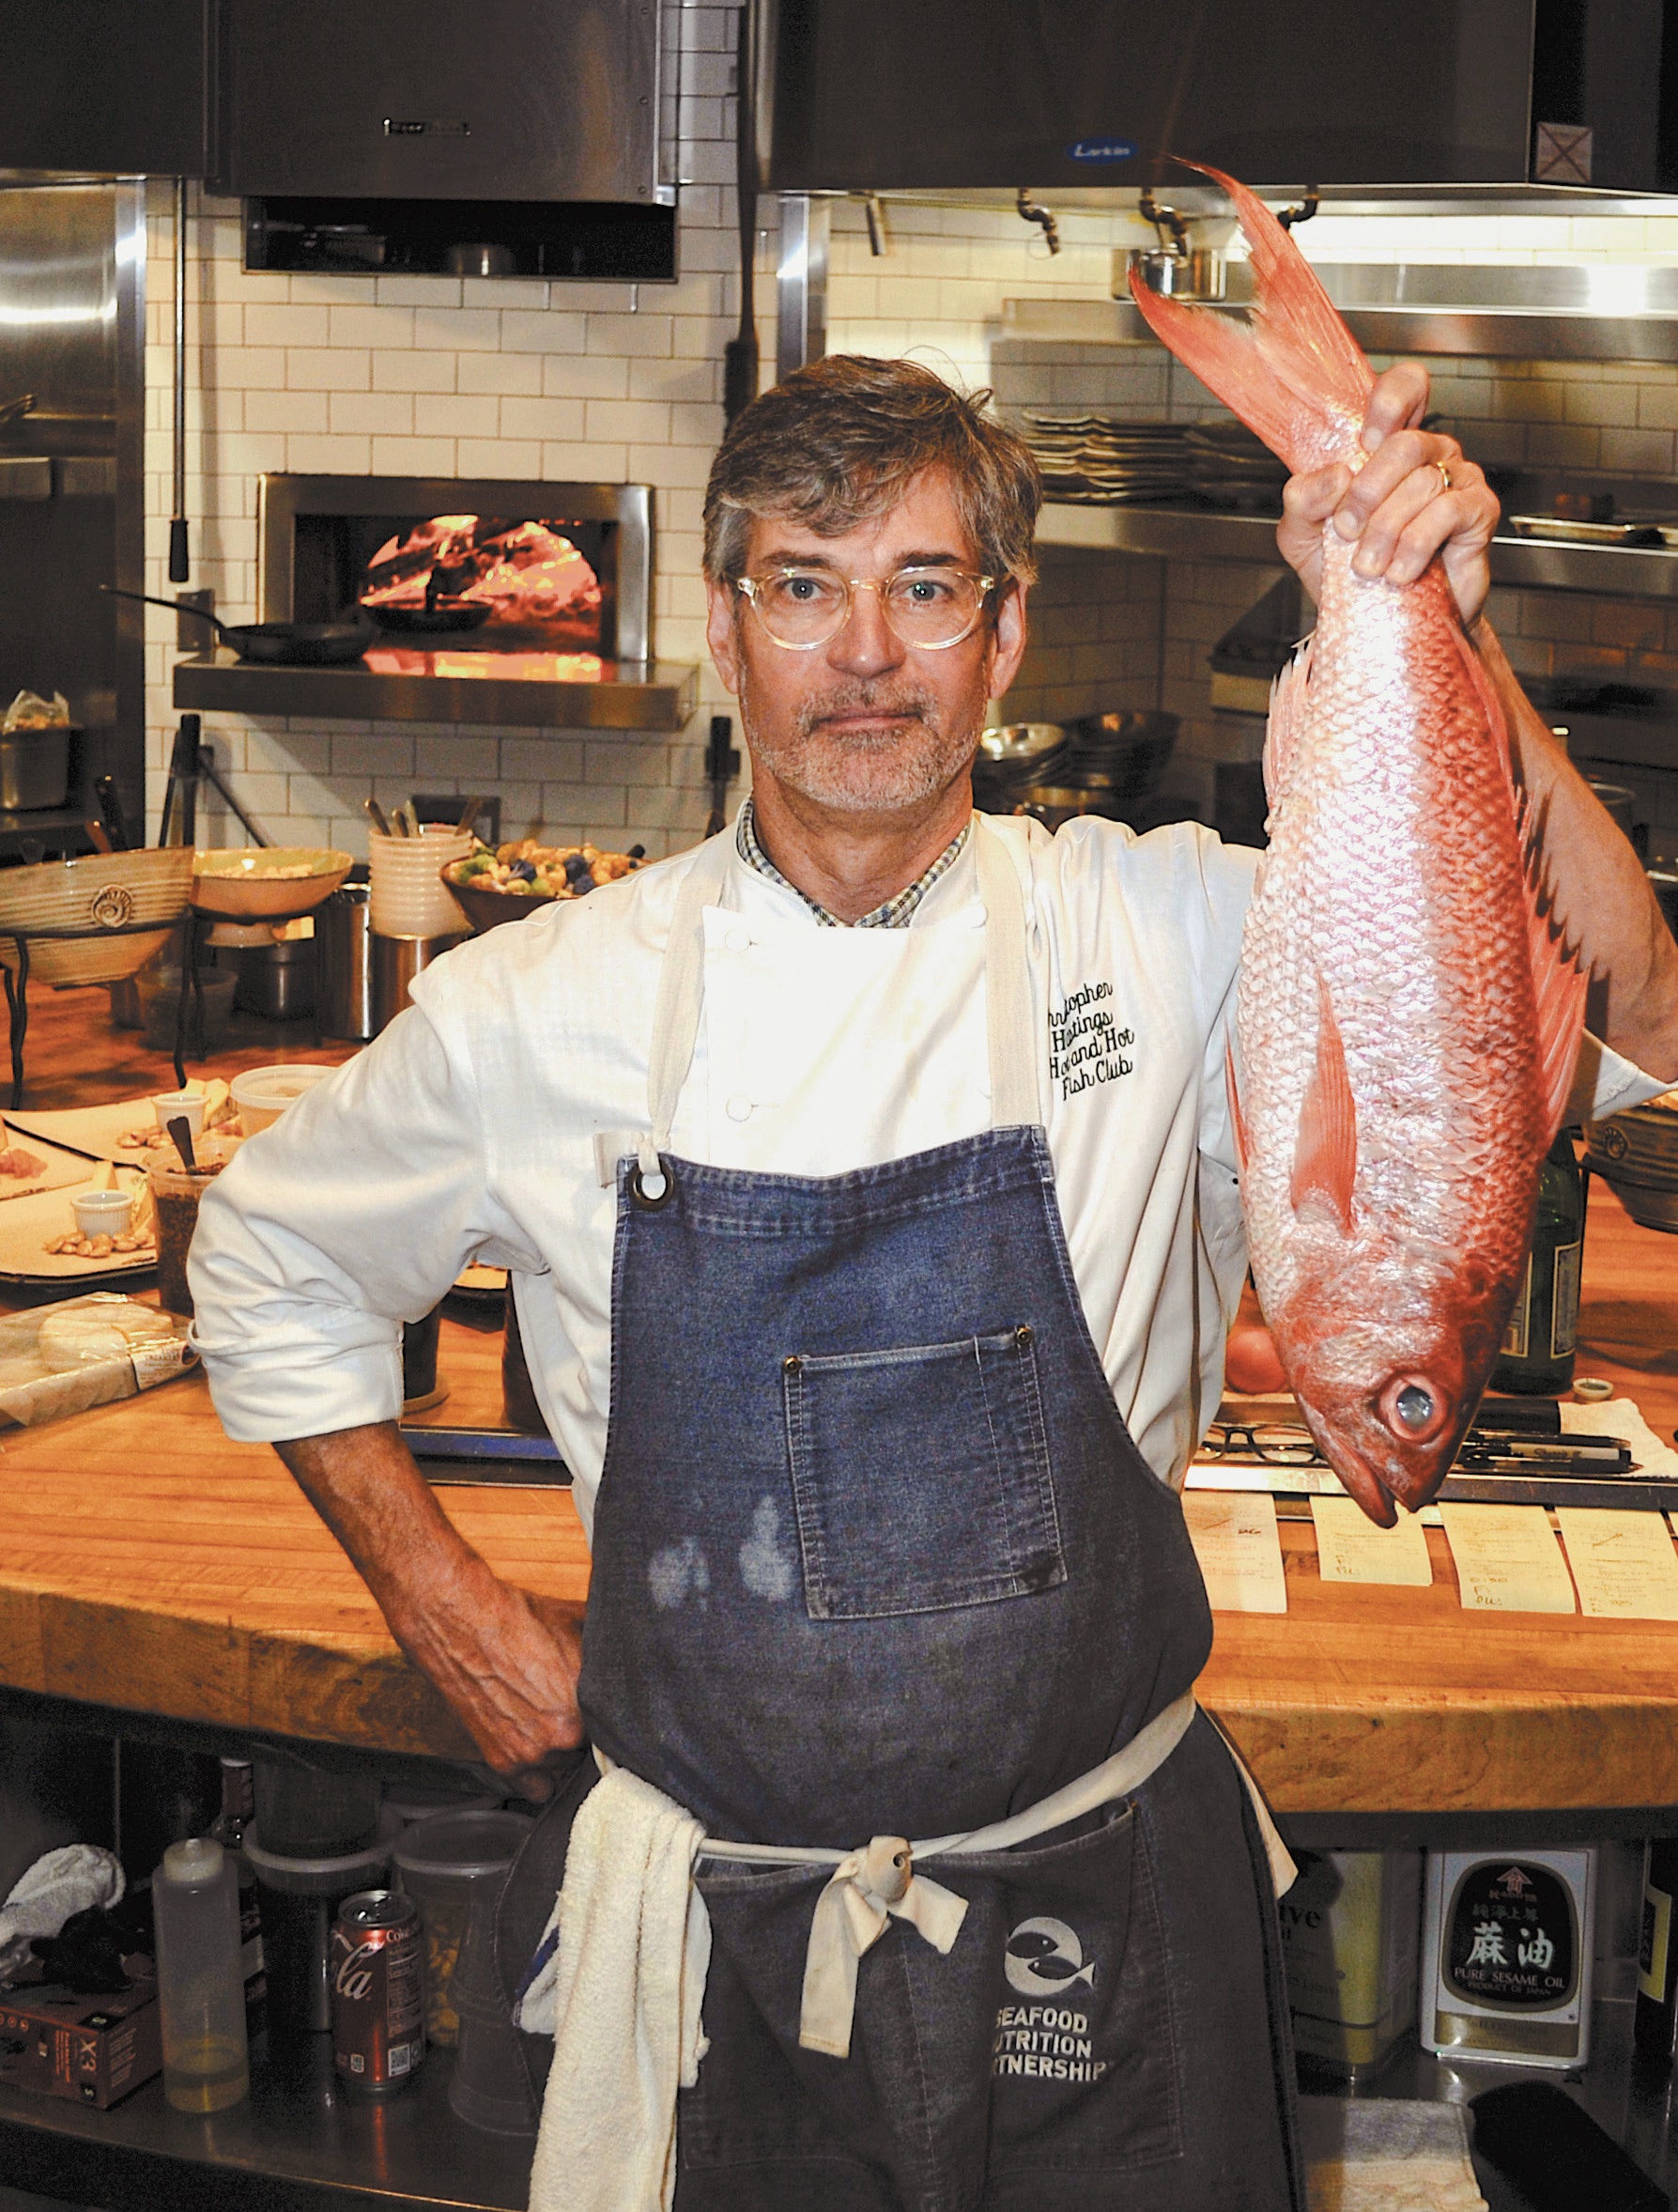
Chef Chris Hastings in the kitchen of the Hot & Hot Fish Club in Birmingham, Ala. (Karim Shamsi-Basha for American Essence)
“We opened the original location of the Hot & Hot Fish Club in 1995. When we opened, everyone thought we were crazy because the location was questionable,” Chris said. Then, with a mischievous smirk, he continued, “We have made it work, though. And now, in this new location at Pepper Place, we are really cooking.”
The new Hot & Hot Fish Club is in the Pepper Place district of Birmingham, filled with artisans, galleries, and other creative ventures. The Hastings family opened the restaurant six weeks before the pandemic hit.
“When we opened here in Pepper Place, everyone was so excited, the staff, our loyal guests. Then, the pandemic hit,” Idie said. “We had no idea how long we would be closed, but it dragged on. We finally opened in October of 2020, and it’s been terrific.”
Chris and Idie have been married for 34 years and have worked together for 27 years. The couple enjoys being with each other despite having different management styles.
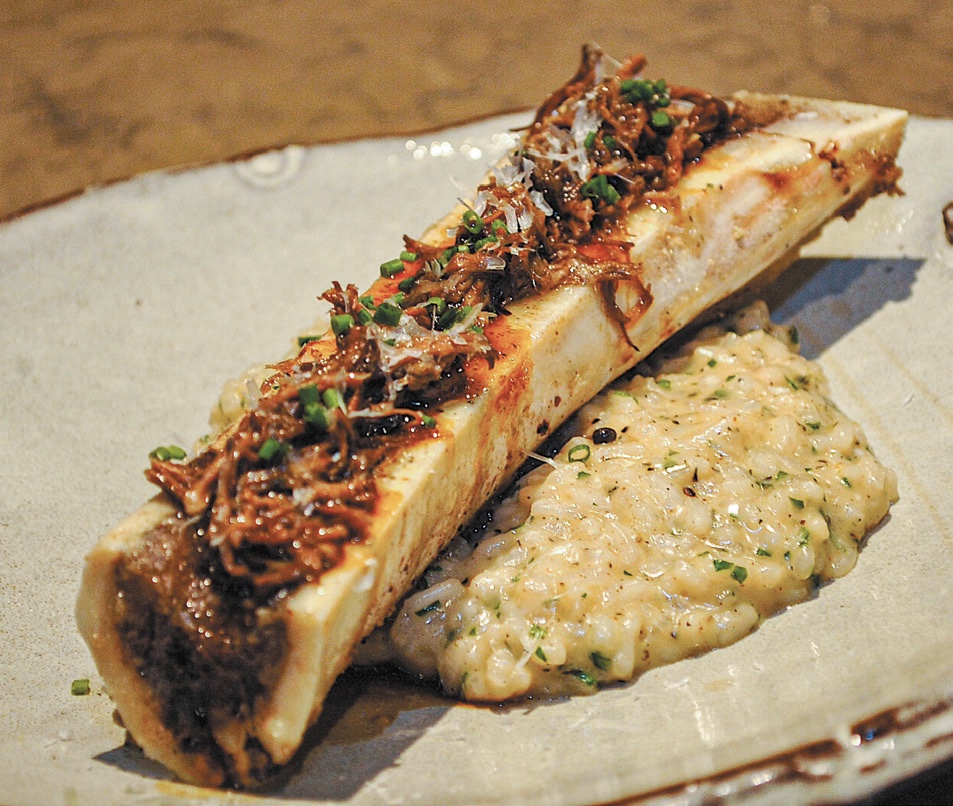
Bone marrow with short rib and mushroom risotto. (Karim Shamsi-Basha for American Essence)Roasted beet salad with pecan granola, sheep’s milk cheese mousse, arugula, and blood orange gastrique. (Karim Shamsi-Basha for American Essence)
“The two of us working together is like the yin and yang. I may not agree with everything Chris does, but at the end of the day, you have to ask yourself if it’s worth it,” Idie said. Chris laughed, winking at his wife, “Exactly. But believe me, everyone knows who the real boss is.”
Chris studied as a chef at Johnson & Wales Culinary School in Providence, Rhode Island. He then moved to Birmingham and worked for legendary chef Frank Stitt as chef de cuisine of Highlands Bar & Grill. After a stint in California, the Hastings family returned to Birmingham and opened the Hot & Hot Fish Club, followed by Ovenbird, another restaurant in the same district.
The Hastings family loves the farm-to-table process. “We have the best food artisans and purveyors here in Alabama,” Chris said. “I truly love what I do; it’s what wakes me up in the morning. And I adore working with my wife and my family. I can’t do much of anything else, but I love being a chef. I love the tasting and handling of food and the creation of the dishes. To this day, it’s exciting every day. I live for that feeling I get when I know the dish is right.”
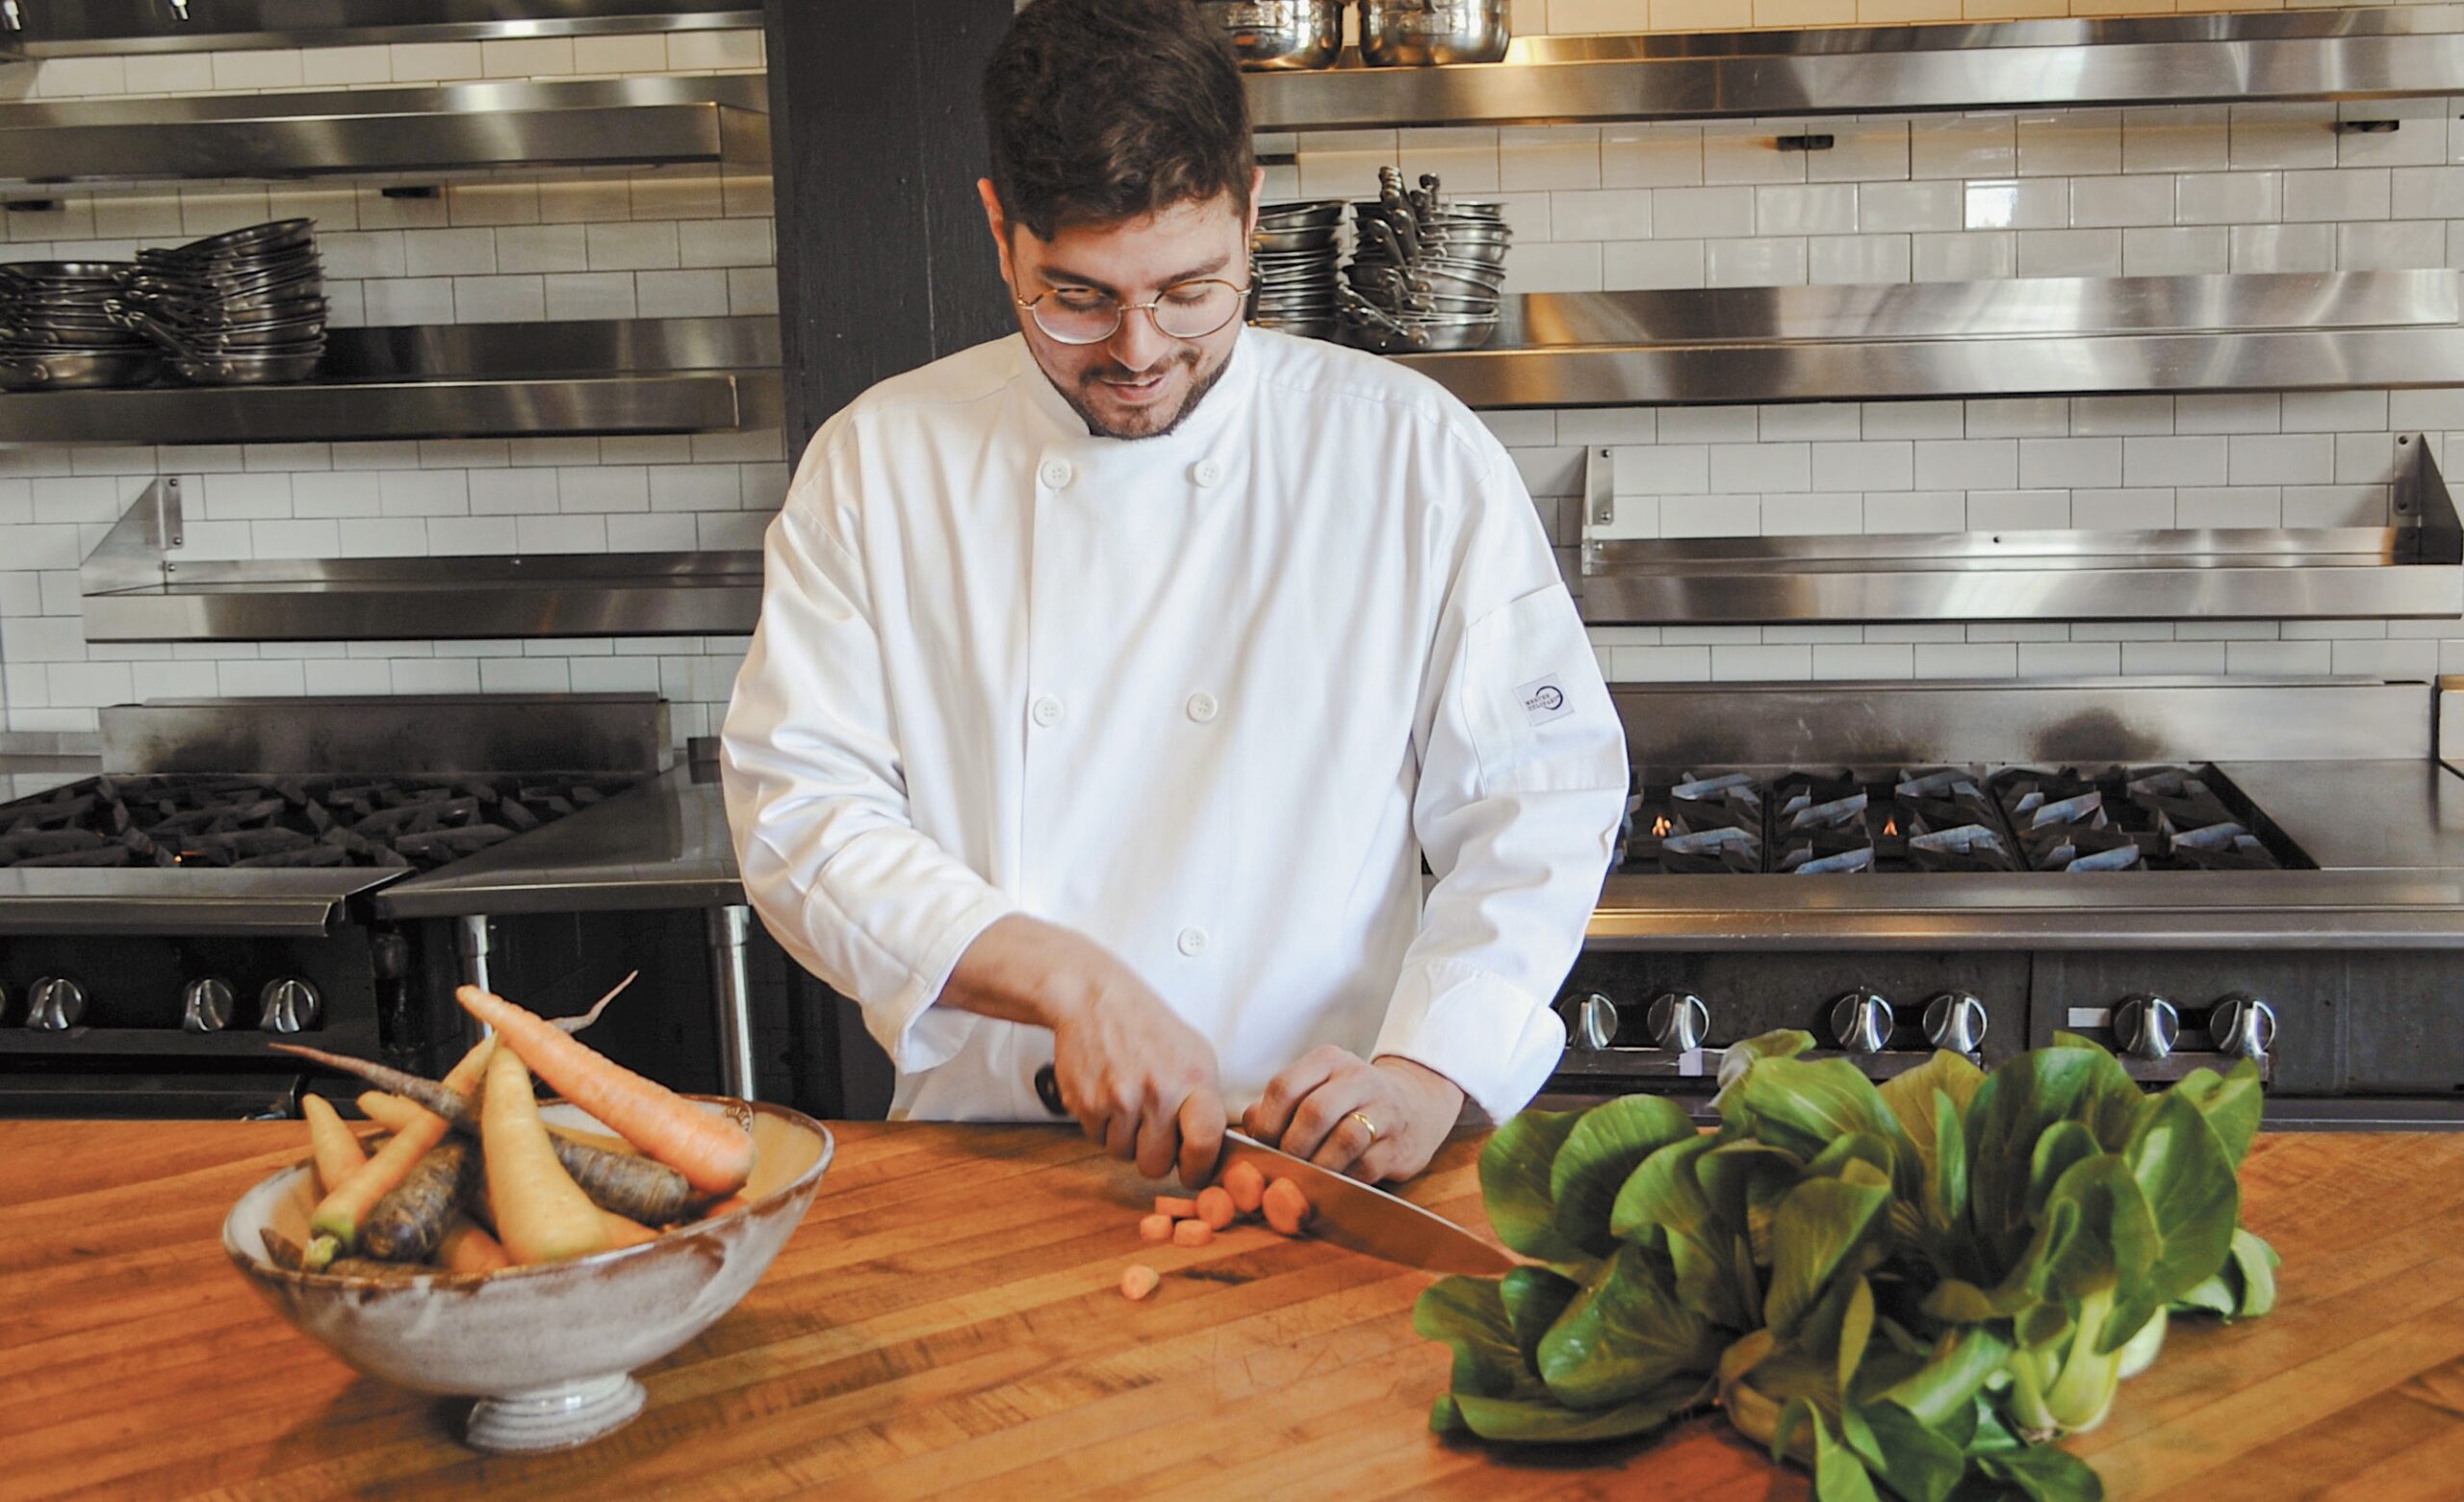
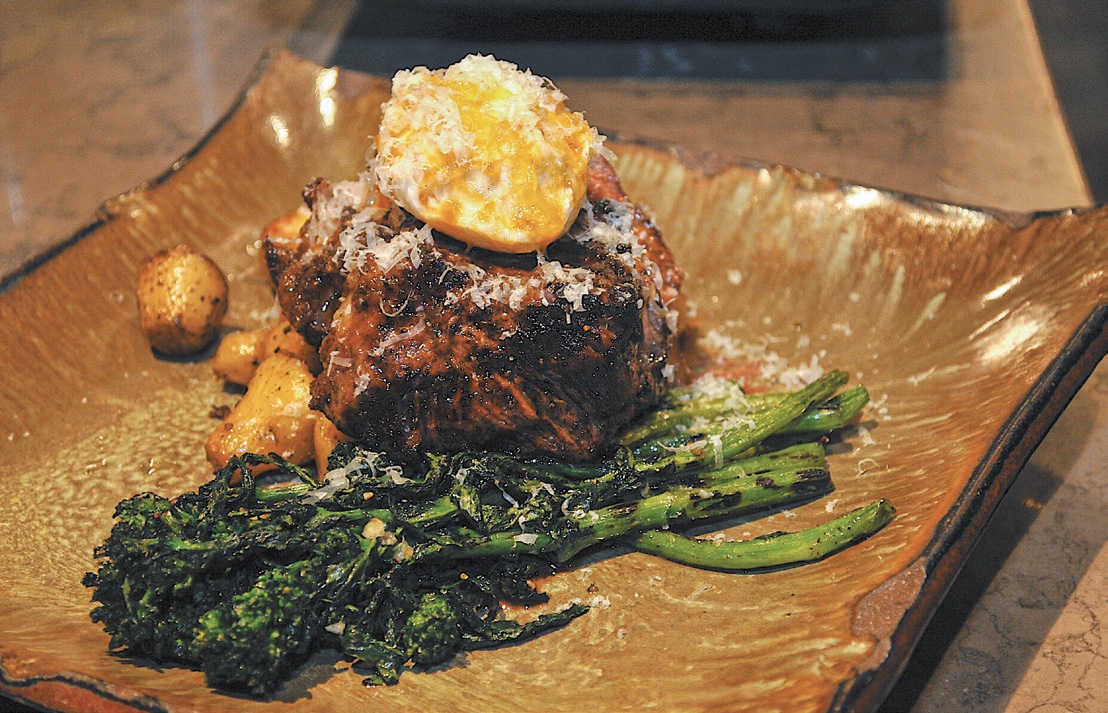
Hastings’s son Zeb, who is also the sous chef at the restaurant. (Karim Shamsi-Basha for American Essence)Prime New York strip with roasted potatoes and grilled rapin. (Karim Shamsi-Basha for American Essence)
Chris has had his share of high-profile accomplishments. He has appeared on the Martha Stewart Show and the Today Show. He has impacted the culinary scene in Birmingham and the South at large. His two restaurants, Hot & Hot Fish Club and Ovenbird, continue to receive rave reviews. But one honor rises to the top.
“Beating Bobby Flay on Iron Chef was just … sweet!” Chris said. “We practiced for two months. Then we competed and created five dishes around sausage. When they announced that we won, it was surreal. That moment will probably live forever.”
Idie peered at her husband, nodding. “When they said, ‘And the Iron Chef winner by one point is—’ there was this silence for what seemed like forever. Then they said Chris’s name. I let out a scream so loud you could hear it on television. I was going crazy. I couldn’t believe it, and then, I could believe it. I definitely could believe it. Chris is extremely talented.”
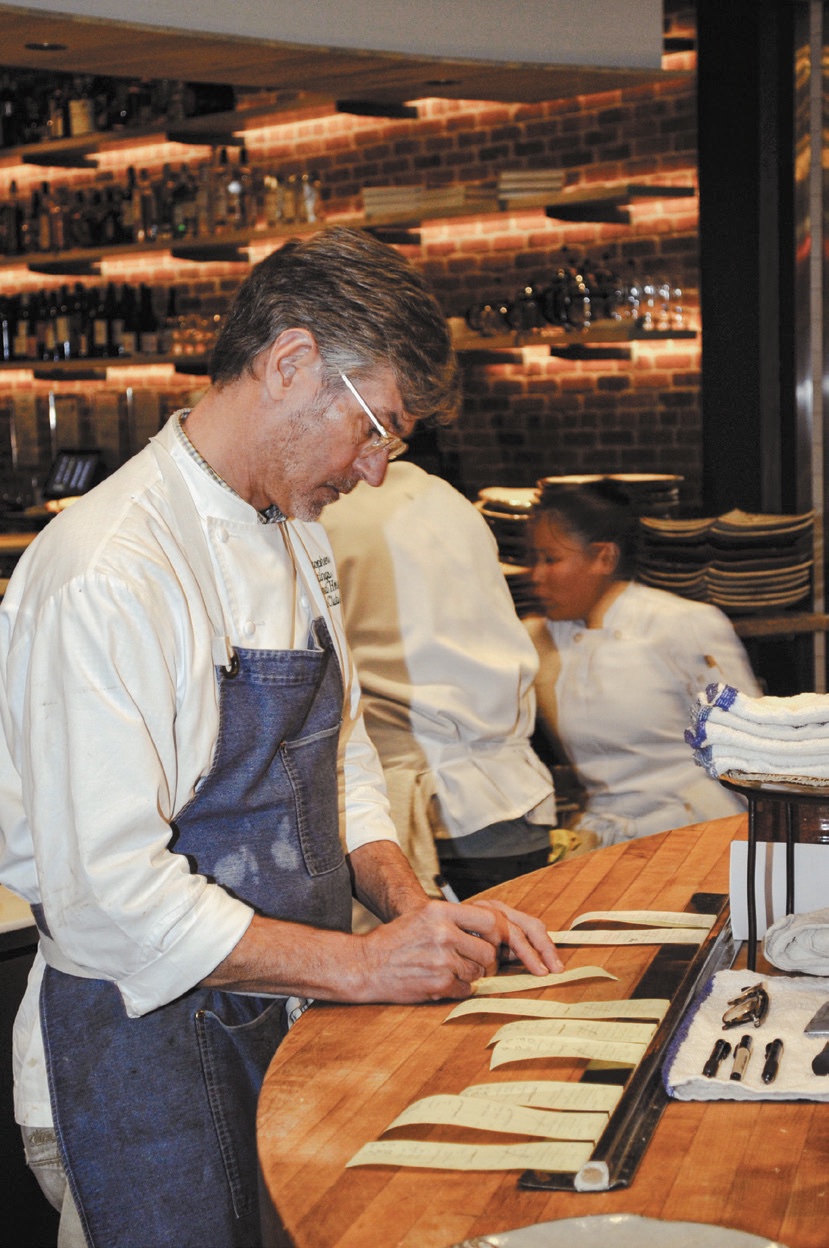
Chef Hastings takes orders on a busy day at the restaurant. (Karim Shamsi-Basha for American Essence)The Hastings family (L to R): Zeb and his wife, Molly, with baby Fraser, Chris, young Hubbell, and Idie. (Karim Shamsi-Basha for American Essence)
Zeb and Molly joined in the conversation while carrying their two little ones, Fraser and Hubbell. “We loved it that my dad won. Working together can be challenging, but for the most part, it works. Sometimes we have really tense moments; other times it’s a lot of fun,” Zeb added. “We cover a wide range of emotions, believe me.”
Molly nodded at her husband while squeezing little Fraser in her arms. “I love the fact all of us work here, and even though it’s not that easy sometimes, we know we’re very fortunate.”
Summing up the Hastings family’s journey to success, Idie took a long breath, then peered at her husband, her children, and the two little ones. “When I look at my family, the restaurant, and all that we have accomplished, I am seriously blown away. … I never set out to accomplish all of this. Our journey has evolved,” she said. Her dream was to be happily married, work with her husband, and raise a family—and it came true, in a way she didn’t expect. “I am very grateful and proud.” Idie was silent for a few seconds. She closed her eyes and made a tiny and content grin, one of assurance that all was good in the world. “I couldn’t ask for anything more in my entire life.”
This article was originally published in American Essence magazine.
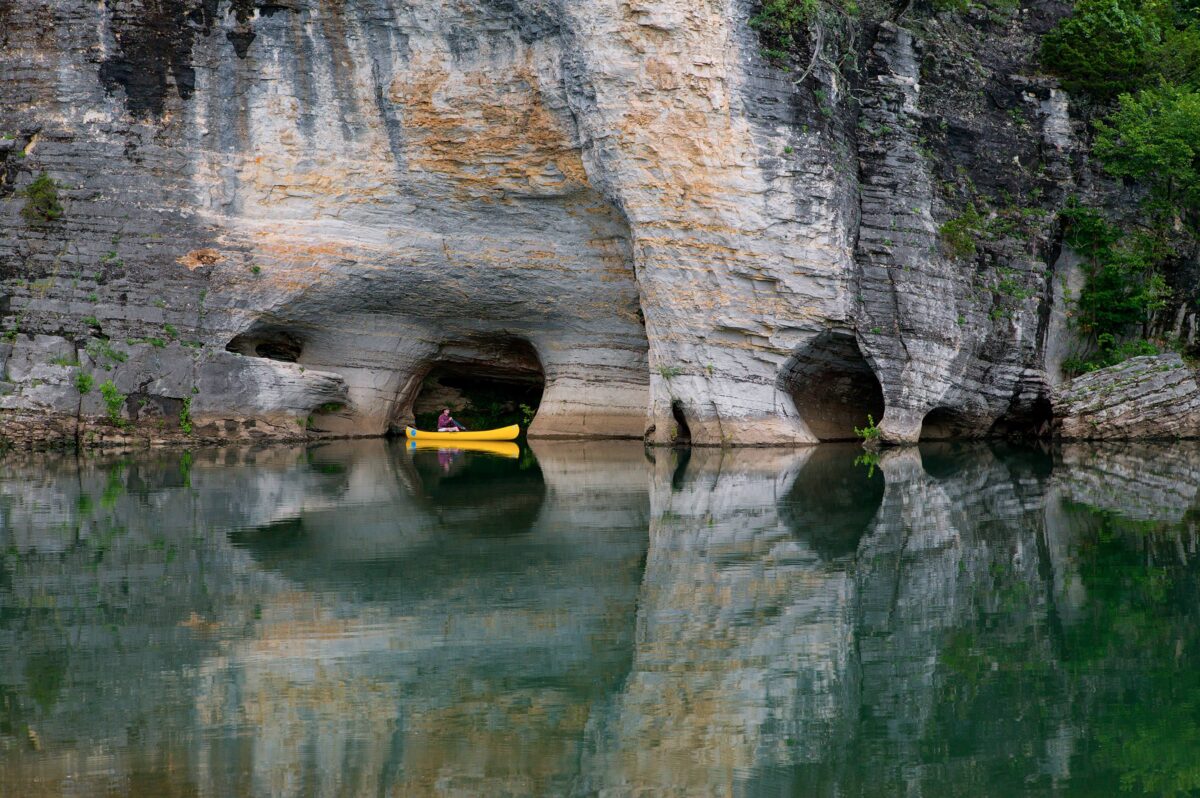
Visitors can explore the Bee Bluff via a canoe on Steel Creek. (Tim Ernst)
Winding down the mountain and through the rugged landscape of dense forest scattered with enormous rock formations, the road flattens out at the tiny, outdoor town of Ponca, Arkansas. With a population of fewer than 120 people, a post office, and a couple of wilderness outfitting stores, Ponca is the middle of nature-nowhere for the Midwest. With stunningly beautiful rustic surroundings and a full array of outdoor adventure opportunities, this northern Arkansas area is perhaps one of America’s best-kept secrets.
Ponca rests on the Buffalo River, the first river in America to be designated a National River. Commencing deep in the highest elevations of the Boston Mountains, the river’s over 150 miles of winding water carve a path eastward through the wilds and wonders of northern Arkansas. Its uppermost section boasts such steep terrain, sharp ridges, crags, and crevices that roughly the first 16 miles are further designated as wild, and the upstream gem is officially known as the Buffalo National Wild and Scenic River.
Show up at the Ponca Low-Water Bridge on any spring weekend morning, and you’re likely to see groups of people wearing orange life vests, paddles in hand, shoving off from shore in canoes bearing outfitters’ logos. Across the bridge lies a short trail to a historic cabin built in 1882, as well as a trailhead leading to a scenic, full-day, 12-mile hike upstream to Boxley—a small community in times past but now a river put-in and trailhead itself. Beneath this hiking stretch, the valley extending up to the ridgetops is a favorite location for Arkansas’s only herd of wild elk. Catching sight of them grazing before a backdrop of sloping terrain near the river’s emerald green waters resembles a scene from somewhere out West.
History
The Buffalo National River was established in 1972; its founding was the result of a long, contentious battle that began in 1960 when the U.S. Army Corps of Engineers proposed the construction of two hydroelectric dams that would have destroyed the river and buried its beauties. Under the leadership of Dr. Neil Compton, area residents and outdoor enthusiasts united to fight the proposal, forming a coalition known as the Ozark Society. Their decade of unwavering commitment to the river’s preservation ultimately saved the Buffalo and the treasured wilderness surrounding it.
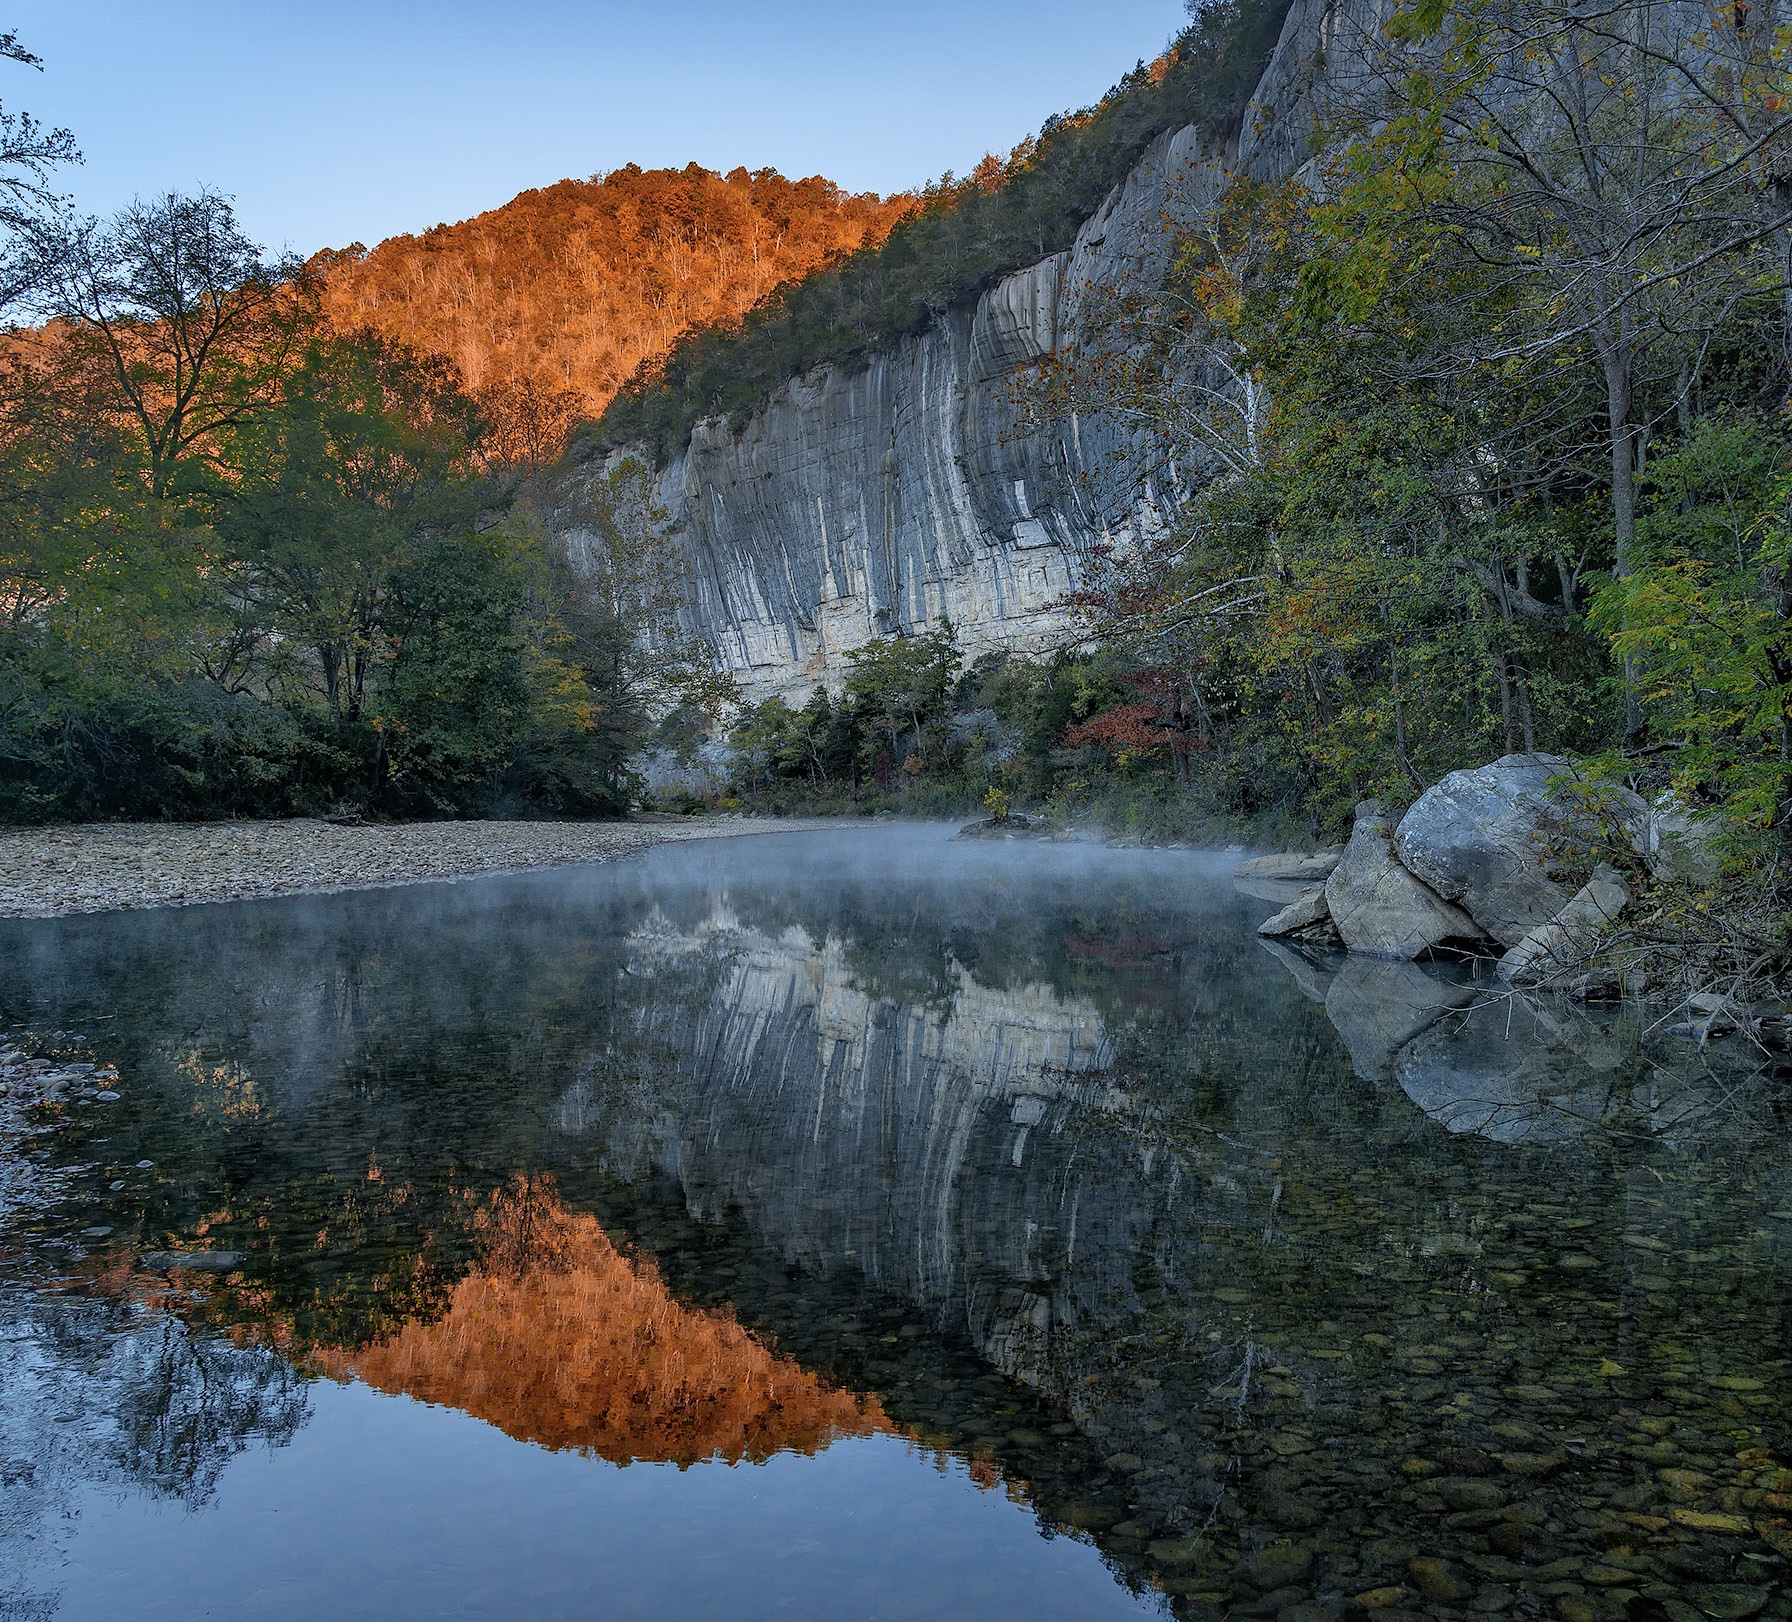
The Roark Bluff at dawn, one of the most stunning sites at Buffalo National River. (Tim Ernst)
The year 2022 marks the 50th anniversary of the Buffalo as a nationally protected area.
One of the few remaining free-flowing rivers left in the lower half of the country, the Buffalo River itself is a sculpted work of art, with water carving around rock and winding through untouched stretches of Arkansas wilderness. Its towering, seemingly painted bluffs are striking, and the clear emerald water that runs beneath them, vibrant and pristine. The waterway is a mecca for canoeists, kayakers, fly-fishers, and riverside campers. Perhaps an even greater set of wilderness wonders, however, exists within the surrounding crags, cliffs, and creeks beyond its banks—discoveries found after setting out with a pair of hiking boots, a map, and a backpack.
Area hiking expert Tim Ernst has spent almost a lifetime unveiling some of those discoveries, carving out trails, and documenting many of the Buffalo Wilderness Area’s wonders. His journaled publications are vital to hikers and backpackers alike, as they record miles of hiking trails ranging from the frequently traveled to the obscure, the relaxing stroll to the arduous climb, and the tiny trail to the week-long expedition.
Buffalo Wilderness Area
The nearly 95,000 acres encompassing the Buffalo National River hold a network of trails and treasures that extends even farther as it connects with the surrounding 1.2 million acres of rugged Ozark National Forest. With levels of exploration ranging from novice to hard-core hiking, and opportunities for mountain biking and equestrianism as well, the undeveloped remote areas are full of treasures waiting to be discovered by outdoor enthusiasts of all levels and ages.
Hiking the Buffalo Wilderness Area is also year-round. “You can’t hike in the Rockies, the Appalachians, or the Pacific Crest in the middle of winter,” said Ernst, “but you can hike in northern Arkansas—and the Buffalo’s emerald-colored water contrasted with scenic views of grays and browns is striking.”
Just this past January, Ernst completed an end-to-end winter bushwhacking journey starting at the river’s Cave Mountain headwaters and traveling 151 miles down to the mouth at the White River. A spinal issue prevents him from carrying a pack, so he completed the two-week excursion tentless and stoveless, sleeping under bluff overhangs and traveling ultra-light. “It was one of the most fun and spectacular trips I’ve ever taken,” he said.
Day Hiking Discoveries
You don’t need to sleep under a rock in winter to see some of the best of what the Buffalo River’s wilderness areas have to offer. Although there are plenty of single-track trails for backpackers and serious trekkers, easier trails with amazing sights and abundant waterfalls are not far from the pavement (or gravel, in this case).
The Milky Way is visible over the historic Villines Homestead in Boxley Valley within the Buffalo National River area. (Tim Ernst)
Lost Valley is one of those signature trails, with everything from vertical walls of rock reaching upward from the valley floor, to Cob Cave—named after the many cobs of corn discovered there in 1931 when it was found to be rich in preserved native artifacts. Following Clark Creek, Lost Valley’s beauty is on display throughout the entire hike, winding through a lush forest full of waterfalls, cascades, and amazing rock formations. Packed with outdoor works of art and springtime wildflowers, the short, two-mile round trip is a scenic journey from start to finish and a small taste of the entire Buffalo River area.
Another offering among the renowned trails and signature sights is Hemmed-in Hollow, a towering waterfall and impressive rock formation that spills out varied amounts of water or displays icicles, depending on the season. A more arduous trail with a 1,400-foot elevation change, it isn’t for the faint of heart. Those up for the challenge will not be disappointed, though, as the famed, 209-foot vertical rock face is the tallest waterfall between the Rockies and the Appalachians, and hiking to its base is like discovering a secret hideaway at the end of a canyon.
Nearby lies another geological wonder that, when first encountered, might feel like a sacred discovery as well. Big Bluff, accessible via the appropriately named Goat Trail, is an impressive, oversized rock face, leaning out over the river with breathtaking views. Wrapping around the mountain and morphing into a mammoth wall of sandstone, the somewhat precarious trail narrows to curve around the bluff, revealing a 550-foot drop and an expansive view of the river and backcountry below.
Backcountry and Dark Skies
Lost Valley, Hemmed-in Hollow, and Big Bluff are just a few of the amazing trails and seemingly endless sights for day hikers to explore. On the other hand, hikers preferring to gear up with backpacks and tents for a weekend or two, venturing off the beaten path in the woods, can find what they’re after on the Buffalo River Trail. Winding back and forth across the river, as well as up and down in elevation, the “BRT,” as it’s known, totals almost 80 miles in length and can take you downstream via foot rather than canoe. Eventually connecting with the almost 200-mile network of the rugged and remote Ozark Highlands Trail, the Buffalo backcountry feels endless—ideal for trekking each day and sleeping under the stars each night.
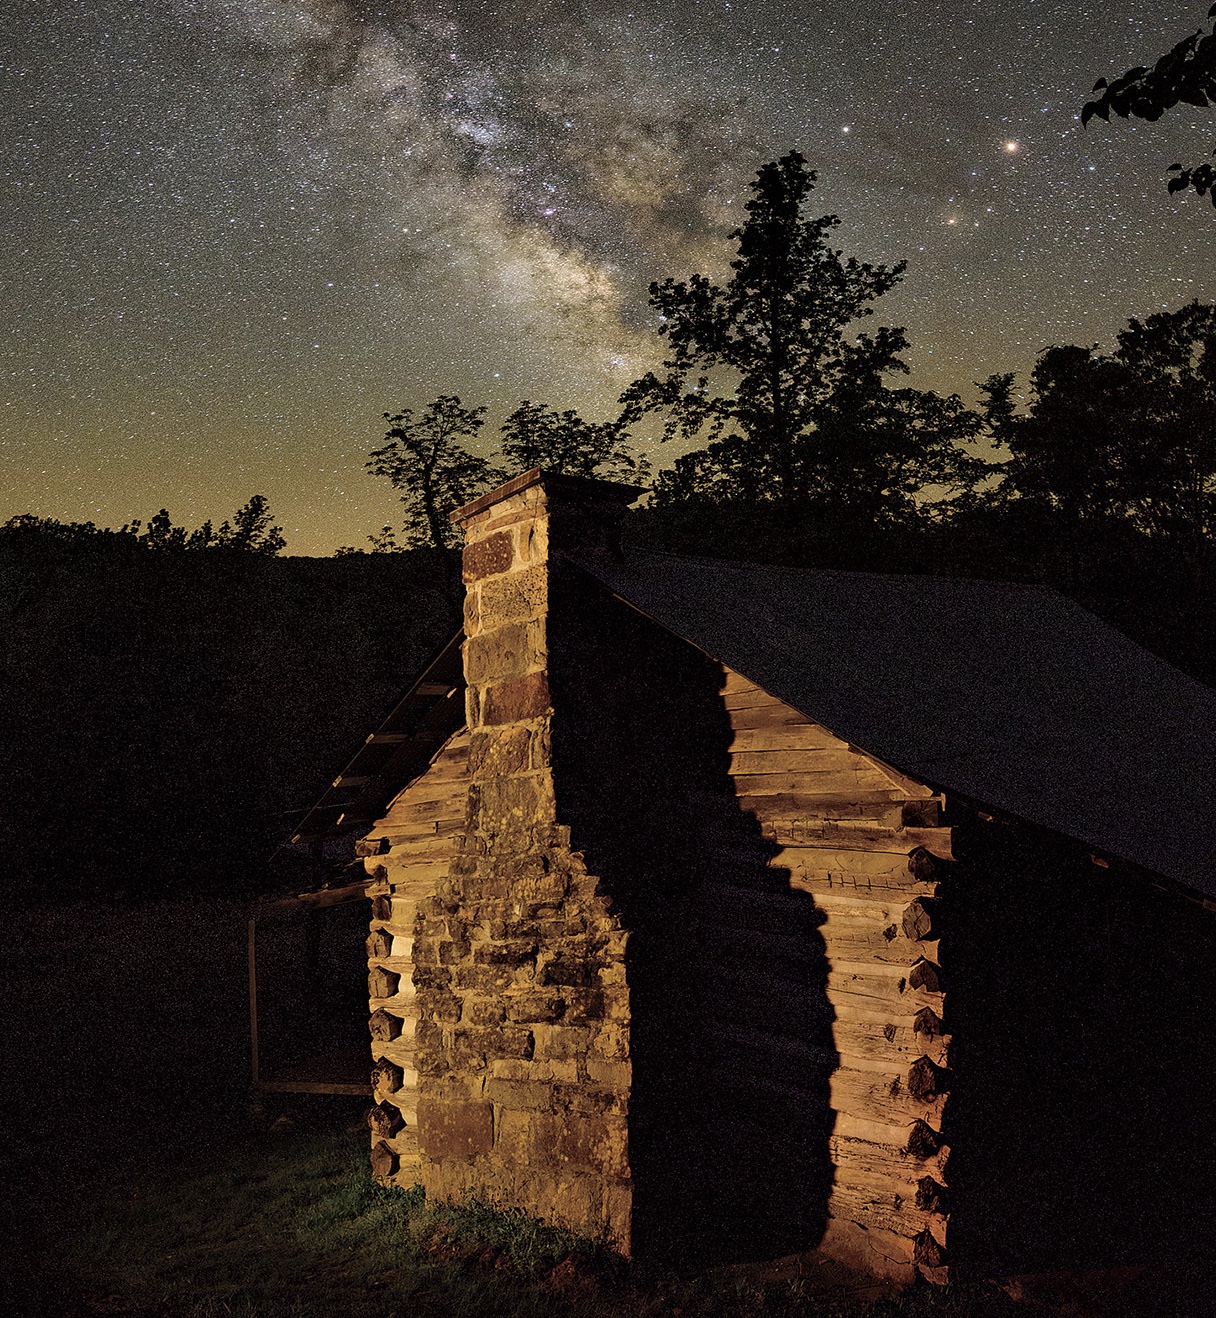
Speaking of stars, the Buffalo National River was recognized in 2019 as an International Dark Sky Park. With the darkest nighttime skies in all of Arkansas, the park is a great place to go to escape suburbia and do some stargazing, learn the constellations, or see the Milky Way. With park regulations aimed at eliminating light pollution, the natural twinkling lights of nighttime skies are now as protected as the wilderness they blanket.
Sunrise over Boxley Valley within the Buffalo National River area. (Tim Ernst)
Preservation Through Growth
Many historical cabins and preserved homesteads are scattered throughout the Buffalo area as well. Granny Henderson’s cabin, the Parker-Hickman Farmstead in nearby Erbie, and the Villines family cabins in Ponca all commemorate a past era when pioneers worked tirelessly to survive in the wilds of a rugged landscape while carving out hard livings.
Although times have greatly changed since those days, the raw, rustic, and simplistic form of much of the area is still preserved. In the past 50 years in particular, since the national park and national river were established, the town of Ponca and the Boxley River Valley have remained virtually unchanged. Nestled in the valley between mountainside and river, the old-school mountain town atmosphere is difficult to miss.
The Buffalo Outdoor Center outfitters and Lost Valley Canoe and Lodging rentals still reside as the only two businesses of tiny Ponca, and most of the cabins viewed from the road are rentals. There are no motels. Although certainly adding to the area’s charm, the simplicity also poses some issues during crowded times, especially as the area grows in popularity.
“Elk, waterfalls, and hiking trails have increased traffic to the Buffalo River immensely,” said Ernst. “Particularly when the big bulls are out there bugling.”
The once-unknown, tiny area’s increased popularity hints at the need for new infrastructure to handle it—apparently, grants are in place to do just that. In the meantime, though, this area is still “in its infancy,” as Ernst said, citing that there aren’t too many places left in the United States where you can still chart new territory as a hiker or backpack a 47-mile section of backcountry without any established campsites.
Labeled the “Natural State” for a reason, Arkansas has plenty of raw, rare, hidden beauty, and although it’s rapidly growing, the Buffalo River remains a somewhat unrecognized outdoor mecca. “I doubt that the personal experience of discovery will ever be completed here,” Ernst challenged. So next time you’re in search of adventure, find Arkansas Highway 43 on a map, head south, and wind down into Newton County, stopping off in Ponca. A bit like venturing off the grid, the disconnection from your everyday world may end up connecting you with exactly what you’ve been looking for.
This article was originally published in American Essence magazine.
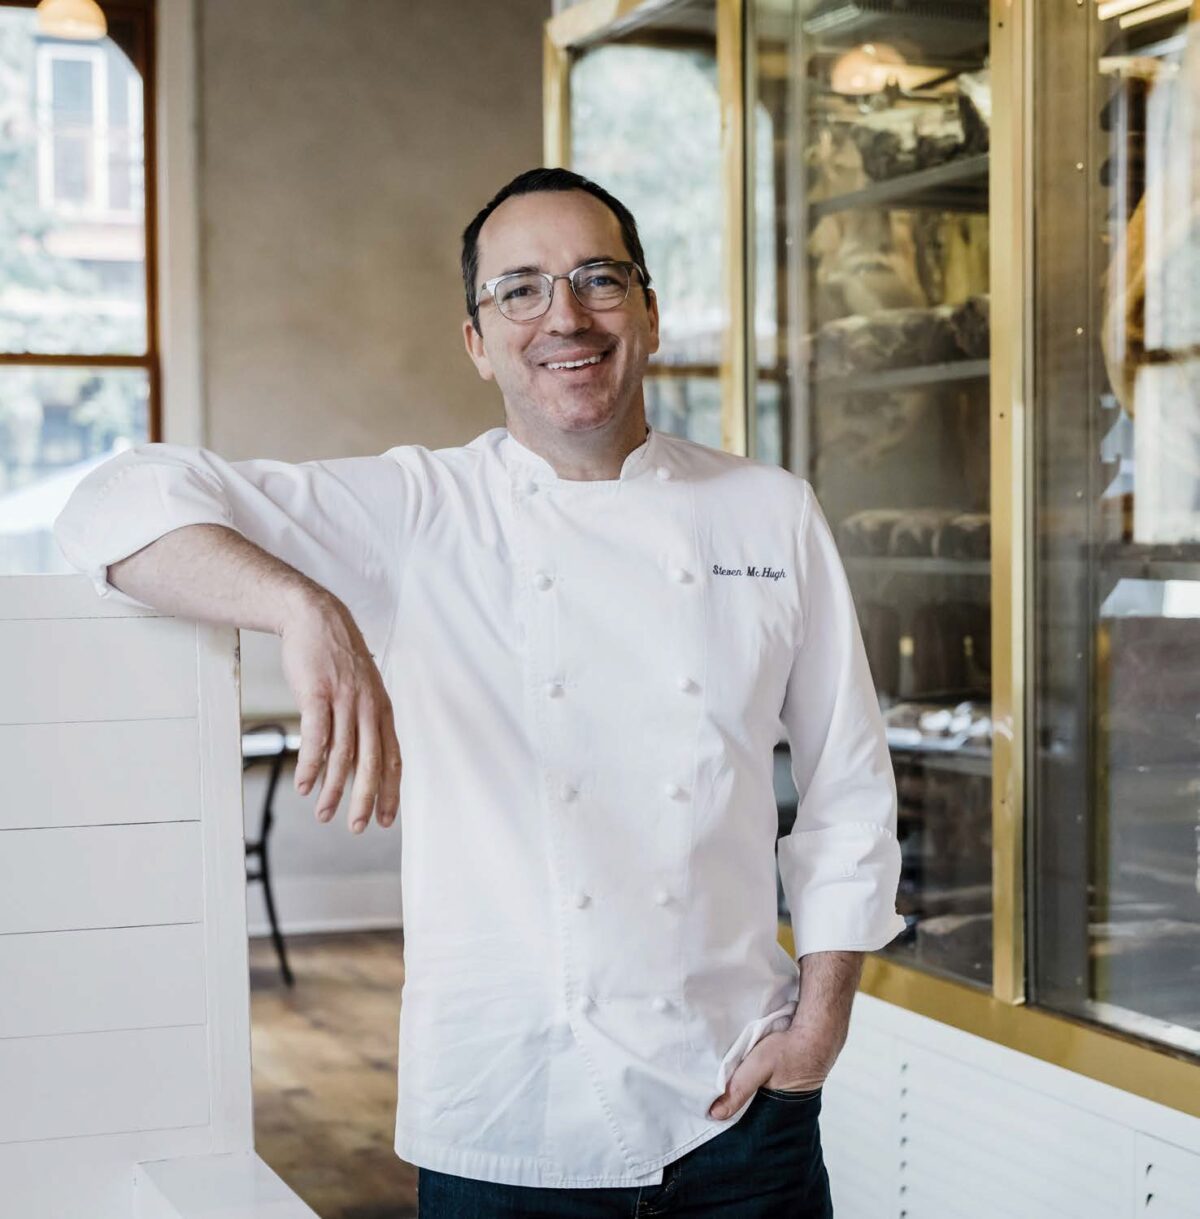
Five-time James Beard Foundation Award finalist Steve McHugh is nothing short of an acclaimed chef. The owner of the highly respected, game-changing restaurant Cured and the restaurant Landrace, which opened last year, says he really “stumbled right into” becoming a chef.
Though McHugh’s introduction to food may have been a happy accident, over the course of his studies and career as a chef, his curiosity and sense of excellence have produced inspiring results. In a way, his story has been about coming full circle and getting at the root of food and sustenance—and American cuisine.
“I’m not the star of this show,” said McHugh.
‘If You Want to Go Learn About Food’
New Orleans is where McHugh first made a name for himself. Right out of culinary school, a friend had told him, “If you want to go learn about food, you need to go where the true indigenous food of the U.S. is.”
“And that’s New Orleans,” said McHugh. There, he worked in the kitchens of the Brennan Family Restaurants, the Creole chefs Stanley Jackson and Chris Brown, and the John Besh Restaurant Group. Besh, a celebrity chef and philanthropist well known for his efforts in preserving New Orleans heritage cuisine, became a mentor of McHugh’s. In those kitchens, McHugh learned that it wasn’t just about Cajun and Creole—the city was truly a melting pot of cultures and cuisines influencing each other, coming together to make up the flavor of New Orleans.
A dish of mussels made with beer and Tasso ham.(Inti St. Clair)
And then Hurricane Katrina hit.
“Up until that moment, we had run from storms and we dealt with floods—but that one, that was scary,” McHugh said. He remembers watching the satellite images, seeing a storm the width of the Gulf of Mexico approaching his city. He and his wife had evacuated and were sitting in a crummy motel in Tennessee, just waiting. When it became evident that they couldn’t go back right away, McHugh went to his parents’ home in Wisconsin.
McHugh grew up with six brothers, three adopted, on a dairy farm in Wisconsin. His dad was a schoolteacher. His mom was a nurse, then an OB-GYN.
“They just had a lot of love to give, my parents. They’re just amazing, amazing people with so much love to give. My mom especially was one of those people who just gave, and gave, and gave of herself,” said McHugh. “My dad was the same way—it was all about taking care of people.”
Living in their small Wisconsin town of some 1,200 people, McHugh never thought he would become a chef. In high school, he got a job washing dishes and fell in love with the energy of the kitchen. That fondness led to many other kitchen jobs, but he didn’t think of them as part of a career path.
“When I was growing up in kitchens, what we call the chef was just some tattooed-up guy who rode his motorcycle in, and he was in charge,” McHugh said. He actually went to school majoring in music, with a saxophone scholarship, but then ended up back at home.
“It was my dad who finally sat me down and said, ‘Why don’t you go to culinary school?’” McHugh said. The conversation was eye-opening. “I’m still thankful for that sit-down with my dad, every single day, because it’s truly a blessing to continue to be in kitchens and restaurants and working with great people.” His dad also had a slightly selfish motivation for the talk, however: “I was back living at home,” McHugh quipped, “so part of it was, ‘How long do you think you’re gonna live here at home with your parents?’”
At McHugh’s restaurant, every part of the animal is used for the charcuterie- focused menu. (Inti St. Clair)
“I think he really wanted me to find my way.” And McHugh soon did, delving into The New York Times’ Wednesday food inserts and doing his own research. “I was just looking at recipes and interviews, and reading about different chefs throughout New York City, and was just blown away by what was really possible.”
Although he was back at home again after the storm, when McHugh got the call from Besh asking him to come back to New Orleans less than a month later, he was ready. “New Orleans had become my home, and you hate to see your home take a one-two punch like that,” said McHugh. “You want to be a part of helping her get up off the ground and get going again.”
Sustenance
Besh was reopening Restaurant August, and McHugh’s response was, “Yeah, let’s go.”
It would be under entirely different circumstances—here was a restaurant that was known for using prized ingredients, and now there wasn’t an abalone or truffle in sight.
As McHugh tells it, “John said, ‘Let’s just cook what we have. let’s just cook what we can get our hands on, and we’ll make up the menu.’” As a young chef, McHugh relished opportunities to work with some of the finest ingredients. “Now, you’re so excited when a farmer brings by 12 chickens, or you get your hands on some red beans and you’re able to cook a pot of beans,” he said. “These were things we never cooked in that restaurant before; and now, all of a sudden they’re the most important things we’ve ever cooked in our lives because our customers needed it.”
Yet McHugh felt it was sustainable in myriad ways: “It’s sustaining your soul, and cooking for people who needed a lift up. We used to cook for the city’s elite, now we’re just cooking for our own survival and for the people we were cooking for.”
At the same time, they were “putting in 17, 18, 19-hour days like it was nothing. We weren’t tired. I would get up in the morning and go to work and I wouldn’t get home till the wee hours of the next day—and do it again. It never felt like work. It stopped feeling like work during that process,” he said.
“It really changed my whole perspective on food and cooking, on being a chef, and what it’s really all about,” said McHugh. “It’s such an eye-opening experience to really put so much love into a pot of beans, or a pasta, or a really good bread pudding.”
It brought to mind his mother, who was always taking care of people, helping any and all who showed up—whether or not they could give anything in return. “I never understood that until I became that person who was just taking care of folks,” he said. That labor of love became an indelible lesson for McHugh.
“Now, I cook what I can get my hands on. I want to work with local providers, local producers, and also be right with the earth and not cook species of fish that are overfished—and not working with producers who are destroying the land,” he said. “It’s important to me to continue to take the lessons learned during Hurricane Katrina forward and continue that path.”
The next chapter of his life would be in San Antonio, Texas, where McHugh moved in 2010 to open Besh’s first restaurant outside Louisiana, Lüke. But it wouldn’t begin without a challenge.
Cured
Not long before McHugh’s move, he woke up with a swollen face. “It almost looked like I was in a prize fight the night before,” said McHugh. He’d been tired, lethargic, and couldn’t understand why he was feeling that way. His doctor thought it was a cold, and other doctors and specialists he saw were baffled. Finally, someone told McHugh he looked like he had allergies, and he went to see an allergist.
McHugh remembered, “The allergist looked at me and said, ‘Whoever sent you here is crazy.’” Allergies didn’t happen overnight or cause reactions like McHugh was experiencing. After a CT scan, the cause of McHugh’s ailments became obvious.
“There it was: I had a tumor in my chest about the size of a baseball,” he said. He had blood cancer, B-cell lymphoma—but the swelling was fortunate because, otherwise, he might not have found the cancer until he got much sicker.
In New Orleans, McHugh began his chemotherapy treatments. After two sessions, he confided in his doctor: “Hey, I’m supposed to be moving in a month. Should I not? Should I stay here?”
“And I remember him saying, ‘Nobody’s told you to stop living your life,’” said McHugh. The takeaway was powerful. He felt then that he could beat the cancer—and he did.
“I just went at it like ‘this isn’t going to slow me down.’ I moved to San Antonio, my wife and I came here, I opened a restaurant while going through treatment,” he said. “The power of positive thinking and believing, and understanding that you’ve got more to accomplish in life, really pushes you through.”
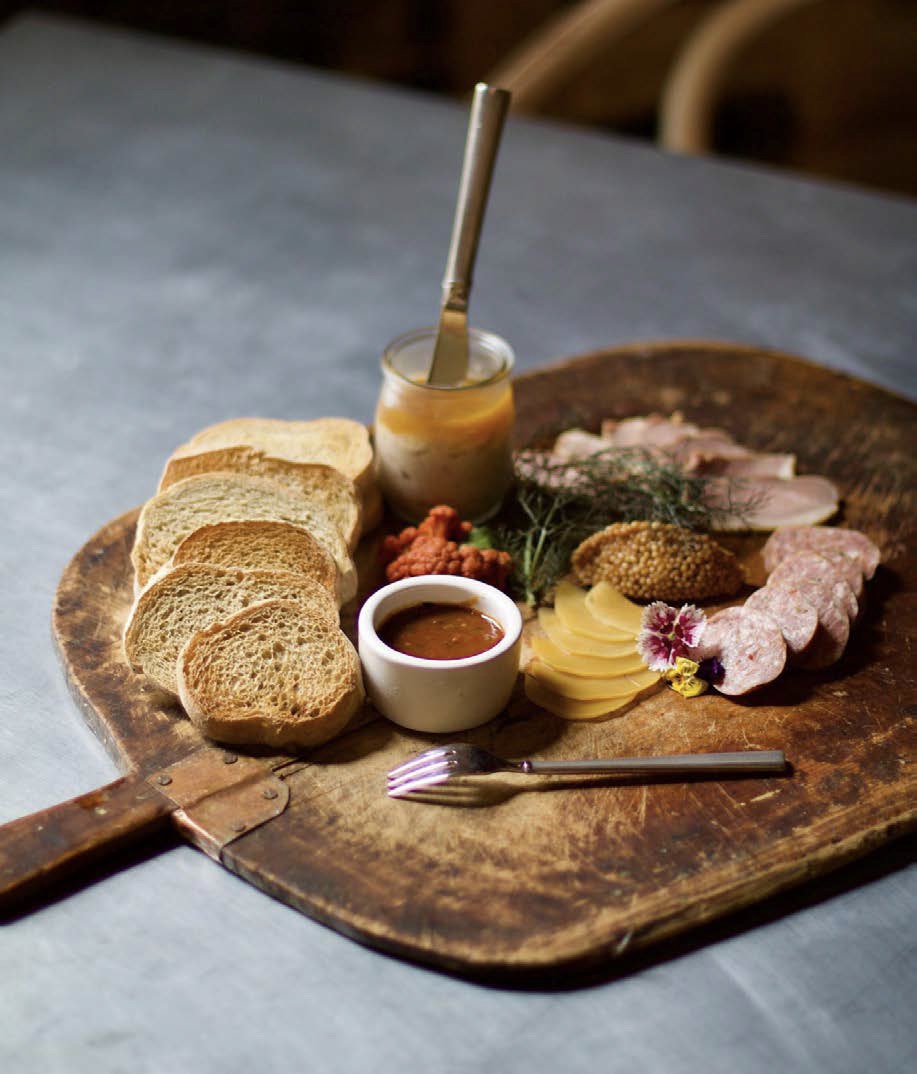
In the aftermath, having already opened several restaurants for others, McHugh opened his own restaurant, Cured, in 2013. While the name in part signifies his triumph over cancer, Cured is also one of the most popular charcuterie restaurants in the country, famed for its whole-animal approach in cooking. Every part of each butchered animal is used, so the menu is ever-changing based on what’s in stock.
Cured is located within an old administrative building in San Antonio built in 1904. (Inti St. Clair)
“Ten, eleven years ago when I got sick, I didn’t think that food could play such a huge role in health, and the more I study and the more I learn about food and food systems, it makes me want to continue to be a better chef and provide better ingredients and better products,” he said.
“I don’t want to consume, and I don’t want my customers to consume, any animal that’s been penned up its whole life, that’s been shot full of hormones, or sustained solely on one thing,” he said. McHugh visits the places where the animals are raised and the produce is grown. “Being around farmers my whole life—you know what to look for.”
For instance, he said that the steak at Cured is great not just because of the way it’s prepared, but also because of where it comes from: “[Peeler’s] ranching practices are amazing. They do great field rotation, so the cattle aren’t just stuck in one field all the time. They also will rotate sheep and goats through the fields as well, and the importance of that is that goats are great at really cleaning up just about anything unhealthy; they have stomachs that are amazing and they can get in there and eat a lot of the grasses that are harmful to the cattle.” This also clears out parasites, making for healthier fields and cows.
When visiting a hog ranch, he found 1,000 acres where pigs were running freely. McHugh said of the farmer: “He refuses to ring their noses, because pigs want to root.” Many farmers put rings in pigs’ noses so they won’t tear up the earth, but the pigs on this farm: “They go in there eating bugs, they’re eating mesquite beans, they’re rooting for those tender shoots under the ground that they love to chew on and snack on. He lets them give birth out in the fields where they want to be—and the babies are healthier, the mamas aren’t rolling over on them. There are a lot of species of hog in our country that we have bred the mothering nature out of—because the [sows] don’t know how to be mothers anymore.”
“For me, it’s important to see that they’re healthy, they’re happy,” said McHugh.
“If we’re constantly eating unhealthy animals, we are going to become unhealthy, right? I want to be able to offer really good meat—and as somebody who butchers and has been a butcher a lot of his career, I tell people: eat less meat, eat better meat,” he said. “Let’s eat less, but let’s eat better.”
Seeing the ranchers and farmers in their craft grew McHugh’s knowledge, as well as his interest in using local sources. At a James Beard Foundation dinner with chef Kevin Nashan, McHugh heard him use the word “landrace,” and he quickly made a note of it on his phone.
Pig cheeks poutine with pickled cauliflower. (Inti St. Clair)
“Landrace is the idea that something is better because of place, and is growing within its natural surroundings,” said McHugh. “It isn’t just something that is native to the area, but it can also be something that has thrived in the area.” Case in point: Texas cattle.
After that, he developed an idea for a restaurant that focused on native ingredients and celebrated the Texas terroir. In 2021, McHugh opened Landrace. “Thanks, Kevin Nashan.”
Determined that the new restaurant wouldn’t be Cured 2.0, McHugh went back to the three pillars of what he believes makes a successful restaurant: good food, good service, and great ambiance.
“I kept thinking: What are we going to do here? What’s going to be the star of the show here? And, we brought in this big, beautiful wood-burning grill that is completely fueled by Texas post oak and mesquite,” he said. “It’s really about taking cooking back to its most elemental, right? Cooking started with fire.”
“It was stepping outside of my comfort zone and working with solid fuel like wood. And it really challenged me to think of food on that level. Can I grill a salad? Can I grill these carrots—not just turn them into smoke bombs—being gentle with something that can be very in-your-face like wood and smoke?” he said. “It was a lot of fun.”
At this point in his career, it’s not uncommon to be asked about the next big thing. Young chefs are certainly thinking that way, too, and McHugh has some advice for them: “Don’t try to come up too fast. Travel, learn—and when I say travel, I’m not saying go to Paris, I’m saying we’re an hour from Austin—there’s no reason to not go and have a nice meal and come home.”
This article was originally published in American Essence magazine.
The Mele family skateboards and scooters together during quarantine at the start of the pandemic. (Courtesy of Nick Mele)
He is the great-grandson of a famed Alabama governor. He grew up in the rich districts of Washington, D.C., before becoming a quintessential snowbird: part-time New Englander and part-time Floridian.
Nick Mele knows he grew up privileged, with the ocean-opulent milieu of Newport, Rhode Island, serving as his childhood playground in the summer and the aristocratic venues of Palm Beach during the winter.
He has rubbed elbows with the most elite of the elites, who have thought nothing of allowing Mele to hang out and photograph them in their “ordinary” lives. He compiled the highlights of his summer adventures into the book “Newport Summer,” a mesmerizing pictorial that mingles—as Nick dubbed them—“the last bastions of old school American high society” with his own family, including his wife and their two young sons. With his sweet sense of humor, Mele calls them his “kid monsters.”
The would-be envy of any photographer, the 39-year-old modestly regards those days as more of a hobby among friends. As far as wedding shoots go—the proverbial bread and butter of most pros—“I’d rather never do one again,” he breezily proclaimed.
Of all things, for the silver-spooned Andover (prep school) graduate, the thing Mele craves the most is being hired to do marketing shoots: to put his brand of photography on a brand, he explained, that teases the imagination with an entire story line.
Molly and Archer play around at the 2021 Kips Bay Show House in West Palm Beach. (Courtesy of Nick Mele)
“For me, it’s less about how pretty a picture is,” he said, “and more about telling a story; it’s more of a personality thing, and that means trusting me to set the scene from my camera’s point of view.”
Among his lengthy list of clients who trust him are Vanity Fair, The New York Times, and Town & Country. One of his favorite shoots was for shoe giant Sam Edelman, in which Mele himself appeared. The image, which depicts the tall, debonair Mele opposite a beautiful French model playing a newcomer to lavish living, appeared on billboards all over Los Angeles.
Sarah Wetenhall is the owner of The Colony Hotel, an iconic respite cradled by ocean vistas and Palm Beach’s paradisaical luxury fashion stores. She trusted Mele enough to allow him to tie her up to a chair with Christmas lights and stick a corn cob in her mouth.
Named one of the top hoteliers in the world by Hotels Magazine, Wetenhall hired Mele to do a holiday campaign for the iconic hotel known affectionately among its A-list of clientele as the “Pink Paradise.”
For the shoot, Mele also dressed Wetenhall’s three young children in monkey suits and instructed them to climb trees next to their “restrained” well-dressed CEO mother. He did a similar shoot during the pandemic that captured the potentially zany reality of what life might be like quarantining in an empty, fancy hotel with three children under the age of 10—complete with Wetenhall’s kids riding their bicycles through the hotel lobby, kayaking in the hotel’s swimming pool, and having a tea party atop an elegant baby grand piano.
“Nick has such an appreciation for the charming and the irreverent that, when combined with his brilliant eye—magic happens,” reflected Wetenhall, adding that life would not be the same at The Colony if Mele hadn’t been the one to “tell its story.”
Nick Mele with his wife, Molly; their sons, Johnny and Archer; and the family dog Lola in front of their home in West Palm Beach, Fla. (Courtesy of Nick Mele)
Mele indeed underscores humor as a key ingredient to his success. There are also the little things that count, like never showing up to a shoot “looking like a photographer.”
“I try to go to these things and be the best dressed person there and really fit in,” said Mele. “I find a big part of taking people’s pictures in places like that is making them feel comfortable, and I like them to see me as another guest who happens to have a camera.”
He is unabashed about drawing ideas from some of the world’s most influential photographers, or whom he calls the “the greats.” Slim Aaron, Douglas Friedman, Tina Barney, and Patrick McMullan are his foremost idols. But he turns to them not to copy their styles, Mele emphasized, but to study how they broke the rules, such as “using an overly harsh flash” and actually “having it work.”
“The most successful photographers and the ones I really love,” Mele shared, “are the ones that have a really strong brand and a very strong vision and you could look at them and be like—‘That’s their signature.’”
Nick also sometimes breaks the rules when it comes to drawing inspiration. His grandmother Marion “Oatsie” Charles, who died at the age of 99 in 2018, did not approve of him taking up such a poor man’s trade as photography. Mele said he was actually “a little afraid of her” when he was a little boy because she was so commanding.
She would end up being his greatest influence.
Nick Mele’s son Johnny and dog Bodhi take a peek at what’s on the table at the family home in Newport, R.I. (Courtesy of Nick Mele)
The granddaughter of Alabama Governor William Oates, known for fighting in the Civil War with only one arm, Oatsie—as everyone called her—was as uncontrolled as she was connected. She was friends with the Kennedys and someone whom Nancy Reagan was introduced to as part of her unofficial inauguration into the White House’s high society—and not the other way around.
When Ronald Reagan died, Oatsie was, of course, invited to the president’s funeral, and she recruited her college-age grandson Mele to take her. When a low-flying plane was suspected of attempting to attack the Capitol building, U.S. Secret Service burst into the Rotunda and ordered everyone to evacuate.
After Mele anxiously navigated his wheelchair-bound grandmother through the throng of frenzied funeral-goers fleeing for safety, instead of thanking him, she chastised him for not going back after her beloved tigerwood cane that she had dropped in the chaos of their hurried escape.
“She never entered a room that wasn’t absolutely thrilled to see her,” Mele both mused and reflected.
It sounds like the apple doesn’t fall far from the tree, or perhaps in Nick’s case, palm trees.
As Wetenhall summed it up: “You can’t live in Palm Beach and not know Nick Mele.”
This article was originally published in American Essence magazine.
If you’ve seen Kate Somerville Cosmetics ads or have seen Kate in magazines or on TV, you would think that she’s always been beautiful and that her life is perfect and always has been. Kate says, “People usually expect me to be ‘silver spoon stuck up.’” But that is the furthest thing from the truth.
Kate grew up on a farm in Fresno, California, with a dad who was a high school football coach who wasn’t in touch with his emotions and a mother who suffered from mental illness and addiction. Actually, it was probably Kate who suffered most.
Kate’s dad was known to all as a great guy. He was beloved by the boys at the mostly black high school where he coached. He mentored those boys and helped them see that there was a good future for their lives. The single moms of the boys he coached were grateful because he helped them keep their sons in line. But at home, he was full of rage, so much so that Kate remembers that no doors were left standing in their house. Her dad was completely unable to cope with his wife’s erratic behaviors or to be there for her.
Kate describes her mother as an “eccentric hippy.” She would go out drinking and partying and then fall into deep depression. When Kate was 9 years old, her mother left her with her dad. But occasionally her mother would call to tell Kate that she was going to commit suicide. It was an emotional roller coaster. For the next year, it was just Kate and her dad living in the barn on their land. She describes it as, “incredibly eclectic and artistic with a beautiful garden, a trailer for a kitchen and an outhouse for a bathroom. I was the only person I knew who lived this way and I’m convinced it was the source of my creativity.”
Kate’s dad moved on, remarried, and started a new family, a family where Kate didn’t fit in. She loved her dad and knew he was a good guy (because everyone said he was), but she felt completely abandoned.
She spent her high school years “couch surfing” with friends and living with a relative, and then in her senior year of high school, she moved in with her boyfriend. All throughout her high school years, her mother would come in and out of her life, and every time she showed up, she brought chaos and pain with her. Fortunately for Kate, her boyfriend’s mother became a strong mentor in her life, providing a sense of stability.
Another important person in Kate’s life was her high school counselor, Mr. Talley. He knew that things were rough for her. He saw her struggling and not fitting in at school. He knew when Kate’s mother was in her life because Kate would get hives and have a painful flare-up of eczema from head to toes, complete with dried, cracked, and oozing skin. Mr. Talley knew that Kate was working, trying to deal with her mother, and suffering through the humiliation of the skin problems she experienced, so she wasn’t able to have a normal senior year. She couldn’t go to the prom or to games or do any of the other things that other kids seemed to be enjoying.
Mr. Talley, with whom she is still in touch today, made a deal with Kate—he would let her leave high school early (she had enough credits to graduate) if she would go to city college, which she did. Kate worked three jobs to support herself while attending college. Her mentor, Barbara Wells, her boyfriend’s mother, taught her the value of unconditional support and believing in yourself. Because she had grown up with horrible eczema, she knew what it felt like to be uncomfortable in her own skin. She had always looked for different remedies to solve her own skin issues, which sparked her passion for helping others do the same. So when a friend who was a dermatologist suggested she get a degree in esthetics, she enrolled in esthetician school and focused all her attention on helping others who suffered with skin problems.
Comfortable in Your Skin
As a result of the suffering Kate experienced with her own skin condition, she wanted desperately to learn what she could do for herself and others who suffered with skin problems. Kate knew intimately the impact of an ugly skin condition on one’s self esteem and confidence level. She had experienced the helpless feeling of her body’s obvious public outcry of eczema. Kate knew better than most that the trauma we experience in our lives takes a toll on our body, mind, and spirit.
While in school, Kate had an idea to work side by side with doctors to complement their services. This was unusual at the time, as most estheticians worked in spas giving facials. Kate created and presented a business plan to a cosmetic surgeon, and shortly after graduation, she opened her first clinic inside one of the country’s top cosmetic surgery offices. Celebrity clients quickly fell in love with Kate’s post-procedure care and began booking esthetics appointments with her.
In 2004, Kate opened her first Skin Health Experts Clinic in the heart of Hollywood. She built a team to help create custom skin care protocols for people of every age, ethnicity, and skin type. They found solutions for those who couldn’t find solutions anywhere else. Word quickly spread through the entertainment industry. Soon, the world’s most famous and photographed faces were coming to Kate for her expertise.
In that first year, one of Kate’s celebrity clients asked her to bottle her clinic super facial so she could take it on location while filming under harsh lights. Kate’s signature product, ExfoliKate Intensive, was born. This was huge because at the time, the skin care industry was dominated with products that were developed by physicians who were predominantly male.
Kate has seen over and over again the true personality of a person emerge as a result of her healing products, like in the case of a young, black teen who came into her clinic one day and couldn’t make eye contact. He had a ball cap pulled way down low over his face, and he kept his face down as he told the receptionist that he was hoping to see if Kate would help him. Kate took one look at him and knew that this was the worst case of acne she had ever seen. The kid told her that he had no money to pay her, but her tenacity kicked in, and Kate was on a mission to heal this young man.
Kate took that teenager into a room and began a healing process that involved him returning twice a week until he was totally transformed. He became part of the family. Everyone in the clinic cheered him on as they watched this young man transform from the kid who couldn’t lift his head to make eye contact into a handsome model and an R&B singer!
(Courtesy of Kate Somerville)
Kate Arrives
As Kate’s business grew, her national reputation as an esthetician and healer grew with it. At just 23 years old, Kate was featured in the front window of Henry Bendel’s on Fifth Avenue in New York. She said, “It was this insane window that said ‘Kate Somerville has landed.’ They had beautiful mannequins who looked like flight attendants.” She arrived in New York late on the day of the launch, and as this farm girl from Fresno pulled up in the taxi and saw the huge display that was her name and her products, she thought she would feel excited. Instead, she felt a huge pressure. She had arrived, but now she had to live up to the hype and maintain this national status.
“My team and I had created this hype before we were actually a big business. I was treating a lot of famous people. I had a vision of the brand early on when I was 20 or 21. So here I am, a young girl with big aspirations, never been to business school. I was an esthetician and a healer. I felt like I was on Mount Everest with fake nails and flip flops,” she said.
At the same time that Kate’s business was starting to take off, her mother was declining. She was living on the streets, was sick, and had lost all her teeth as a consequence of drug use. Kate remembers vividly the night that her products were going to be in the swag bags for attendees at the Oscars. This was huge for her! She was on top of the world. Her products were finally being recognized. But at the same time, she was processing the wild emotions of her mother being in her last days. While preparing to attend the Oscars, she went to a hospice to say goodbye to her mother. By that time, Kate had heard from some of her mother’s friends from high school about what her mother had gone through as a young girl at the hands of her step-father. Kate finally understood that her mother’s addictions were her attempt to medicate her pain in the only way she knew how. Her mother died on Valentine’s Day. Kate was able to forgive her mother and make peace with her before she passed.
By this time, Kate was married and had a son. And although she had a great life, Kate still harbored a lot of anger toward her dad. She would write letters to him and then burn them in order to get the anger up out of her. It was Kate’s marriage to her wonderful husband and their raising a son that led to Kate letting go of the anger toward her father before he passed away. She realized that her mother and father probably did the best they could with what they had.
Kate says that in hindsight, three good things came out of her childhood. First, Kate was exposed to diversity from her earliest memories. Her mother brought home friends who were gay and bi-racial, and her dad often invited the black football players he coached over to the house, so she has always been totally comfortable with people who are different from her. Second, she learned to work hard. She knew that if she was going to be successful, it would be because she worked hard and earned it. She never expected success to fall into her lap.
When asked how she healed from the chaos and loss of her childhood, Kate said, “Emotionally I’ve worked really hard, going to Al-Anon, reading self-help books, and seeing a counselor on my journey to be better and trusting.” Third, Kate has a fierce tenacity. She doesn’t give up. That tenacity served her well when she began her mission of trying to find the right combination of ingredients that would help her, and thousands of others, heal from serious skin conditions. Kate has been on a mission to do that ever since. And heal she has! Her skin is beautiful and radiant, and she has surpassed her goal of helping thousands of others. In fact, she has helped tens of thousands of other people to look and feel like the beautiful people they are.
Kate has continued to grow her business through helping and healing one person at a time. Her products are in all the high-end retailers and are available all over the world. She still maintains her clinic in Los Angeles. She wrote a book called “Complexion Perfection,” and she’s working now on curricula for training and certification for paramedical estheticians who will practice alongside dermatologists.
Kate says that a very small percentage of women get funded for business at this level. She’s grateful for the success she has achieved, and for the people who have helped her get there, but her greatest reward is the people who come up to her crying and saying, “You changed my life when you transformed my skin.”
Q&A
What advice do you give to others about their appearance?
Enjoy youthfulness because no one can have it forever. Your looks right now in your youth, enjoy it. It’s a commodity. It will be gone. Right now you can walk in a room and turn heads. At my age, you don’t turn heads as much anymore. And you know what? If you’re okay inside, it doesn’t matter. What matters most in life is doing whatever makes you feel fulfilled and doing it as much as possible.
What do you think is the most significant way someone can help a young person?
Mentorship is everything—especially for women! The greatest mentor in my life was a woman named Barbara Wells. She was my boyfriend’s mother, and she took me in young. She had unconditional love, but tough love. When I was 20, Barbara told me, “You have a choice of what you want your life to be. You can either dwell on your childhood and the past, or you can make your life what you want it to be.
Having grown up in a chaotic environment as a kid, I didn’t know what choices were available to me. Life felt out of control. Barbara let me know I had a choice and changed my life personally and professionally from that moment on.
What would you say to a young person starting out in business?
People told me my dreams were impossible. I didn’t take it personally. I found a way to defy impossible. Find a way to defy what seems impossible for you.
From a business perspective, it’s not to lose sight of what you’re trying to do. A business will take you over—the sales, the cash flow, etc. If you lose sight of why you’re doing it, it’s not fun anymore. For me, it’s important to connect with clients and stay close to what motivated me to start this—to heal people. Keeping your focus on the mission of what you’re doing!
Also, no matter what industry you’re interested in, have the courage to take the path. When there is a “no” or a slammed door, go the other way, don’t give up. Keep going. There are so many incredibly successful people who failed before they made it.
What would you say to women in business?
Delegation is key! Know what your strengths and weaknesses are and hire the people you need to. I am an esthetician first and business woman second, so it’s important to have the right team in place.
Also, take time for yourself! I love being a wife and a mother and a business woman, but with so much going on it’s important to take time for yourself in order to be able to be your best. Small luxuries like relaxing in a beautiful bath with candles lit allows me to recharge so I can continue to give to my family and my business.
This article was originally published in American Essence magazine.
A polo player must have great control not only of his body, but also over his horse. The two must be able to turn together on a dime. In the ancient game of polo—one of the oldest-known team sports, originally crafted as a mock battle for training cavalry—the speed is fast, the strategy is sharp, and the maneuvers are precise.
With horse power driving the action, the players’ lives are at stake. “People don’t understand … that we literally put our lives on the line every time we step out on the polo field,” said Nic Roldan, current captain of the U.S. national polo team.
He balked at discussing further the dangers or injuries he’s witnessed. “I never like to talk about it or even think about it,” he said. He compared polo players to NASCAR drivers; neither can afford to be paralyzed by fear. “The moment you start thinking about those things and having that fear, it’s probably the moment you need to quit,” he said.
Roldan keeps a tight rein on his thoughts. He directs them toward positivity, gratitude, and achieving his goals. At the age of 15, he became the youngest player to win the U.S. Polo Open. Now, at 39, he not only continues with polo, but also models, has his own apparel line, and founded a property development company. He spoke of the perseverance that’s key to his success.
“There have been challenging moments in my career—where either I’ve lost a job, or I didn’t get hired one year, or I wasn’t on a really good team—and you get really frustrated. You just go through it. I’ve always dug deep and had faith and a strong belief that I could do it. The mind is a very powerful muscle.”
An Early Start
Roldan starts his busy days with meditation and prayer. He takes an hour and a half of peaceful time to himself, and it’s his favorite part of the day. But going to the “office” is pretty good, too.
“Coming to my barn every day and knowing that this is sort of like my office and being able to hang out with these incredible animals, … I’m obviously incredibly blessed,” he said.
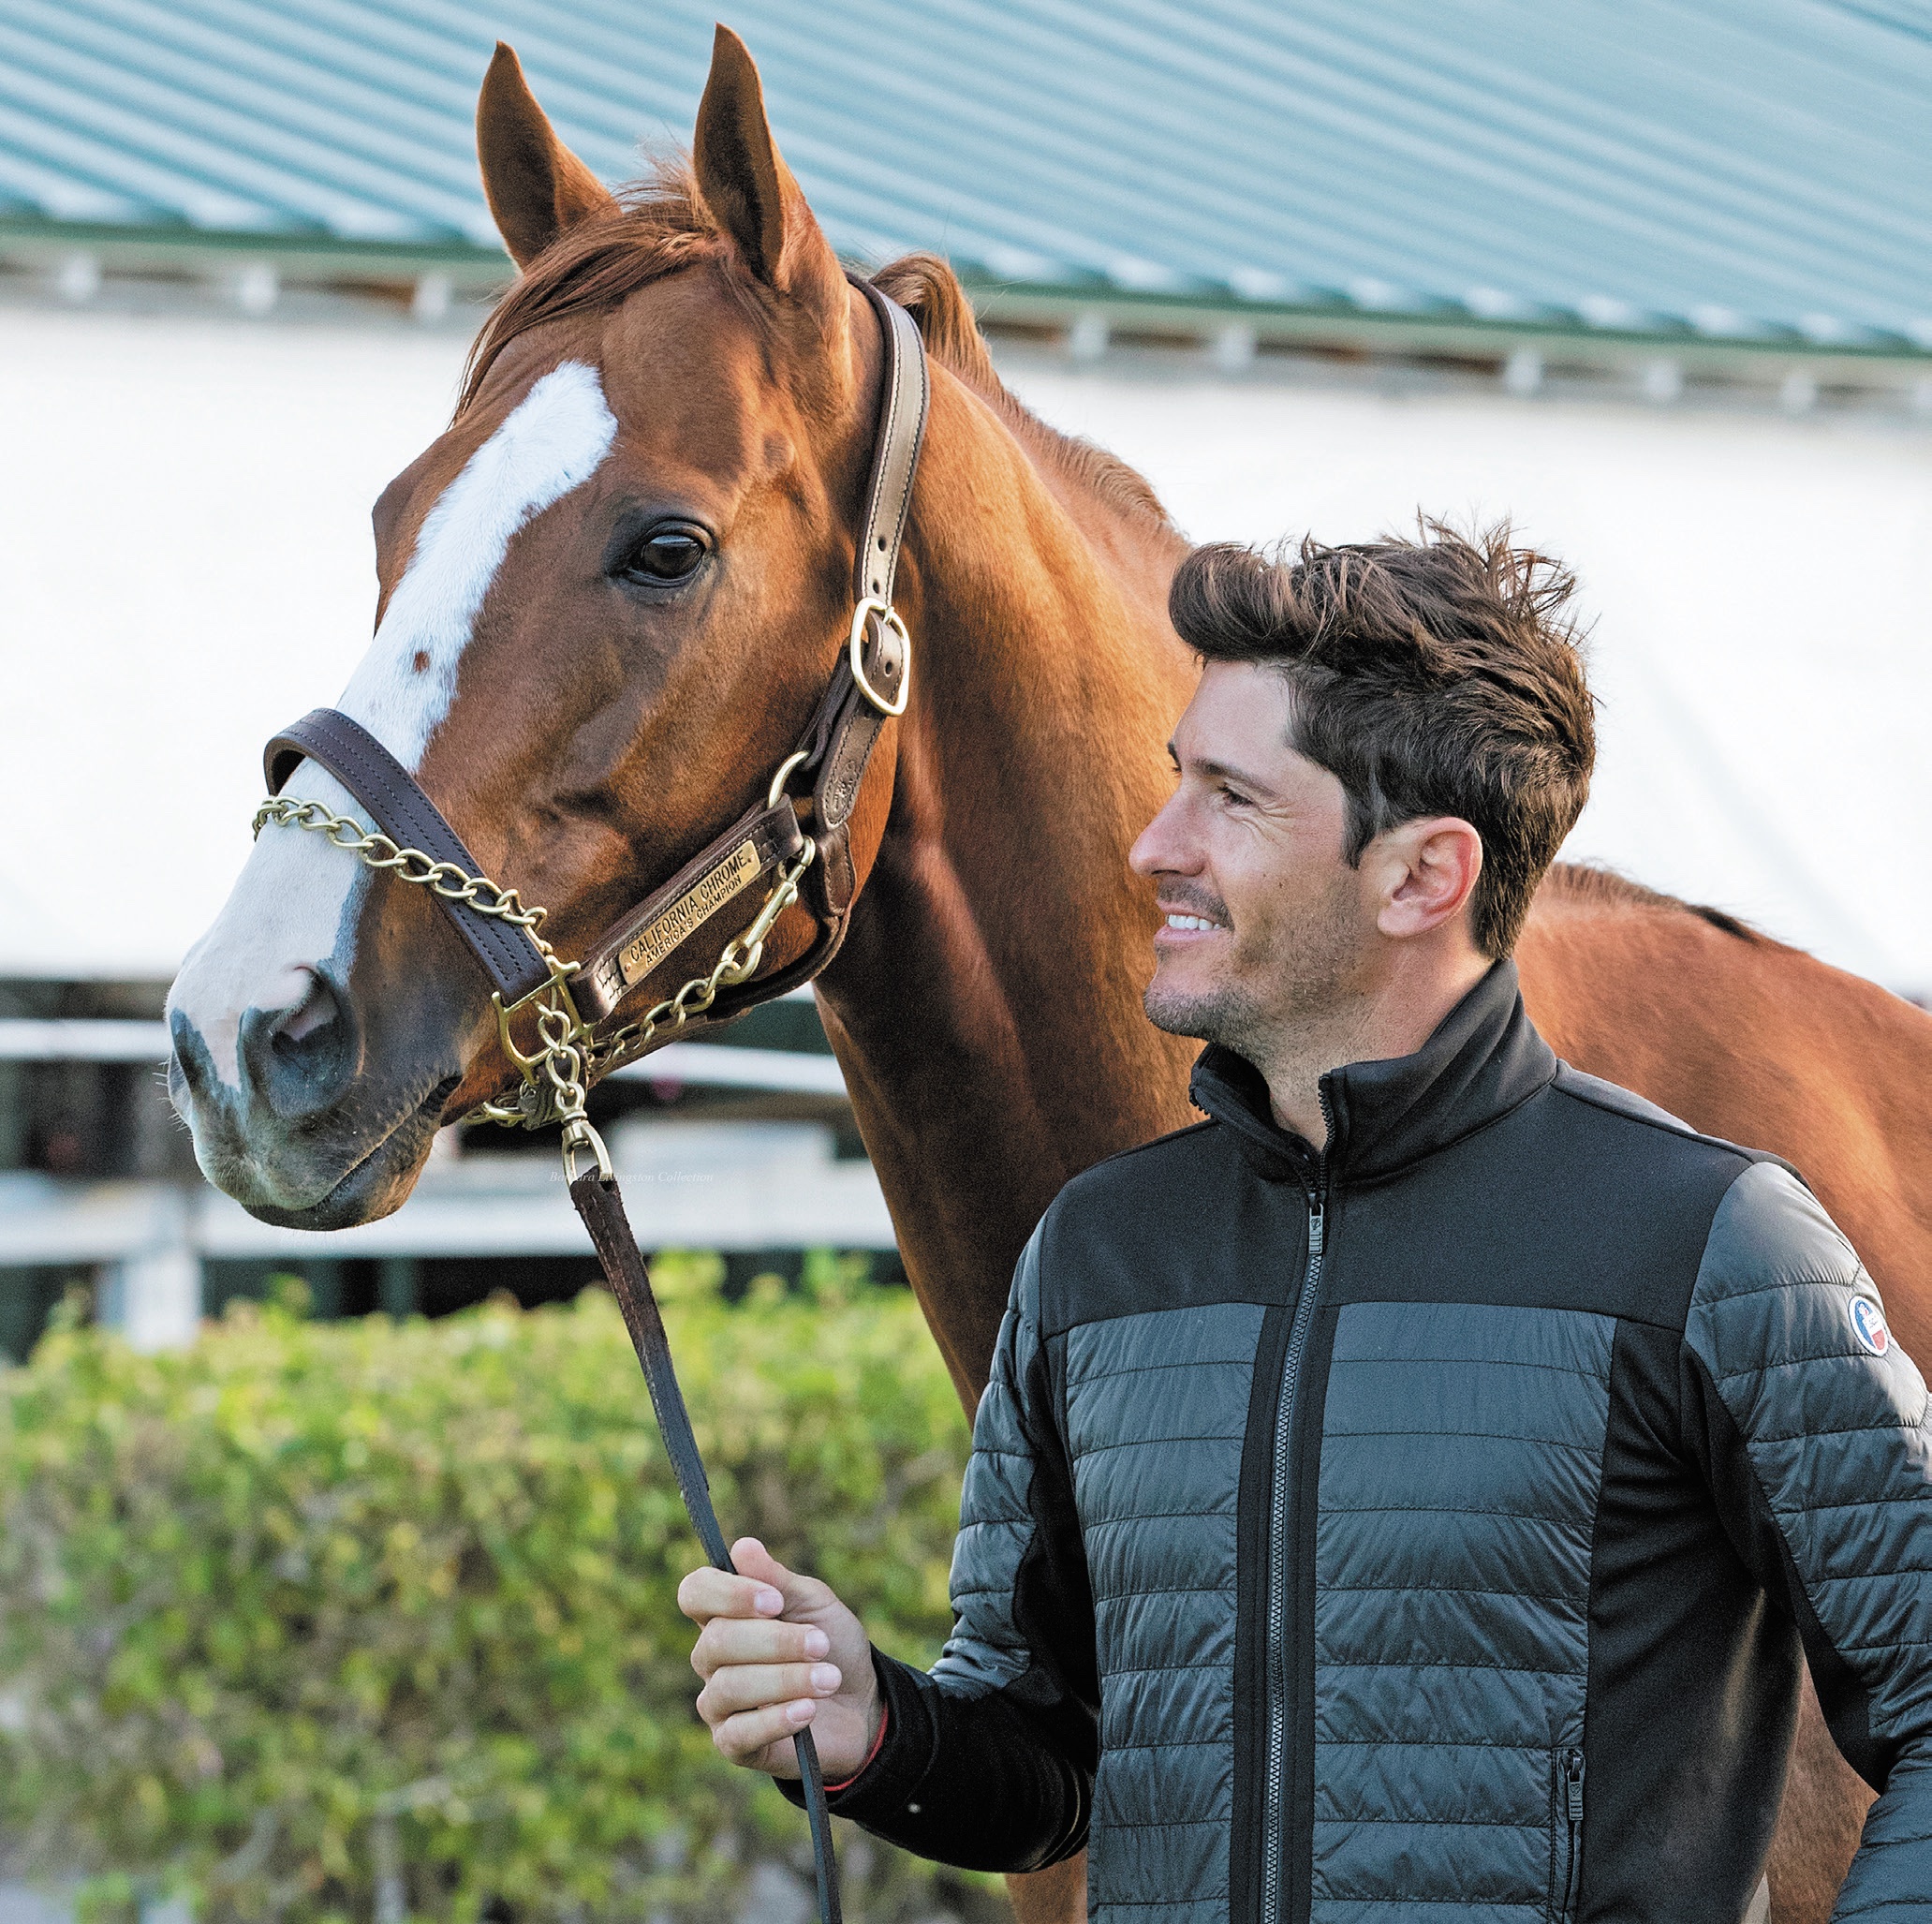
Roldan at a meet-and-greet with the champion racehorse California Chrome. (Courtesy of Nic Roldan)
As a fourth-generation professional polo player, Roldan has been around horses for as far back as he can remember. His father, Raul Roldan, played polo for the Sultan of Brunei. His father is Argentinian and Roldan was born in Argentina, though he has lived most of his life in Wellington, Florida.
“What I learned the most [from my father] was his dedication, his passion for the sport,” Roldan said. “He was always extremely humble. I think that was a really great quality of his. He was always very kind. I think at the end of the day, those are the most important things.”
Roldan’s account of what led to his success shows humility as well: “It’s a little bit of luck; it’s having the right team, the right organization, and the right horses under you.”
He says that the relationship with horses is one of the most important parts of playing polo. “What defines an elite polo player is being at-one with your horse, … flowing with each horse in sort of an artistic way, like a ballerina.” It’s not easy to learn that level of synchronization, Roldan said. It’s partly innate, and it also develops naturally by spending a lifetime with horses.
The Horses
A game of polo typically lasts more than an hour, and players switch horses every several minutes. A player must thoroughly understand each horse’s unique characteristics, Roldan said.
For example, some are light in the mouth, so the player must be mindful of how hard he pulls to have the horse respond as he needs. Some horses have more stamina than others. He must be aware of how the horse is feeling that day. “You could have your best horse, but that day he doesn’t feel that great,” Roldan said.
He describes what it’s like taking all this into consideration in the moment: “It’s the relationship with the horse you have to have, the speed and the intensity, the understanding of each horse and the control of each horse—all while you’re trying to hit a ball 25 to 30 miles an hour, [and] you’ve got four other guys trying to chase you. It’s incredible.”
Roldan added: “We don’t just get out onto the polo field and run around like a bunch of chickens without heads. Every play is thought out. … It is really like a chess game.”
Holistic Life
Polo works the mind and the whole body. “The most important thing for polo is having strong legs, strong core, and strong shoulders and upper body,” Roldan said, laughing as he admitted that he listed pretty much every part of the body. “It’s the whole body. … If you look at most polo players, we’re not bulky. You need to be lean, flexible.”
Roldan also exercises his creative side. His mother, Dee Roldan, is an interior designer, and Roldan began working with her on flipping houses as a side project during his 20s.
“My mom has always had an artistic palette. She’s always been very unique and very distinctive in the way she’s dressed and in her designs,” Roldan said.
He set his mind to excelling in this pursuit and started building from the ground up. He founded a development company, Roldan Homes, and recently became a realtor for Equestrian Sotheby’s International Realty.
The polo player is committed to keeping his mind and body in peak condition at all times. (Courtesy of Nic Roldan)
His equestrian experience melds with his real estate ventures. His hometown of Wellington is a large equestrian community, with many housing developments centered on equestrian facilities. One of his projects was a horse barn in the Grand Prix Village that sold for $8.8 million. The stalls are a clean, crisp white, contrasting with black wrought iron. Neat cobblestones pave the passageway through the barn. The staff accommodations are modern and roomy, and the owner’s lounge is centered around a large fireplace.
“As an athlete, your career ends at some point. Thankfully, in polo, you can play until your late 40s at a competitive level. As my career starts to wind down, I have to have other things to do,” Roldan said. “I love to stay busy. I love to work hard.”
Gratitude
He also loves to give back. Roldan has dedicated himself to philanthropy, including working regularly with the Boys and Girls Club in Wellington and Kids With Cancer.
“First and foremost, my motivation is what life has given to me. I feel deep down in my heart that, because of what I was given, that I should give back,” he said. “For me, anything to do with kids is really important.”
At the Boys and Girls Club, he spends time with children who are less fortunate, who need extra support as their parents struggle to provide for them. “We throw pizza parties there. I love going over there and seeing the smiles on the kids’ faces and playing ball with them. We do karaoke. It’s a lot of fun,” Roldan said.
Through Kids With Cancer, he spends time with children who are either going through treatment or in remission. He recalled a boy named Johnny who was in remission. “He was an entertaining little boy to be around. He was always smiling and having fun.”
Roldan keeps his mind on gratitude. “I’m obviously incredibly blessed to be where I am today, to have had such a great career. I get to travel the world, and I get to do something I love, I get to meet incredible people,” he said. It has taken hard work to excel to the level he has in polo, and “there’s the gray times and struggles,” but in the end, “it’s built me to who I am today.”
This article was originally published in American Essence magazine.
The Midwest, also known as America’s Heartland, is home to a myriad of cultures. Immigration, over hundreds of years, has played a key role in developing its diverse food traditions, evident in its variety of delicious dishes—like classic Swedish meatballs, Polish perogies, German bratwurst, and hearty macaroni and cheese casseroles.
Midwest food expert Capri Cafaro hosts the podcast “Eat Your Heartland Out” and regularly features guests from all over this area to discuss its many food traditions. Born and raised in Ohio, Cafaro is well-versed in Midwestern food and the different cultural influences on the region’s culinary scene.
In this interview, she discusses the importance of county and state fairs in building community and showcasing different local foods and agricultural practices. We also talk about unusual dishes in the Midwest, such as “dessert salads,” and the prevalence of farm-to-table schemes, such as Community Supported Agriculture (CSA) programs, which allow city dwellers to enjoy fresh produce from local farms.
This interview has been edited for clarity and brevity.
Q. How do you think immigration has influenced the Midwest culinary sphere?
Midwestern food and culture are incredibly diverse. I often think that Midwestern food is perceived as either bland, or industrial, or just typical fast food. Those things are somewhat true, and have some historical context based on companies like General Mills, Kellogg’s, and Kraft, which all originated in the Midwest. However, Midwestern food has a great deal more depth and variety, precisely because of both the immigration and migration patterns of individuals who have come to the Midwest over the last 200 years or more.
The purpose of my podcast, “Eat Your Heartland Out,” is to show how different immigrants have shaped the face of food in the Midwest—like Germans in Wisconsin, and Scandinavians in places like Minnesota.
Q. Can you give us an example of an interesting Midwestern food tradition that is still practiced today?
One of the things I personally associate with as a food tradition—and something I actually did a podcast episode about—are the Lenten traditions surrounding the Easter holiday, and the fish fries that churches and restaurants sponsor on Fridays throughout Lent.
They each take on the color of their particular communities and the churches they represent. For instance, some places serve macaroni and cheese as a side dish; some serve perogies because they have a larger Slavic community; some serve haluski, an Eastern European type of noodle dish.
They also serve as a way to bring the community together every Friday during the Lenten season.
(Photo credits: Emily Raw)
Q. Are there any distinctive dishes that you would only associate with the Midwest?
The Minnesota hot dish is a landmark recipe from the 1930s that calls for hamburger meat, onions, celery, canned peas, canned tomato soup, and Creamettes—a special Minnesotan macaroni—all to be stirred together and baked. It’s not a typical casserole because it is intended to be the main meal.
Then, there is the runza (a cross between a Hot Pocket and a burger), which is like a meat pie with Russian origins that became very popular in places like Nebraska. There is also Cincinnati chili, a stew-like meat sauce served with spaghetti, that I am not particularly a fan of, but which is very popular in that region of Ohio.
Q. Can you tell us more about the unique Midwest “salad dishes” and how they came about?
Jell-O salads, which can also be served as desserts, originated when it was discovered that bone marrow could be used to make gelatin. This discovery occurred just in time to be featured at the 1904 World’s Fair, held in St. Louis, Missouri, where gelatin was showcased as a brand-new food item.
As mechanization and industrialization came about, women were trying to spend less time in the kitchen and were looking for something that was easy and simple to make in a fast and affordable manner. Recipe books were published by companies in the Midwest, like General Mills, Kellogg’s, and Kraft, as a way to promote this new gelatin product. You can still find these well-used Jell-O cookbooks in many Midwest kitchens.
Jell-O salads remain very popular with hostesses, who find them convenient and easy to make and serve, either as a salad or for dessert. They are also easy to make and transport to church suppers or potlucks.
(Photo credits: Emily Raw)
Q. County and state fairs are a celebrated tradition in the Midwest. What are some typical foods served there?
That depends on where you go. In my neck of the woods—northeastern Ohio—you will always find pasta and meatballs due to the many Italians living here. Perogies are also a popular fair item where there are a lot of Eastern Europeans.
County and state fairs have their roots in agricultural production, in sharing agricultural techniques, and in bringing your bounty to market. You have dairy products that are often on display. For instance, in my area, people line up for the milkshake stands every year at the Ashtabula county fair because it’s the one place every year that you can get the freshest milkshakes in many different flavors.
The places where you really find the local foods at the fair are the ones that are affiliated with a local organization. So, sometimes the local 4-H club [a national youth organization] will run specialty food stands, but you also have fraternal organizations—like the Lions Club, Kiwanis, or Rotary—that will have their own stands to promote local food traditions, as well as to raise money for their various organizations.
Q. What do county/state fairs say about the American ideal of agricultural bounty and the desire to celebrate that?
Even though more and more people are moving out of rural communities and into suburban and urban areas, there is still a large part of our country that continues to rely on rural agriculture. The Midwest, in particular, has always been known as the breadbasket of the nation—even of the world. That’s because it is one of the major grain producers—including corn, soy, and wheat—as well as a major producer of livestock and dairy products.
Fairs have this sense of nostalgia and provide a magnet for urban dwellers to go back to their roots, at least annually—sometimes even if they have never lived in that particular state or county. There is also a sense that, while you may not necessarily be involved or affiliated directly with agriculture, you want to be engaged in supporting it, one way or another.
While farming may look very different today than it once did, the popularity of county and state fairs continues. Our nation’s politicians certainly appreciate that fact when they regularly visit these fairs to meet and greet voters, and to taste the most outrageous new food items, like fried ice cream or doughnut burgers.
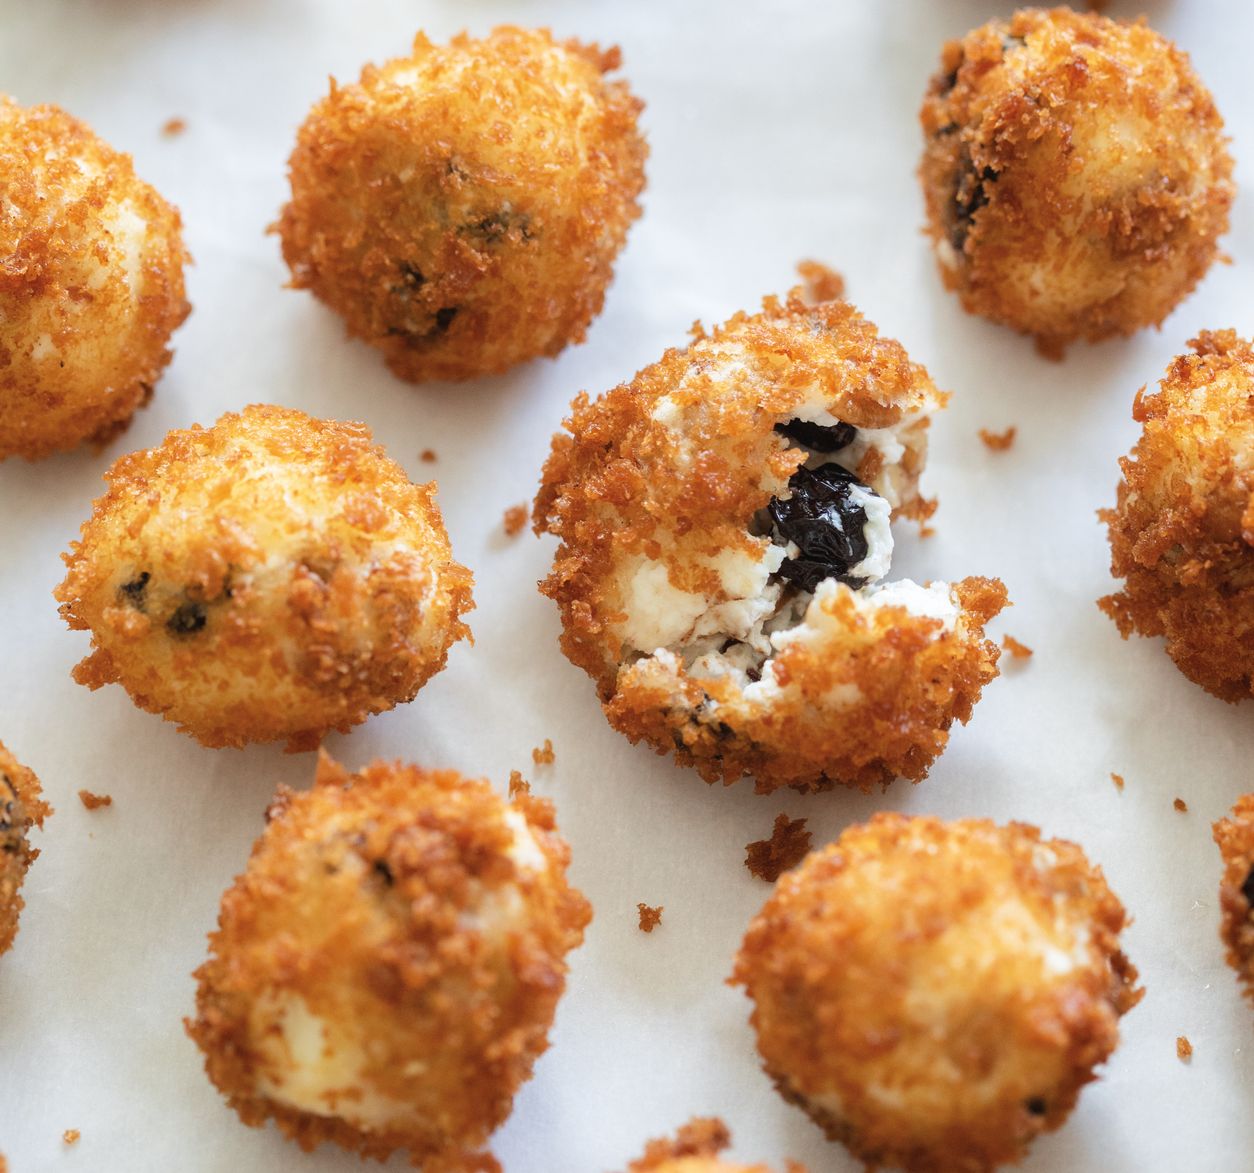
Fried Goat Cheese Cherry Balls. The dish originated in Michigan. (Photo credits: Emily Raw)
Q. What do you think about the trend in farm-to-table schemes like the Community Supported Agriculture (CSA) programs that allow urban and suburban communities to enjoy fresh, local produce?
CSAs have been a part of daily life in a lot of Midwestern cities and towns for decades. Nearby farmers and small-batch artisans promote CSAs as a kind of direct-to-household or farmers market activity, and as a way for even urban dwellers to have regular farm-fresh produce. You get your box of whatever produce is in-season every week, or every two weeks. That way you are supporting local agriculture, even if you may not live directly near it.
CSAs are becoming very popular in urban centers across America, not only in the Midwest. I think there is a misconception that the Midwest doesn’t necessarily set trends, but I would beg to differ. These programs are one longstanding Midwestern trend that is now catching on in other places.
Q. Do you have a specific Midwestern dish that you particularly enjoy?
I’m from the part of the Midwest that is highly Southern and Eastern European. So for me, my favorite comfort foods involve pasta. Also, anything that includes cheese, because some of the largest cheese producers are located in the Midwest.
Growing up in Minnesota, outdoor activities never ended despite the cold winters. We just had to adapt to the weather and changing seasons. With the right equipment and know-how, you can camp all year, even during the coldest months!
Entering any new type of outdoor recreation, even as a seasoned camper or backpacker, can be intimidating. Throw in a few life-threatening conditions like extreme cold and snow, and it’s even harder to make that leap.
Cold weather camping doesn’t have to be scary or even really that dangerous! This guide will help you break into cold weather camping with confidence and prepare you to invest in the right equipment before you go.
What is cold weather camping?
If you research cold weather camping, you’ll find varying definitions. As a general range, anything below 50°F (10°C) can be considered cold weather camping. Other experts and winter enthusiasts may express that temperatures should be closer to freezing (32°F/0°C) to fit in that category.
To me, the best distinction between those discrepancies is to classify cold weather camping and winter camping differently. When cold weather camping, temperatures may be low, there may be some moisture, but it’s likely not cold enough for snow.
Freezing temperatures are expected when winter camping, and may include some snow and ice. A lot of this boils down to the climate and area you are camping in. For instance, winter in the Sonoran desert may have cold temperatures but will likely have less snow than winter in the Cascades.
Get to know the area, climate, and weather patterns. Then, you can begin to prepare for the journey ahead.
Considerations for winter camping
Since temperatures and weather patterns are the main differentiating factors from warm weather camping and winter camping, there are varying considerations when prepping for a trip or buying gear.
Things to think about before you go winter camping:
Weather conditions: keep an eye on the weather and consider bringing a GPS device with satellite weather information.
Terrain: if there is lots of snow, know how you will cover ground and pitch a tent in the snow, as well as if there is ice, rocks, or glaciers in your path.
Getting enough calories and food: eating and drinking enough is vital in winter conditions, and eating nutritious meals can help you stay warm. Plan warm meals for morning and night and pack additional nutritious foods to eat throughout the day.
Water sources: remembering to hydrate can be hard when it is cold outside, so schedule breaks that include drinking water. Plan water sources accordingly, knowing they may be frozen and what to do in those situations. Pack a few warm drinks like tea to up your water consumption as well.
Cold injury prevention: a first aid kit is a must in the back-country. Familiarize yourself with cold-weather injuries like frostbite, wind-burn, and the signs of hypothermia.
Cold weather gear: pack the appropriate sleeping gear, boots, shelters, stoves, etc., for the conditions at hand. For example, not all fuels work at high altitudes or low temperatures. Not all shelters are built for winter conditions. Get to know your gear and invest in equipment that will keep you warm and safe.
Dress appropriately: your wardrobe needs to reflect the weather. Invest in proper boots, gaiters, traction devices, and learn to layer your clothing to cut down on the volume and optimize heat retention and warmth when hiking and when you’re in camp.
Many of these considerations overlap with standard backpacking preparation but are applied to a cold-weather setting.
Leave No Trace
Always follow Leave No Trace principles when camping or backpacking. Cold weather camping includes the same general rules, with some modifications.
A few of those modifications include:
Only travel on trails when the ground is exposed, otherwise, travel on deep snow as much as possible.
Camp on deep snow if possible and only in designated areas.
Pack out all waste, especially human waste. When camping on snow, wag bags make this easy to do.
When having a fire, use dead and down wood. Never cut or break tree limbs.
See all Leave No Trace Winter Recreation ethics and best practices on their website.
What do you need for cold weather camping?
Among the planning considerations for winter camping and backpacking, gear will significantly impact your experience. A part of getting the right equipment for your trip is knowing what to expect in terms of weather and terrain.
One aspect of winter backpacking specifically is that you will be carrying more bulky gear. You need more layers of clothing, more options for traction devices, a thicker and more durable tent made of less meshing, and likely a thicker, warmer sleeping bag. All of this will add weight and bulk to your pack.
So, if that is too daunting as a beginner, I recommend starting with a few car camping expeditions until you can hone in your gear and practice packing and carrying the additional weight.
The main focus areas for cold-weather outdoor gear includes two things:
It keeps you warm.
It keeps you dry.
That means certain materials, like cotton, that absorb moisture or take a long time to dry must be omitted. Your tent needs to keep you dry and warm, even during storms, and your sleeping bag should ensure warmth and continue to insulate when wet. There are even cold-weather sleeping pads that help you retain more heat.
Cold weather camping gear list
New gear is expensive and can be hard to justify buying if you’re unsure whether you like an activity or not. Consider renting gear from an outfitter that can provide expert knowledge not only of the equipment but of best practices in the back-country and current trail conditions.
Much more can be said about the types of gear you need, but here is an essential list to get you started.
Optional: camp pillow, sit pad, sleeping bag liner, foot warmers
Camp Kitchen: stove, fuel (liquid or canister with pressure regulator), lighter, cook set, bowl/mug, cutlery, insulated water bottle, biodegradable camp soap, towel/cloth, reusable wet bag
Water/Food: water canister (bottles, reservoir, etc.), insulated water canister sleeves, water treatment, extra fuel, meals and snacks, an extra day’s supply of food, bear canister/bag (if needed)
Optional: hot beverage mixes
Toiletries: toothbrush, toothpaste, hand sanitizer, towel, toilet paper/wipes, wet bag, menstrual/urination products, prescription medicines, extra pair of glasses, sunglasses, sunscreen
If needed: wag bag (or portable toilet in a bag)
Clothing: long underwear, long-sleeved base layer, insulated mid-layer, puffy jacket (with hood), insulated pants, waterproof jacket, pants, wool socks, winter boots, gaiters, hat, polar buff, gloves/mittens, underwear, extra clothes
Navigation: map, compass, GPS, satellite messenger, route information, and watch
Emergency Kit: whistle, first-aid kit, emergency shelter, two itineraries (one in car, one with a friend)
Repair Kit: tent repair (cord, pole sleeve, etc.), duct tape, tenacious tape, knife/multi-tool, other specialized repair kit items
A lot of planning and preparation goes into any backpacking trip, and plenty of thought should be put into your food beyond the gear and location logistics. Food is fuel on the trail, and you can only carry so much! That’s why a well-thought-out plan consisting of nutrient-dense, lightweight, and non-perishable foods is a must.
If you’re not used to planning out your meals for days at a time, like anything, you’ll get better with a bit of practice. Read on for field-tested tips to help guide the way.
Meal planning and preparation
Before you choose the foods you’re packing, ask yourself a few essential questions:
What is the intensity of my trip?
How many people are going?
How long will I be gone?
How much time do I have available to spend prepping food for my trip?
Identifying these specifics helps you start the meal planning process. Once you know the length of your trip, how many people are going, the intensity level, and how much time you have to spare, then you can start planning out the rest.
Although I often backpack alone, if I do go with a partner, we create a plan together. I find it easier to plan meals together to cut down on the number of things we need to carry and to save fuel when cooking.
Before the trip, we often schedule a phone call to discuss food options, likes and dislikes, and when we will do physical prep. Then, we add our ideas into a sharable document like Google Docs or a shared note.
Here is an actual meal planning document I’ve used for a trip as an example:
Meal
Day 1
Day 2
Day 3
Breakfast
Oatmeal + coffee
Oatmeal + coffee
Lunch
Pita with hummus, tomatoes, cucumbers, etc.
Tuna wrap
Tuna wrap
Snacks
Dried mangoes, peanut butter/banana wrap
Trail Mix, Date Balls, granola bar+peanut butter
Trail Mix, granola bar, dried mangoes
Dinner
Burrito Bowls/tacos
Tomato Basil Couscous
Other
Hot Chocolate/Tea
Hot Chocolate/Tea
On this trip, I went with another person, and we planned to eat many of the same things along the way. Underneath this chart on our shared document, we listed what we would need to buy for each meal or snack. That way, our shopping list is also made.
I always plan an extra day before and after the trek itself. The day before is vital to help you gather your gear and get all of your meals together and packed.
What type of food to bring
When planning a trip, no matter the length or number of people involved, simplicity is key. It can be tempting to want to plan for variety, but this can mean you’re buying more and carrying more. For most hikers, the easiest areas to repeat are breakfast, lunch, and snacks. Since supper is often the most calorie-dense and largest meal of the day, it’s the easiest place to add variety.
The type of food you choose to bring should first and foremost be foods you’ll eat! Don’t choose a snack or a meal option because you think you should eat it while backpacking. For instance, if you don’t like Clif bars, don’t pack Clif bars! Choose foods you enjoy to ensure you will reach your nutritional needs.
After that, consider these other factors:
Portability: Opt for dehydrated, freeze-dried, or powdered foods. Backpacking food can consist of perishables (like in my example above). However, those are eaten on the first day. The rest of the food should have a long shelf life to ensure it will not spoil as you hike.
Weight: keep in mind you are carrying everything you need! Avoid foods that have heavy packaging (i.e., cans) or contain a high water level. Gathering food from bulk bins, using pre-made meals, and repackaging some items can help you have more control over the weight.
Nutritional value: the main things you’re looking for in backpacking meals are calories (unsaturated fats), carbohydrates/sugars, protein, and antioxidants. Among those focus areas, unsaturated fats and carbohydrates tend to be what your body craves most. Protein is important for recovery, but complex carbs and good fats are needed for sustained energy. Then, sugars help with bursts of energy, while antioxidants boost your immune system function.
Cook time/method: many pre-packaged meals are designed so that all you have to do is add hot water, let it sit, and eat. If you are gathering and prepping meals on your own, then the cooking time may differ and include simmering food on the stove. Try to find foods that only use boiling water, and if it has to be cooked longer, keep it under 20 minutes. Longer than that, and you’ll find yourself carrying a lot of extra fuel.
Where to get backpacking food:
Prepacked meals from online shops or outdoor retailers
Bulk food sections in grocery stores
Small packaged foods in grocery stores (i.e., power bars, tuna packets, etc.)
Bulk food sections are my favorite place to make backpacking meals. You can often get the exact amount of certain foods like dehydrated refried beans, dehydrated hummus, and they have tons of seeds, nuts, and dried fruits to create your trail mix.
How much food to bring
Before getting into the number of calories to bring and how much to eat, breaking it down into sections will help you determine the exact amount of each to carry.
Knowing your body and your needs will also help beyond simple calorie calculations. As you go on more trips, you’ll know your eating habits and how much you need to be eating to fuel the adventure.
The amount of food you should be eating will also be influenced by your body size, weight, level of intensity of daily activity, your metabolism, and the weather. Since most folks like to have numbers to reference, a good rule of thumb is 1.5-2.5 lbs. of food or 2500-4500 calories per person per day.
Now, those ranges are broad because so many factors impact your individual dietary needs. For instance, someone hiking four miles on flat terrain may not need to eat as much as someone hiking 12 miles through mountain passes.
How to pack it
Pre-made meals, power bars, and other items will come in an easy-to-carry package. Other foods will need to be repackaged, especially when buying from grocery stores or bulk food sections.
To cut back on packaging, try to utilize the packaging the food comes in, but if that is not an option, repackage items in reusable bags or reusable food wrap. When that is not an option, or it is adding too much weight, you can also use resealable plastic bags.
For organizational purposes, I prefer to have one large food bag in my pack and one snack bag that is easily accessible. I use individual cloth or mesh bags to organize meals within my larger food bag. In some areas, a bear bag or canister is needed, so store all food in that.
Keep in mind, what you pack in, you must pack out. So, pack a garbage bag to carry for the duration of your trip and follow Leave No Trace guidelines.
Camp kitchen checklist
Need a backpacking camp kitchen or are not sure what to pack?
One big issue that beginner all-season hikers struggle with during the fall and winter hiking seasons is how to dress appropriately. Part of the problem with not wearing proper clothing while hiking is that it can ruin your experience. After all, if you’re uncomfortable the entire time, why would you want to keep going and make that discomfort a regular part of your life?
Knowing what to wear and how to wear it during each season and for all climates is essential. Especially in the shoulder seasons (spring and fall), when you will experience a wide range of temperatures throughout the day. To avoid carrying unnecessary weight, layering is the best way to stay comfortable and safe during the hike.
Winter hiking will likely require more layers or different types of layers than hiking earlier in the fall. Still, many of the basics will overlap as far as types of materials to wear and how to layer for the best protection. For instance, hiking during the first week of October in the Cascades may require layers that can keep you comfortable in 30-60° F weather, both when you’re moving and stationary. Then, factor in any precipitation, and you could end up carrying a lot of extra clothing if your layering system isn’t quite honed in.
Anytime you are layering, you’re going to balance the right combination of base layers, middle layers, and outer layers. It can take some time to find the right combination for you, and everyone’s comfort level will differ.
Before we jump into the best practices for layering clothing for cold weather hiking, you need to know what types of materials to wear. When choosing hiking clothing for any season, gravitate towards moisture-channeling and quick-drying materials like wool, alpaca fleece, Tencel, and synthetic blends (polyester, spandex, and nylon). Avoid cotton, including denim and cotton blends, due to their inability to dry quickly and how easily they absorb water. The adage “cotton kills” is especially applicable to cold environments where hypothermia is a threat.
In the fall, you’ll want clothing that allows for enough air flow to be comfortable mid-day when it is 50-60° F but will keep you warm in the morning and night at camp. You can still wear breathable layers in the winter, but your main focus is water resistance and heat retention.
To break down the basics of layering, you need to know the purpose of each layer and how to differentiate between them:
Base Layer: to wick sweat and moisture off and away from your skin (also known as the underwear layer)
Middle Layer: to help you retain body heat and insulate or protect from the cold
Outer Layer: to shield you and your other layers from wind, rain, and other elements (also known as the shell layer)
The primary purpose of a base layer is to keep moisture away from your skin and to dry quickly. In colder weather conditions, the base layer will usually be a long underwear style and is intended to keep your skin dry to avoid a drop in body temperature that could lead to you feeling chilly or suffering hypothermia.
Materials like merino wool and silk are natural fibers that have this ability along with natural anti-microbial properties. Polyester and nylon can also be good options, but all fabrics and blends will vary in drying and wicking ability, odor retention, durability, and comfort. For cold weather hiking, wear a base layer on both the top and the bottom.
The mid-layer or insulating layer is what will help you trap body heat. This is especially important when you are not in motion and aren’t producing as much body heat. Both synthetic and natural insulating materials exist, and it is often up to personal preference on which one you choose. In general, the puffier the jacket, the warmer it will be. However, other types of mid-layers like wool sweaters can help as well.
You may need more than one mid-layer, depending on the weather. For instance, say you have a base layer that you plan to wear consistently on your hike. You may also pack a Smartwool sweater to wear on top of that, but you’ll likely still need a puffy jacket for the morning and evenings in camp. The wool sweater and the puffy jacket are both still considered mid-layers, so don’t be afraid to bring more than one insulating layer depending on the forecast.
Since you won’t only be wearing long underwear on the bottom for hiking, having a durable pair of hiking pants to wear over your base layer is important. You can often get away with three-season pants made from a synthetic blend of materials that is quick drying and still breathes for fall hiking. For winter hiking, opting for less breathable thermal moisture-resistant pants will be ideal for regulating body temperature and keeping moisture out.
Finally, your outer or shell layer is the protection piece to keep the wind, rain, and snow away. Most outer layers will be a rain jacket of some kind that is treated with DWR (durable water repellent). This type of treatment on the jackets or rain pants helps the water bead up and roll off the fabric. Over time and with use, DWR wears off. So, be mindful of when and how to reapply if necessary.
Outer layers can still offer air flow (i.e., rain jackets with vents), and the types of outer layers will vary from softshells, waterproof, water-resistant, and more, depending on climate and intended use.
The shell layer is vital in cold weather hiking, especially if you get caught in a storm of any kind. The outer shell, whether it is a rain/snow jacket or pants, is designed to protect you and your other clothing layers from getting too wet and cold. If too much moisture is allowed to penetrate your inner clothing layers, you will struggle with regulating your body temperature.
Other clothing to consider for cold-weather hikes include:
Gloves
Gaiters
Hat
Buff/Scarf/Dickie
Winter specific socks
Winter/waterproof boots
Micro-spikes
As I entered the third video call of the day, I was greeted by the teacher and 14 little faces, with adults sitting at each student’s side. As the principal, I would periodically visit these virtual classrooms to experience the chaos that had now become education. As I prepared to read the class a story, nothing in my 30 years of experience had prepared me for a virtual Kindergarten class. Just imagine 14 little 5-year-olds on a virtual call—and yes, it is as energetic as you can imagine and as educationally humorous as it sounds.
Parents, let’s face it. It has been a hard year. Many of you have been thrust into the role of educator, child sitter, and parent, all at the same time. Daily, you joined one Zoom call after another, desperately trying to do your job remotely as you sat beside your child, trying to bring order to chaos, ensuring “Johnny” was paying attention (which is no small accomplishment for the parent of a young student). Daily, you multitasked between saying the alphabet and leading a conference for your office—praying that something did not happen in the background that would be broadcast to your child’s class or embarrass you with your coworkers.
Nothing could prepare any of us for the experience of virtual learning, and in most cases, we had no choice. As teachers worked to reinvent and relearn their trade, parents became more than spectators; and truly, day in and day out, they became partners and co-teachers in their child’s daily education—both groups working desperately to ensure that no matter what, each child, each student, continued to learn and grow.
Yet with every change, and every new path, there are hiccups. Each time something new is tried, some things work, while others do not. This year was “trial and error” as we all worked to keep our children learning and growing. Impacting these results were technological issues, political battles, student attention (or lack thereof), learning curves, and the unique new world and form education had taken.
For some, this change was easy and ideal; for some, it was hard; for others, it became impossible. No matter the response though, research is showing that learning gaps occurred. In studies, news reports, and even anecdotal stories, we see more and more students struggling to meet the learning goals needed to continue to grow and advance in school—all due to this learning loss.
This is not an indictment of educators or parents or students. In most cases, each one worked very hard to ensure that learning continued. Each poured in everything possible to help these children on their educational journeys, and each should be praised for these efforts to so quickly change absolutely everything about the educational process. This gap is merely a byproduct of being forced to try to do new things—some of which worked, and some of which did not.
This gap is also the byproduct of different resources being available to different groups. In some areas, technological and other resources abounded; yet in other areas, these were in short supply. How do you remotely teach a student who has neither a computer nor wireless access? How do you remotely teach a student who does not have a parent to assist him or her? How do you remotely teach a student when you, as a teacher, have never been trained for this? How do you remotely teach a student who does not even have the resources for basic necessities? These are the very real struggles that parents and teachers faced, and worked to overcome, each day during this pandemic.
As we finished last year and began this new school year, educational gaps became more evident. As high school and graduating students attended recovery classes to reclaim credits previously failed, as students received grade reports showing these deficiencies, and as teachers and parents saw student progress stalled, these gaps became more pronounced.
The point of education involves facing new challenges and learning new ways, not only to educate, but to overcome these challenges. This “new challenge” in education is not hopeless, but it is yet a new opportunity to help our children succeed and grow. Every generation has faced challenges in education, and this happens to be ours.
At the start, these opportunities can seem overwhelming, but they are not insurmountable. If we all work together, we can—to borrow a popular term—“cancel” this learning gap and help our children succeed. By taking some basic steps, we can mitigate this challenge and begin to erase these deficiencies. Here are 10 goals:
Strengthen the partnership. Remember, we are a team, working together for these children. The more we can strengthen and make this a partnership, the better it will be for our kids. Remember, it is not us against them.
Research current expectations. Take time to know what your child needs to know. First, check with your child’s school for a list of skills he or she should have. Next, you can find many online resources to help with this, such as Verywell Family, GreatSchools, BabyCenter, Time4Learning, and many other sites. In this case, Google can be your best friend.
Honestly evaluate where your child is educationally. This can be scary for parents but admitting there is a deficiency is not the end of the world. Ask your child’s teachers what they are seeing, and/or evaluate this yourself. You cannot begin to fix the problem until you know and understand what the problem is.
List key educational needs. Believe it or not, not everything children learn is as important as everything else. Work with the teachers and schools to develop a list of what is most critical and focus on that. If you try to tackle everything at once, it will only overwhelm you, the teacher, and most importantly, your child.
Together, develop a plan to address and strengthen learning. This is not the time for a “Lone Ranger” approach. Only together can this be accomplished. Parents and teachers absolutely must develop a plan that accomplishes the goals in the most logical and beneficial way possible. Don’t be afraid to also draw on extra help and services.
Implement strategies and activities to close the gaps. Begin, step by step, to implement the plan needed for success. Don’t get overwhelmed: simply take it one day, one step, at a time. If needed, again, bring in extra help and services—maybe a tutor or family friend—to help the learning process along. If you do this, little by little, your goals will be accomplished.
Make it fun, not punitive or stressful. If you are stressed, your child will be too. Find fun ways to accomplish these goals (there are literally hundreds of sites and apps that will help reinforce these skills). Don’t make your child feel like he or she is being punished. Make it something everyone can enjoy.
Give your child an incentive and something to work toward. No, this is not bribing. It is simply helping him or her work toward a goal. Don’t we all like to be rewarded or have a benefit for the work we do? Why should it be any different for your child? Have your child work toward a reward, incentive, or even payment (just like a paycheck), and reward him or her for hard work. In reality, your child will be the one working for it.
Become an active partner and advocate for your child. Parents, you cannot sit on the sidelines and expect your child and teacher to do it all. Education is our responsibility as parents, and we cannot afford not to be involved. Constructively advocate and be involved—these are not bad words and should be the norm.
Regularly reassess and adjust learning goals, plans, and needs as necessary. Regularly, with the teacher, assess progress, and if necessary, redevelop and rework the plan. Do this to ensure that the most pressing needs continue to be met.
Remember, it took us over a year to get to this point; and it will not be, and does not need to be, corrected overnight. Patiently and diligently work together with your child and his or her teacher, as a team, to accomplish these goals. If you do, before you know it, these goals will be accomplished, and this learning gap can be “canceled.” If nothing else, this can be a new model for how we, as parents, can better work with and support our children, their teachers, and their schools—and once again be on the same side of this battle. When we do, it will no longer be us against them, and the true winners will be our children.
Of all my 10 uncles, Uncle Bob was my favorite. Not only was he the family historian and a talented writer, he was the quintessential family man who involved his family in every aspect of his life, including his life’s work—operating a very successful greenhouse that has remained in his family for almost 50 years.
Upon his death in 2014, my Uncle Bob’s granddaughter Amanda memorialized him perfectly. She offered her hand and said, “Shake my hand. For when you do, you’ll have shaken the hand that shook the hand of the man who planted many seeds, watered and cared for them, and watched with eager eyes as they spread throughout the world. Take my hand and you’ll have grasped the hand of the man who cultivated a beautiful garden of life.”
My uncle was born in Minnesota, one of eight children. Most families were close back then, and his was no exception. This deep sense of family loyalty and service proved to be a guiding light throughout his life. As a young man, Bob helped an uncle who owned a small greenhouse in North Dakota, and his charismatic personality and strong work ethic undoubtedly served him well even at a young age.
Years later, he would refer to his life’s work as “people business.”
Bob took basic science courses in college and later served in both World War II and the Korean War. He married Clare, the love of his life, and together they had nine children. Working in a greenhouse was in his blood, and after the war, he advertised in a national florist magazine for a business. After receiving almost 100 replies to his ad, his dream of owning his own business soon came to fruition. In 1972, he purchased a small greenhouse in Centerville, Iowa, that would become his life’s work and his family’s legacy.
The property needed cleaning and repairing, and he engaged the help of his older children. Together, they hauled away 52 truckloads of junk to a landfill. From the start, the greenhouse was a family endeavor.
“A lot of the family could get involved with it,” he said. “Even an 8- or 10-year-old boy or girl can do something productive in a greenhouse. It’s strictly a family business with all members of the family helping out.”
He got into the business initially because he saw people wanting to improve their yards and homes, and “they needed someone to help.” Years later, he told his son David that the business also afforded his children “the pursuit of higher learning through college, and subsequently allowed each to pursue his/her journey in life.”
(Courtesy of Karen Brazas)
Operating a greenhouse isn’t for the faint of heart. “But,” my uncle said, “it’s one of the most satisfying jobs anyone could have … watching your work literally grow and become healthy right before your eyes.” And grow it did! Over the years, he and his sons renovated older buildings and added new ones. New lighting was installed and generators were frequently updated. What had once been a local retail business turned into a large wholesale operation serving several states.
As Uncle Bob said, “It’s like farming. You have to make hay when the sun shines.” During the busy spring season, the family worked from sunrise to sunset—13 to 14 hours a day. Success depended on the rain and the sun. Ice storms could knock out power, insects could ruin plants, and molds could kill flowers and trees. At times, things were hectic.
But “Centerville Greenhouses” survived, and over the past 49 years, three generations of the Bob Lind family have worked hard together. Some might call it a labor of love.
When Bob retired, his son Rob and his family took over. And these days, Rob’s sons Pete and Alex run the business with help from other family members. The family believes that “there is no better worker than a ‘home grown’ one.”
(Courtesy of Karen Brazas)
Grandson Pete says the greenhouse industry is “competitive, but everyone is friendly. There is a tradition of honesty and pride in the business. Everyone works toward helping the industry survive. They take pride in what they sell.” He and his brother Alex have hired several other workers now that the business has expanded with new buildings, renovated spaces, and more inventory.
“The biggest challenge these days,” he says, “is keeping up with marketing concepts and the demands of the consumer.” But they enjoy their jobs and are proud to maintain the work ethic and the family traditions passed along to them.
Their Uncle David said his father’s legacy was, “Always strive to do your best, but initiate a deep faith to provide the necessary guidance.”
I have no doubt they would echo their cousin Amanda’s final message to her beloved grandfather: “Love is the seed from which your tree has grown. It is the water and the sun. It is the care and the tenderness. It is all that is necessary. And I am so grateful, so moved, so happy to be one of its many leaves, forever connected to it, regardless of which way the wind blows.”
Karen Brazas is a retired high school English teacher and creative writing instructor who taught in California, China, and Lithuania. She worked and studied in 35 countries with the Semester at Sea program. Karen is a wife, mother, and grandmother, and now lives in Nevada City, California, and Channel Islands, California.